

-
Welcome to Tacoma World!
You are currently viewing as a guest! To get full-access, you need to register for a FREE account.
As a registered member, you’ll be able to:- Participate in all Tacoma discussion topics
- Communicate privately with other Tacoma owners from around the world
- Post your own photos in our Members Gallery
- Access all special features of the site
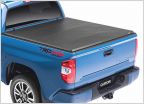 Tonneau Cover Help
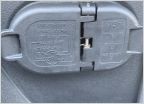 3rd gen Tacoma 7 pin to trailer colors
 USB port vs. 12V DC power for charging iPhone 7 and Kindle
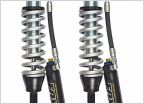 Rear Bump Stop Question
 Bilstein 5100 vs 5125 Different valving question
 NOCO Boost
Rear Seat Delete Decks
Discussion in '3rd Gen. Tacomas (2016-2023)' started by ExploreBackcountry, Oct 2, 2019.
Page 12 of 45
Page 12 of 45
Products Discussed in


