1. Welcome to Tacoma World!

    You are currently viewing as a guest! To get full-access, you need to register for a FREE account.

    As a registered member, you’ll be able to:
    • Participate in all Tacoma discussion topics
    • Communicate privately with other Tacoma owners from around the world
    • Post your own photos in our Members Gallery
    • Access all special features of the site

Fixing Slop in 2nd Gen Shifter

Discussion in '2nd Gen. Tacomas (2005-2015)' started by Tonto ATX, May 17, 2021.

  1. May 17, 2021 at 5:37 PM
    #1
    Tonto ATX

    Tonto ATX [OP] Member

    Joined:
    Mar 17, 2021
    Member:
    #359616
    Messages:
    10
    Gender:
    Male
    Vehicle:
    2005 Silver Tacoma Access Cab TRD Off-Road
    This is my experience fixing the slop in my shifter using urethane rubber compound.

    Like many others I had some slop in my 2005 Tacoma 6 speed shifter, so I ordered the seat shift sub-assembly (33505-35020) and the shift lever bushing (33548-60040) thinking this was the obvious reason for the slop. Once I had them in hand and took apart the shifter it became apparent it was not the seat or the bushing.

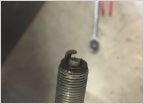
    As others have noted in other threads, it was the non-serviceable rubber isolation dampener inside the hollow part of the shifter that had deteriorated. The solid rod goes up into the black hollow part of the shifter about 3" where there is a rubber dampener attached at the end. You can see in the picture that I was able to remove it and it came out in two pieces. Seeing as my shifter is already a TRD short throw shifter, I didn't want to throw down the money for a new one, and preferred to try and fix the one I already have for much cheaper.

    I've seen some people use epoxy or bolts to secure the two pieces of the shifter together, but both options were noted to remove the vibration dampening effect. I decided to go with a urethane rubber compound commonly used for making casting molds. I chose a rubber that was 60 on the shore hardness scale, which has it in between a pencil eraser and tire tread from what I could tell. I chose the hardness of 60 based on only a guess of what would work well.

    I drilled a 1/2" hole at 2-3/8" from the base of the tube. This was slightly arbitrary, as I didn't know what the inside of the shaft looked like. I just wanted it high enough to fill with the rubber and low enough to be in the wider part of the shifter since I was doing a 1/2" hole. It ended up being just below the end of the solid part of the shaft that the isolation dampener use to be on. Once the hole was drilled I was able to remove the old dampener, which was in pieces, and prepare to make create my own dampener.


    I used a vise to hold the shifter, grabbing it at the solid part of the shifter, below the black hollow section. With the shifter sitting straight up, the two pieces were self centering in relation to one another, so I didn't have to worry about the shifter be crooked after the rubber hardened.

    The urethane rubber compound was a 1:1 ratio, so easy mixing and 30 min pot life. I used a syringe to fill the shifter to just below the bottom of the hole I drilled. There I walked away and let it sit for 24hrs.


    After 24hrs, the rubber was fully hardened. I put a grommet in the hole that I drilled to clean it up and then re-installed the shifter in my truck. It's been 3 days now, and so far so good. I have way less play in the shifter. I don't have the metal on metal vibration and noise from before and it seems to still dampen the vibrations from the transmission fairly well. Only time will tell if this is a long term fix.
     
    Last edited: May 17, 2021
    DaTacoNL, Pplexxed and Geeves77 like this.
  2. May 17, 2021 at 6:15 PM
    #2
    Taco'09

    Taco'09 Well-Known Member

    Joined:
    Dec 31, 2008
    Member:
    #12073
    Messages:
    1,873
    Gender:
    Male
    Great write up OP! After you drive it for a bit will you report back on whether that shore hardness was ideal or may be a +/- is in order. Also a part number for the grommet and where you obtained.
     
    Geeves77 likes this.
  3. Dec 16, 2022 at 4:09 PM
    #3
    hemmjo

    hemmjo Well-Known Member

    Joined:
    Apr 15, 2010
    Member:
    #35314
    Messages:
    91
    Gender:
    Male
    Central Ohio
    Vehicle:
    2005 Access Cab 4wd, TRD, Off Road, Tow Package
    Thanks, Kelsey, this looks like a good plan. I am curious why you do not fill the cavity completely? Perhaps tilt the shifter on it's side, fill the whole cavity, then put tape over the hole and stand it up like you have it in the vise?

    Thanks again.
     
  4. Dec 16, 2022 at 5:39 PM
    #4
    Tonto ATX

    Tonto ATX [OP] Member

    Joined:
    Mar 17, 2021
    Member:
    #359616
    Messages:
    10
    Gender:
    Male
    Vehicle:
    2005 Silver Tacoma Access Cab TRD Off-Road
    Hey Hemmjo, the bottom piece (bare metal) of the 2 piece shifter that goes into the top half (black) only goes up so far into the tube, so it it seemed to me that i only needed enough rubber to encapsulate the rod. I didn't see a benefit in filling the entire void, probably no down side either. Maybe it would give it a heavier feel? Likely negligible though. To date it has held up well and still feels good.
     
  5. Dec 16, 2022 at 5:45 PM
    #5
    Clearwater Bill

    Clearwater Bill Never answer an anonymous letter

    Joined:
    Oct 11, 2014
    Member:
    #140097
    Messages:
    24,348
    Gender:
    Male
    First Name:
    Billy
    Largo Florida
    Vehicle:
    '13 5 lug AC w/convenience package
    A few OE parts from fancy trucks
    Excellent inginuity!
     
  6. Feb 21, 2025 at 7:55 AM
    #6
    TimTamTaco

    TimTamTaco New Member

    Joined:
    Feb 21, 2025
    Member:
    #466401
    Messages:
    1
    Gender:
    Male
    Vehicle:
    2007 Tacoma Prerunner
    I tried filling the shaft up all the way, and taping over the opening as the Vytaflex cured. This was straight forward, and eliminated the need for the grommet, but the shifter now transmits a little more vibration that I'd like, so I think OP's way is a bit better. Since I don't have a vice, I used vice grip pliers instead. That worked fine, but I'd use a vice if I had one.
     

Products Discussed in

To Top