1. Welcome to Tacoma World!

    You are currently viewing as a guest! To get full-access, you need to register for a FREE account.

    As a registered member, you’ll be able to:
    • Participate in all Tacoma discussion topics
    • Communicate privately with other Tacoma owners from around the world
    • Post your own photos in our Members Gallery
    • Access all special features of the site

Cynicalriders "J0hnny5 is ALIVE!" 01 build thread.

Discussion in '1st Gen. Builds (1995-2004)' started by cynicalrider, Aug 8, 2013.

  1. May 6, 2021 at 12:32 PM
    #1981
    cynicalrider

    cynicalrider [OP] #NFG

    Joined:
    Jul 25, 2012
    Member:
    #83399
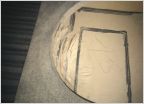
    Messages:
    16,464
    Gender:
    Male
    Jersey
    Vehicle:
    01 SR5 TRD 4x4, '23 Bronco Wildtrak, 2017 HSQV FE350
    Drop bracket lift and booger welds
    To steal the quote from @Chux... "Dad, are we overlanders now?"

    [​IMG]
     
    6 gearT444E, Phessor, Reh5108 and 5 others like this.
  2. May 10, 2021 at 8:43 AM
    #1982
    cynicalrider

    cynicalrider [OP] #NFG

    Joined:
    Jul 25, 2012
    Member:
    #83399
    Messages:
    16,464
    Gender:
    Male
    Jersey
    Vehicle:
    01 SR5 TRD 4x4, '23 Bronco Wildtrak, 2017 HSQV FE350
    Drop bracket lift and booger welds
    6 gearT444E, HomerTaco and jubei like this.
  3. May 17, 2021 at 2:08 PM
    #1983
    cynicalrider

    cynicalrider [OP] #NFG

    Joined:
    Jul 25, 2012
    Member:
    #83399
    Messages:
    16,464
    Gender:
    Male
    Jersey
    Vehicle:
    01 SR5 TRD 4x4, '23 Bronco Wildtrak, 2017 HSQV FE350
    Drop bracket lift and booger welds
    Alright well nothing can ever go easy/right. I started the airbag install on Thursday thinking I had anything I need that could potentially go wrong. I had new center pins, all the hardware welded up for the cradle mounts, bags, etc. I knew I would need to custom fabricate the top mounts and had the material for that as well.

    The main purpose to the airbag install on my truck is to make it a little more flexible for the ever changing loads I carry. When I have it unloaded it's still got a ton of extra weight now that the dakars just cannot handle appropriately. Most of this is likely due to my under bed gas storage system, extra metal from the shock crossmembers, and the fully boxed with 3/16" plate frame. Add being fully loaded for a multi state trip or have the bike in the bed with camp gear for a riding trip, I am riding the bump stops on every bump and those expensive go fast ADS shocks are doing nothing for me anymore.

    Ride height right now:

    [​IMG]Airbag install by Michael Halat, on Flickr

    Also when @HomerTaco and @6 gearT444E and I installed my shocks/extended my bumps we expected the wheelers bumps to compress more than they actually did, so i was not using 1" of my up travel as well.

    [​IMG]Airbag install by Michael Halat, on Flickr

    About 1/2" of shock showing and 1/2" of shaft left under the shock bumps. Now I'll have the adjustability to use all the travel.

    So I dug in cutting off my old bump stop extensions. That was hella quick with the sawzall, and ground it all flush. Next up was to work on the mounts for the cradles which are doubling as the u bolt mounts. I got the idea of this setup from @Phessor on his taco build here.

    There are a couple differences that I did not notice though and some I knew about ahead of time. The first is the fact that the dakars move the axle up to the front of the truck by about an inch and i am using relocation plates to center the axle in the wheel well again. This meant I needed to move the hole on the u bolt plates up. I copied the flip plates I was already running and drilled a hole. I filled in the original hole just for looks more than anything else, but in retrospect I probably should have left it in case I get rid of the dakars. Oh well.

    The second thing was the fact that these u bolt plates and u bolts are wayyy wider than my old setup. So much so they can't go on because my shock mounts are in the way. So great, now I am cutting off shock mounts now too.

    Shocks hitting the u-bolts:

    [​IMG]Airbag install by Michael Halat, on Flickr

    Cutting these off sucked, and now I want a plasma:

    [​IMG]Airbag install by Michael Halat, on Flickr

    New holes and filled in old ones:

    [​IMG]Airbag install by Michael Halat, on Flickr
    [​IMG]Airbag install by Michael Halat, on Flickr

    And a width comparison:

    [​IMG]Airbag install by Michael Halat, on Flickr

    After the old shock mounts were cut off it was only a matter of clamping the leaf springs and swapping in new longer center pins.

    [​IMG]Airbag install by Michael Halat, on Flickr

    This pass through socket was the real mvp there.

    Then I chopped everything down so I could mount the cradle.

    [​IMG]Airbag install by Michael Halat, on Flickr

    Once the cradle was mounted I set out to make mounts for the airbags themselves. I had left over stock from the bumper build and cut pieces the width of the frame.

    I centered the studs into the piece and drilled those holes out as well as made the space for the air line. I saw from large piece of tube (obvs was going to cut it down) that in my situation with the cradle mounts moved forward, the bag mounts needed to be angled for best contact.

    [​IMG]Untitled by Michael Halat, on Flickr

    So I cut it down and burned it in:

    [​IMG]Airbag install by Michael Halat, on Flickr
    [​IMG]Airbag install by Michael Halat, on Flickr
    [​IMG]Airbag install by Michael Halat, on Flickr

    From there it was just rinse and repeat on the other side:

    [​IMG]Airbag install by Michael Halat, on Flickr

    The fact that the pack travels in a ( shape really fucks with your head.

    [​IMG]Airbag install by Michael Halat, on Flickr
    [​IMG]Airbag install by Michael Halat, on Flickr

    Now I just need my replacement mounts to come in from ruff stuff and run the lines in the meantime.
     
    seen20, BYJOSHCOOK, Reh5108 and 3 others like this.
  4. May 17, 2021 at 3:05 PM
    #1984
    EatSleepTacos

    EatSleepTacos Well-Known Member

    Joined:
    Mar 24, 2015
    Member:
    #151688
    Messages:
    59,635
    Gender:
    Male
    First Name:
    Randy
    West Valley, AZ
    Vehicle:
    2017 4Runner
    If it makes you feel any better, cutting shock mounts off of the axle is still garbage work with a plasma cutter. I hate it so much.
     
  5. May 17, 2021 at 4:59 PM
    #1985
    cynicalrider

    cynicalrider [OP] #NFG

    Joined:
    Jul 25, 2012
    Member:
    #83399
    Messages:
    16,464
    Gender:
    Male
    Jersey
    Vehicle:
    01 SR5 TRD 4x4, '23 Bronco Wildtrak, 2017 HSQV FE350
    Drop bracket lift and booger welds
    shhh I am convincing myself to drop an absurd amount of money on a rarely used tool as it is :p
     
    EatSleepTacos[QUOTED] and jubei like this.
  6. May 18, 2021 at 4:44 AM
    #1986
    Snowy

    Snowy Is neither here nor there

    Joined:
    Feb 5, 2014
    Member:
    #122349
    Messages:
    3,372
    Gender:
    Male
    First Name:
    Connor
    Winnebago, IL
    Vehicle:
    3 linked 98 Xtra cab
    Stock-ish
    They aren’t all an absurd amount of money :)

    200CDF24-D1D4-4E51-A2D7-6B61BD0F6ED7.jpg

    Out of stock right now but I love mine, cut a TON of steel during my 3 link with it
     
    jubei likes this.
  7. May 18, 2021 at 5:53 AM
    #1987
    cynicalrider

    cynicalrider [OP] #NFG

    Joined:
    Jul 25, 2012
    Member:
    #83399
    Messages:
    16,464
    Gender:
    Male
    Jersey
    Vehicle:
    01 SR5 TRD 4x4, '23 Bronco Wildtrak, 2017 HSQV FE350
    Drop bracket lift and booger welds
    yeah @Wheelspinner pointed me in the direction of this one too:

    Lotos LT5000D Plasma Cutter 50Amps Dual Voltage Compact Metal Cutter 110/220V AC 1/2" Clean Cut & Technology LCS22 Plasma Cutter Consumables Sets for Brown Color LT5000D and Brown Color CT520D https://www.amazon.com/dp/B091V6V94P/ref=cm_sw_r_cp_api_glt_fabc_9SR2MQESBQZYKDBVCRC9

    Which both are about as much as I’d like to spend for a more rarely used tool.
     
    jubei likes this.
  8. May 18, 2021 at 9:04 AM
    #1988
    betterbuckleup

    betterbuckleup Well-Known Member

    Joined:
    Jun 26, 2017
    Member:
    #222483
    Messages:
    4,230
    Gender:
    Male
    First Name:
    Ian
    Concord, CA
    Vehicle:
    2000 Tacoma SC 2.7 4x4 5spd
    This is what I got and it's been great.
    https://yeswelder.com/products/cut-55ds
    Make sure you have a good air dryer though. Otherwise you'll be hating life trying to use it.

    Another thing to keep in mind is that all these cheaper ones use high frequency inverters to power them which prevents you from using them with a plasma table down the line if you're into that kinda thing.
     
    jubei likes this.
  9. May 18, 2021 at 9:10 AM
    #1989
    cynicalrider

    cynicalrider [OP] #NFG

    Joined:
    Jul 25, 2012
    Member:
    #83399
    Messages:
    16,464
    Gender:
    Male
    Jersey
    Vehicle:
    01 SR5 TRD 4x4, '23 Bronco Wildtrak, 2017 HSQV FE350
    Drop bracket lift and booger welds
    Where do you have the drier in relation to the machine? Right at the input for the airline? I don't have an air drier currently and my air comes from a 50 foot retractable hose from the ceiling. I heard the consumables from yeswelder are cheaper than the Lotos stuff.
     
  10. May 18, 2021 at 9:14 AM
    #1990
    betterbuckleup

    betterbuckleup Well-Known Member

    Joined:
    Jun 26, 2017
    Member:
    #222483
    Messages:
    4,230
    Gender:
    Male
    First Name:
    Ian
    Concord, CA
    Vehicle:
    2000 Tacoma SC 2.7 4x4 5spd
    You generally want it right after the outlet of the compressor. That's where I have mine. Got a short 3' hose to connect them and mounted it to the wall next to the compressor. I got this one. Surprisingly solid and good quality for the price.
    https://www.amazon.com/gp/product/B07Z5PHJS6/ref=ppx_yo_dt_b_asin_title_o07_s00?ie=UTF8

    I haven't had to buy any replacement consumables yet, but it comes with I think 2 or 3 of two different style tips. One for 110v and another for 220v.
     
  11. May 18, 2021 at 9:18 AM
    #1991
    jubei

    jubei would rather be doing something else

    Joined:
    Mar 17, 2016
    Member:
    #181549
    Messages:
    5,950
    Gender:
    Male
    First Name:
    Jason
    NoCo
    Vehicle:
    White 2002 XC TRD and Yellow 1971 JEEP CJ5
    Stuff. Also things.
    Just curious as to why this is the case.

    Would you mind explaining for dummies like myself? Thanks!
     
  12. May 18, 2021 at 9:21 AM
    #1992
    betterbuckleup

    betterbuckleup Well-Known Member

    Joined:
    Jun 26, 2017
    Member:
    #222483
    Messages:
    4,230
    Gender:
    Male
    First Name:
    Ian
    Concord, CA
    Vehicle:
    2000 Tacoma SC 2.7 4x4 5spd
    since they're high frequency they will damage and cause interference with the sensitive components that in a gantry table. (i.e. stepper motors & controllers).

    You sadly need a much more expensive unit to use with a table. One that uses pilot arc instead
     
    Bandido and jubei[QUOTED] like this.
  13. May 18, 2021 at 9:32 AM
    #1993
    jubei

    jubei would rather be doing something else

    Joined:
    Mar 17, 2016
    Member:
    #181549
    Messages:
    5,950
    Gender:
    Male
    First Name:
    Jason
    NoCo
    Vehicle:
    White 2002 XC TRD and Yellow 1971 JEEP CJ5
    Stuff. Also things.
    Awesome explanation. Thanks, bud.

    I work with steppers and their controllers every day and good god those things are so susceptible to EMI it’s not even funny.
     
  14. May 18, 2021 at 9:56 AM
    #1994
    Snowy

    Snowy Is neither here nor there

    Joined:
    Feb 5, 2014
    Member:
    #122349
    Messages:
    3,372
    Gender:
    Male
    First Name:
    Connor
    Winnebago, IL
    Vehicle:
    3 linked 98 Xtra cab
    Stock-ish
    The herocut uses a pilot arc and a CNC port, which was a big reason I got that one
     
    jubei and betterbuckleup[QUOTED] like this.
  15. May 18, 2021 at 10:14 AM
    #1995
    cynicalrider

    cynicalrider [OP] #NFG

    Joined:
    Jul 25, 2012
    Member:
    #83399
    Messages:
    16,464
    Gender:
    Male
    Jersey
    Vehicle:
    01 SR5 TRD 4x4, '23 Bronco Wildtrak, 2017 HSQV FE350
    Drop bracket lift and booger welds
    Everything I read mentions having the drier after the air cools down a bit. I am thinking i might be able to hook a drier up to right before it comes into the hose reel...

    I mean I highly doubt I'll ever have a plasma table but the thought is nice. Crazy that one comes with all those features at that price.
     
  16. May 18, 2021 at 10:58 AM
    #1996
    betterbuckleup

    betterbuckleup Well-Known Member

    Joined:
    Jun 26, 2017
    Member:
    #222483
    Messages:
    4,230
    Gender:
    Male
    First Name:
    Ian
    Concord, CA
    Vehicle:
    2000 Tacoma SC 2.7 4x4 5spd
    Ah. Interesting, yea I guess. I don't use my compressor continuously for hours at a time or anything like that so I've never noticed the air get that hot, and never heard anyone mention that before, so I'm not that worried about it but that's just me.
    Just before the hose reel would probably work well for you in that case.
     
  17. May 19, 2021 at 5:29 AM
    #1997
    ToyRyd04

    ToyRyd04 Taco Transformer

    Joined:
    Aug 5, 2011
    Member:
    #61217
    Messages:
    1,794
    Gender:
    Male
    First Name:
    Greg
    Perryville, MD
    Vehicle:
    '04 PreRunner
    SAS'd PreRunner Diamond Axles Crawlbox
    I see you have the ol' Passenger side wheel well rusting through....:poking:

    Got the same, going to a few junkyards next weekend to patch that very same area...:anonymous:

    upload_2021-5-19_8-29-24.jpg
     
  18. May 19, 2021 at 7:06 AM
    #1998
    cynicalrider

    cynicalrider [OP] #NFG

    Joined:
    Jul 25, 2012
    Member:
    #83399
    Messages:
    16,464
    Gender:
    Male
    Jersey
    Vehicle:
    01 SR5 TRD 4x4, '23 Bronco Wildtrak, 2017 HSQV FE350
    Drop bracket lift and booger welds

    Dude the bed is a mess. That one's fiber glass patch is still going strong though :rofl: Like I've said before, eventually I'll be scooping up a rust free bed from the south and starting over.
     
    HomerTaco and ToyRyd04[QUOTED] like this.
  19. May 24, 2021 at 10:51 AM
    #1999
    cynicalrider

    cynicalrider [OP] #NFG

    Joined:
    Jul 25, 2012
    Member:
    #83399
    Messages:
    16,464
    Gender:
    Male
    Jersey
    Vehicle:
    01 SR5 TRD 4x4, '23 Bronco Wildtrak, 2017 HSQV FE350
    Drop bracket lift and booger welds
    Got the airbags done and the truck rolling. Should have just barely enough time to check it and the bike before a camping trip this week. Tried to check articulation as best as possible, then burned the mounts in and slapped it all together.

    [​IMG]Untitled by Michael Halat, on Flickr

    The welds/mounts clear the u bolts nicely now.

    [​IMG]Untitled by Michael Halat, on Flickr

    This is how the shocks sit "unloaded" - basically all my tools, spare, hi lift and recovery gear in the bed, but not camping gear or anything else. My daily carry. At 6 psi the bags barely touch the cradles.

    [​IMG]Untitled by Michael Halat, on Flickr

    And the stance of the truck:

    [​IMG]Untitled by Michael Halat, on Flickr

    A couple things regarding the stance, I think I can raise the front a little and make the front match the rear. I also feel like the rear looks higher because of the fenders being cut the same amount all around.

    I did end up finding that my axle was leaking around the spring perches when i was flexing the axle out and all the oil was going to one side:

    [​IMG]Untitled by Michael Halat, on Flickr

    I cleaned it up as best as I could and shot some wire in it:

    [​IMG]Untitled by Michael Halat, on Flickr
    [​IMG]Untitled by Michael Halat, on Flickr

    I'll be trying to figure out a more permanent solution to this.

    After a drive this morning I could tell how much I was hitting my bump stops during daily use. The ride was much more plush and hitting a pot hole wasn't as jarring now that I am not in the bumps on every pothole. After doing the shocks twice, I can tell I could have probably put the lower shock mounts downwards more considering the stance of the truck and high ass high it is currently. This would let the truck ride more in the middle of the shocks range under normal circumstances but then I would need to make sure I don't over compress the shocks by needing to keep the bags more inflated all the time. I would also then not be using all of the shock travels down travel in that circumstance too. I guess that's the trade off of running a pack that cycles about 9", and 10" shocks under the truck while still trying to keep the lift not sky high.
     
    BYJOSHCOOK likes this.
  20. May 24, 2021 at 2:25 PM
    #2000
    Reh5108

    Reh5108 Well-Known Member

    Joined:
    Feb 18, 2013
    Member:
    #97832
    Messages:
    5,621
    Gender:
    Male
    First Name:
    Ryan
    Idaho
    Vehicle:
    2004 SR5 4X4 2.7L Extra Cab
    OME lift, 4x sliders, Demello rear bumper, custom front bumper, Engo 9000lb winch
    If it wasn't for the bedliner I'm pretty sure I could see daylight through that spot.
     
    POSTacoMike and ToyRyd04[QUOTED] like this.

Products Discussed in

To Top