

-
Welcome to Tacoma World!
You are currently viewing as a guest! To get full-access, you need to register for a FREE account.
As a registered member, you’ll be able to:- Participate in all Tacoma discussion topics
- Communicate privately with other Tacoma owners from around the world
- Post your own photos in our Members Gallery
- Access all special features of the site
 Pulled out a GMC Canyon in loose sand using 4LO In reverse. 2016 TRD Sport
 Best stump bumper for third gen?
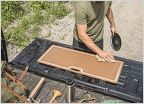 No Ribs Tailgate...anyone?
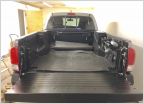 Options for small tool box for bed?
 Any recommendations for portable air compressor
 GoPro Type-C hardwire?
Rear Seat Delete Decks
Discussion in '3rd Gen. Tacomas (2016-2023)' started by ExploreBackcountry, Oct 2, 2019.
Page 14 of 41
Page 14 of 41
Products Discussed in


