1. Welcome to Tacoma World!

    You are currently viewing as a guest! To get full-access, you need to register for a FREE account.

    As a registered member, you’ll be able to:
    • Participate in all Tacoma discussion topics
    • Communicate privately with other Tacoma owners from around the world
    • Post your own photos in our Members Gallery
    • Access all special features of the site

'14 Build for 14ers?

Discussion in '2nd Gen. Builds (2005-2015)' started by DangerPudge, Jan 31, 2021.

  1. Jan 31, 2021 at 6:00 PM
    #1
    DangerPudge

    DangerPudge [OP] Well-Known Member

    Joined:
    Mar 9, 2019
    Member:
    #285927
    Messages:
    167
    Lift, wheels/tires, Snugtop
    I guess 14ers are a term for trails that reach 14k in altitude; it's a term I've become familiar with since moving to CO from TX. I understand there are some trails here that would take me and my Taco up over 14k; that'd be nifty.

    This build isn't going to be all that exciting; perhaps just a way to document the things I'll do to it over the years I own it. It will not be an extreme build. I'm not looking to do really extreme stuff with it since it's my daily and I'm older than I like to admit.

    I bought the truck to pick up where my '06 Z71 was letting me down. I'd bought that truck in TX as a yard tool for my land and wasn't ever intended to be pressed into duty as my daily. It was in good shape, to be sure, but it did start to have some troubles here in CO with the 90 mile round-trip commute every day and I needed a reliable vehicle. I also wanted something a little more focused at offroad, smaller trail capabilities to enjoy this amazing land. Having had Toyota trucks before (all 4x4, '84, '92, '97, and now a '14).

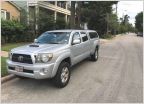
    My '14 was spotted on the lot as I was looking around after one too many dash lights on my Chevy lit up. I figured I'd get the most basic 3rd Gen I could find in a 4x4 and call it a day, counting on it to be anvil reliable. But they were expensive and I was trying to be responsible. I turned around and saw this, and it appealed to my inner 10 year old, and I thought that I'd probably wind up doing all those mods anyway, so having them already installed would actually save me money in the long run. I'm pretty sure it has a 2.5" lift, some American Racing wheels (brand new at time of purchase), and brand new BFG AT TK KO sized two-up from stock, some step rails (which I'd stupidly mistaken for frame sliders), and a Snugtop. And I liked it in white.

    At the dealer, the first day I saw it. I shot this pic to my Mrs. to see what she thought. She said if I liked it to get it.

    [​IMG]
     
    PennSilverTaco likes this.
  2. Jan 31, 2021 at 6:15 PM
    #2
    DangerPudge

    DangerPudge [OP] Well-Known Member

    Joined:
    Mar 9, 2019
    Member:
    #285927
    Messages:
    167
    Lift, wheels/tires, Snugtop
    I liked the truck. I loved it at first, but one thing that has plagued every single Toyota truck I've owned has been the poor ride quality. This was no exception though marginally better than my 1st gen due, I suspect, to the wider track. That bugged me.

    What didn't bug me was the overall niceness of the truck. It's nice to have a really clean vehicle that has been well cared for. Should I have gotten the 3rd gen? Maybe, but I think I actually like the aesthetics of the 2nd gen better, though I do wish this truck had been an Offroad instead of a Sport (though I do like the faux scoop hood).

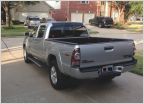
    I drove it as was for the better part of two years. The only three things I did was to add a little license plate base with a light bar attachment that I'd actually purchased for the Chevy, and then got some rubberized license plate holders, and put a Yakima Aerobar system and a cheap basket on the top of the Snugtop. And a few stickers. Life was good enough.

    This was just a few weeks after I bought it, we headed up to Breckenridge when my oldest son came up to visit during a college break:

    [​IMG]

    Then... I lost my job which meant that I wasn't driving much at all. I started up my own little business and it keeps me close to home. Suddenly, I had very different priorities in my life. Instead of working near 80 hours per week and over every weekend, I was suddenly able to set my own hours (which are, sometimes 80 hours a week), but now I had the opportunity to see more of this profoundly beautiful state of Colorado. And the mountains call often; I answer as often as I can. I'm not sure what, exactly, exposed me to 'overlanding' but I'm glad it happened.

    And that's what pushed me to start making some changes to my vehicle. Since it no longer had to travel 90 hours a day to work I had some liberties, though I still need it to be dead reliable and easy to live with. Nothing extreme. I loved camping as a kid and that hasn't ever faded. The roof top tents are appealing but after much consideration, I have decided that I'm going to do a bed-sleeping option instead. It's just more weather friendly and it eliminates a much more expensive rack system for the cap to allow me to fit the truck in the garage (though the GFC Superlight was going to be my choice, and may still be at some point in the future).
     
  3. Jan 31, 2021 at 6:46 PM
    #3
    DangerPudge

    DangerPudge [OP] Well-Known Member

    Joined:
    Mar 9, 2019
    Member:
    #285927
    Messages:
    167
    Lift, wheels/tires, Snugtop
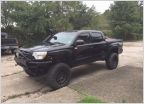
    After driving it for a little bit the one issue with the faux hood scoop became dangerously apparent; it reflects one hell of a lot of light in the right conditions. No, sunglasses won't help (maybe welding goggles, though that'd introduce different issues, I suspect). That had to be addressed and I finally got around to it nearly two years after purchase. I sure wish I'd have done it immediately. I taped out an outline of the scoop and shot it with some PlastiDip since it is reversible. That did the trick perfectly and I haven't had an issue since, though I have decided I'd like to expand the matte black area and wanted a very even finish, so I purchased a sheet of wrap that I'll be putting on sometime in the near future.

    Since I had changed focus from purely reliable daily driver to mild overlanding adventure, I figured one of the first orders of business was lighting. I'd been caught out in the mountains a few times at night on some incredibly dark roads and knew how valuable decent lighting would be. I also knew that I simply didn't need the best money could buy; I'm not racing through the night, but crawling. I weighted the build quality and reputation of companies like Baja Designs and Rigid against the Amazon specials and found some well-rated lights that seemed would do the trick. I had some Auxlights on my Chevy (installed after my first foray into driving through mountain roads at night when the highway was closed) and they were good, but they'd gotten too expensive for what they were, IMO. Nilight seemed to be a good alternative by rating and features, so I bought myself a 12" bar which I've mounted on the rear of the basket, and 4" pod kit which I'm using as ditch lights. I also ordered a set of 6" amber fog pods to mount forward. The 12" bar has yet to be tested, so I can't speak much to it other than to say it looks like the picture and seems to be built well enough. The 4" pods are either too weak to be forward looking spots, or too focused to be true floods are being utilized as ditch lights and seem to work well enough. They're plenty bright for that application. The surprise win of the bunch is the forward facing 6" amber pods. While they don't seem as bright to the eye as a white light would, they actually seem to illuminate better and are a true fog, which is good. They illuminate a very wide swath on either side of the road and also extend quite a ways up into the tree line; while not crazy bright these are my favorite so far.

    But I didn't stop there. I did want some genuine spots (though if they were less than pencil beams, I'd be happier). I also wanted some more powerful fog lights with a wide diffusion in white light, as well as some side shooters for the sides of my rack for use when setting up camp or crawling around trying to un-stick myself (or helping others, etc.). Once again I turned to Nilight for a set of 9" spots which I've mounted midline of the rack and forward of the basket. I also bought some 6" fogs from Nilight and put those just to the outside of the 9" lights. I like the look and am anxious to hook them up. I'm still waiting the wiring, terminal blocks, fuse blocks, and a switched relay panel to do a proper, safe, and neat installation like I used to do when working aircraft avionics. It should all be here in a week or so, then I'll need to build harnesses and find the right connectors for feed throughs, etc. Blahblahblah.

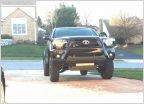
    Here's a quick trip I took a day after a good snow here in Monument. This is Mt. Herman trail; not very challenging by any standard, though a little sketchy with icy areas and no guard rails. You can see the ditch lights and fog lights installed. I'll have to take some more pics soon with the round lights on the top of the cap (which just *barely* clears my garage opening).

    [​IMG]

    [​IMG]

    [​IMG]

    [​IMG]

    [​IMG]
     
  4. Jan 31, 2021 at 6:55 PM
    #4
    DangerPudge

    DangerPudge [OP] Well-Known Member

    Joined:
    Mar 9, 2019
    Member:
    #285927
    Messages:
    167
    Lift, wheels/tires, Snugtop
    Today was a red-letter day! After driving up to Centennial (some 45ish miles away) over lots of construction, the ride quality finally wore on me to the point that I realized I needed to do something. I'd been hearing a lot from folks who took their anti-sway bars off to improve articulation, and that's something that I'd planned on. I'd also been reading that it improved ride quality. Coming from a background of cars that you'd add larger sway bars to in order to reduce body roll and improve cornering, I was well aware of the suspension impacts.

    I read a thread here recently about some poor sod who'd tried to remove his anti-sway bar before a trip with his daughter. This being a Colorado native truck I wasn't sure if I'd find corroded bolts or not.

    I did not.

    The whole operation, from start to finish including getting tools was under half an hour. Well under if I'm guessing. Unfortunately I was careless when pulling the bar out and managed to break the driver's side ABS sensor and yank the wires out of it. Daggumit. That's okay though; small price to pay for the profoundly better ride quality! It isn't quite my Silverado Z71 smoothness (my cowboy Cadillac) but it comes much closer. It's nearly as smooth as my wife's '19 4Runner Offroad. That's sooooo much better. And the handling, while more wallowing, isn't nearly anything to worry about, though as mentioned earlier my truck has been lifted which I'd imagine means it has some aftermarket Billstein shocks, which may or may not behave differently that stock ones. It is utterly reversible, and I'd encourage anyone who isn't hyper-concerned with cornering capabilities to give it a shot. It instantly solved my single biggest complaint with this truck, and it was free (except for the bits I broke being careless).
     
    Hercanstein likes this.
  5. Feb 1, 2021 at 8:20 PM
    #5
    DangerPudge

    DangerPudge [OP] Well-Known Member

    Joined:
    Mar 9, 2019
    Member:
    #285927
    Messages:
    167
    Lift, wheels/tires, Snugtop
    Got some more goodies today. A new relay switch panel, a battery terminal set with multiple outputs so I can run appropriate gauge wires directly from the battery.

    Once again I've yet to power up the final set of lights; I bought some Bunker Industries 7" side shooters and mounts to mount of the side of the basket in order to use them as camp setup lights, or if there's a need for walkaround. They seem to be of similar quality (or perhaps a bit higher) to the Nilight brand but with a far superior automotive grade weatherproof connector. Unfortunately I'll be nipping the connector off to make a continuous run to an auxiliary fuse block.

    I also received an appropriate switch panel to fit in, what I think, is a very nice location. I discovered that the cup holder directly ahead of the shifter is removable, and that with a very mild heat forming to flatten the aft part of the plastic crossbeam just ahead of the shifter trim and a very minor trim at the forward edge of the cup holder area allowed for a very nice fitment. I used a bit of Kydex to form a nice trim piece to fill the gaps. I think this will be a very clean installation and I'm looking forward to having it all done, though I suspect I'll need to get some milspec cannon plugs to do the job I want. Maybe some sealant from Avdec...

    [​IMG]
     
  6. Feb 6, 2021 at 5:52 PM
    #6
    YamaDirtrider

    YamaDirtrider Custom bumpers @FORT-ifyRigs

    Joined:
    Mar 1, 2016
    Member:
    #179877
    Messages:
    6,344
    Gender:
    Male
    First Name:
    Josh
    Elizabeth CO
    Vehicle:
    06 DCLB sport postrunner
    What hasn't been modified?
    Saw your post on mount herm, glad to see ya getting out. Looks like your needing some armor. Are you planning on running those yellow flood lights as fog lights?
     
  7. Feb 19, 2021 at 10:09 AM
    #7
    DangerPudge

    DangerPudge [OP] Well-Known Member

    Joined:
    Mar 9, 2019
    Member:
    #285927
    Messages:
    167
    Lift, wheels/tires, Snugtop
    Thanks. Yes, the amber lights at the front work quite well as legit fog lights. Armor is coming as $ allow. I'm not sure it's huge for me right now; I'm more about taking fire roads and tame trails to get out to where I want to be. I suspect armor will follow a front bumper/winch combo.

    Been working on my truck for the last 3 days, wiring up all manner of lights (6 sets total) through a nice switch panel that has aux ports, a voltmeter, and some panel lighting. That meant heavy wiring going from the battery through a circuit breaker then wired through the cab into the console. I wanted each pair on their own circuit, and for them to be quick-disconnect for the light bar and basket. On top of that, I wanted it all to be seamless and fully integrated.

    Mission accomplished. The backlighting on the panel, voltmeter, USB and 12VDC ports are on switched power. The rest is straight battery power so I can turn them on without the truck running if needed. It's totally integrated and the switch panel sits nicely in the console and looks almost OEM.

    My hands hurt from feeing wire, making looms, and generally feeding them through the shredder that is 'under dash land'. It was worth it though. At least I hope so. To properly do this job I bet I spent at least as much on high quality connectors, wiring, heat shrink, relays, panels, etc. as I did on the lights themselves (which points to good wiring materials or cheap lights... both are the case). I haven't tried the lights out yet though. They function, but tonight I'll finally get them aimed where I want 'em. WOOT!

    Now to get to work installing the sound deadening where I've pulled out a bunch of interior...
     
  8. Mar 8, 2021 at 12:53 PM
    #8
    DangerPudge

    DangerPudge [OP] Well-Known Member

    Joined:
    Mar 9, 2019
    Member:
    #285927
    Messages:
    167
    Lift, wheels/tires, Snugtop
    Well... it's been one helluva week. My mother died and I picked up and drove to VA to deal with her estate, etc. I cannot describe how bad the driving conditions were; 28 hours of nonstop hell; from driving winds that shoved the truck all over the road to POUNDING rains, then fog so thick you couldn't see 20' ahead of you. Most of it happened under cover of darkness. I have to say that the lights performed amazingly well. Driving through some of the darkest roads of VA (super tight, 1.5 lane without a hint of light to creep through the trees) they were a godsend; absolutely as near daytime as I'd need, and the forward fogs were just excellent. This is what I got 'em for. And they worked better than expected. I'm very pleased. The only thing I'll be doing is purchasing some yellow film or amber acrylic to fit over the larger lights on top; even though the light doesn't seem like it is as bright when shoved through an amber lens, the light is just more usable in more conditions with a little better contrast.

    Sound deadening: I got a bit more than 50% coverage on the back wall and rear floor as far forward as the back of the front seats. There's a difference, but not quite as much as I'd have liked. I'll add a bit more, but the difference is notable. I always recommend sound deadening to anyone with any car; just makes it feel more solid. My suspicion is that the doors are the real culprit though, and those hollow bodies work just like guitar bodies and tend to amplify noises. I'll do those before I get any more down on the rear of the cab.
     
  9. Jul 2, 2021 at 8:36 AM
    #9
    DangerPudge

    DangerPudge [OP] Well-Known Member

    Joined:
    Mar 9, 2019
    Member:
    #285927
    Messages:
    167
    Lift, wheels/tires, Snugtop
    I've put a little more into the truck! I finally pulled the trigger on a winch and wound up ordering a Smittybuilt X20 with a synthetic leader. And then it sat in the laundry room in a box for the next several weeks while I tried to decide on a bumper.

    I finally decided that the C4 Low Pro was the way to go and went to order it. But I discovered they had a 10 week backorder. Damn. Well option two... was also on a 10-14 week backorder. Holy cow. The more I looked the less I found. And then I happened upon U.S. Offroad who happened to have some in stock. After checking them out I pulled the trigger and couldn't be happier. It is very well made, fit very well, shipped FAST, and was quite a lot cheaper than other offerings for some reason. I got it unfinished and spent the next couple of days putting Raptor liner on it. The coating looks great but I'm not sure I'm pleased with the durability. I treated the metal, scuffed it, and shot the stuff on. Maybe it'll cure more durable, but... at worst the bumper will just come off and I'll strip and shoot it again. If that's my biggest worry I'm a happy guy.

    I spent the majority of yesterday installing the bumper and winch. I though getting the wiring installed after the bumper was up would be the best option so I wouldn't slice or pinch wiring. Maybe that was the right call, but had I realized how much room I'd have, I would have just wired it all in as it sat on the bumper off of the truck. Cest la vie. The instructions were decent, though not great. Most of it became self-evident, but the bumper cutting could have been described much better and the interface between the bumper and cover should have been explained so that prior to a cut you understood how they were designed to interface. I got a little too much off one side, but... Once again, it is extremely difficult to tell and a little bumper scoochin' to the left will make it impossible to determine that I'd gotten a bit too close on one side. I'll do that at a later date, if I ever truly feel the need to feed my OCD.

    All wired up, fully installed, it was time to get the spool wound. 1Klb load is recommended. Okay... Dunno how I was going to do that but I had an idea. I had my son park his Wrangler down the street which has a nice slope, and just dragged him back to his normal parking spot. Was it 1Klb of load? Who knows, but it had to have been more than me hanging on the line as it spooled. Unfortunately, I couldn't get the remote to work in wireless mode. Hopefully it isn't a control box problem. In any event, I suspect it is just operator error though I'll dig into it over the next couple of days.

    I have noticed that my tires are rubbing on reverse (especially if turning and I move over some uneven ground). This will have to be addressed, but not sure which direction to go. More research.

    [​IMG]
     

Products Discussed in

To Top