1. Welcome to Tacoma World!

    You are currently viewing as a guest! To get full-access, you need to register for a FREE account.

    As a registered member, you’ll be able to:
    • Participate in all Tacoma discussion topics
    • Communicate privately with other Tacoma owners from around the world
    • Post your own photos in our Members Gallery
    • Access all special features of the site

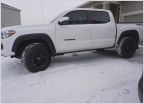
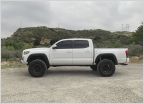
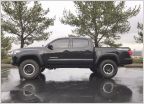
2020 TRD Off-Road Build - "Challenger"

Discussion in '3rd Gen. Builds (2016-2023)' started by SOCL, Jul 19, 2021.

  1. Jul 19, 2021 at 8:27 PM
    #1
    SOCL

    SOCL [OP] Member

    Joined:
    Apr 12, 2021
    Member:
    #362439
    Messages:
    5
    Gender:
    Male
    First Name:
    Saúl
    Alexandria, VA USA
    Vehicle:
    2020 Tacoma TRD Off-Road - "Challenger"
    OME Heavy Lift, Grabber A/TX, ARB Summit Bumper, Leer 100RCC, 2nd spare mount, RCI Engine/Transmission/T-Case Skids, Freedom OffRoad UCAs, custom decals
    Base Vehicle: 2020 Tacoma TRD Off-Road Double Cab : "Challenger"

    Completed Mods
    * as of July 20, 2021
    1. General Grabber A/TX LT265/75R16 + spare
    2. Leer 100RCC Bed Cap
    3. RCI Full Skid Package
    4. Old Man Emu Heavy Load Lift Kit w/Dakar Leaf Package
    5. ARB Summit Bumper
    6. Freedom OffRoad Front Upper Control Arms
    7. Home-built swivel-mounted spare tire carrier - individual build thread forthcoming
      + license plate relocation bracket
    * Not counting numerous cosmetic mods

    Pending Mods
    Planned Mods
    Hypothetical Mods
    • fabricate rear-fender mirror rail to ARB Summit Front Rail (Part No. 4423010)
    • exhaust snorkel extension
    • hitch-mount for e-bike (e.g. Sur Ron) with connection to truck to charge to/from the trails w/manual internal cutoff
    • roof rack-mounted landing platform for a drone intended for use as a non-line-of-sight aerial scout, wireless charging(?)
    I previously built a 91 Jeep Cherokee XJ into a true overland expedition vehicle. You can read that little epic at NOVA Jeepers.
    -----
    Current Photos as of July 20, 2021
    (see here how it looked new)
    IMG_20210720_194620.jpg
    [​IMG]
    bs3bYUS9LdnsnPcOVYq5EBJzZbybOTrwlTSGhWjo_7538d8b71638e7158b684d7e5268c30b311fb36f.jpg
     
    Last edited: Jul 20, 2021
    This site contains affiliate links for which the site may be compensated.
    #1
  2. Jul 20, 2021 at 8:23 PM
    #2
    SOCL

    SOCL [OP] Member

    Joined:
    Apr 12, 2021
    Member:
    #362439
    Messages:
    5
    Gender:
    Male
    First Name:
    Saúl
    Alexandria, VA USA
    Vehicle:
    2020 Tacoma TRD Off-Road - "Challenger"
    OME Heavy Lift, Grabber A/TX, ARB Summit Bumper, Leer 100RCC, 2nd spare mount, RCI Engine/Transmission/T-Case Skids, Freedom OffRoad UCAs, custom decals
    1. The first mod were General Grabber A/TX 265/75R16 tires put on the stock aluminum rims. I've explained elsewhere the hassle I went through to get these tires installed with JiffyLube via Amazon, so it will suffice to say that you should go to a dealership or a good mechanic for this sort of work.


    2. Leer 100RCC courtesy of CapWorld in Laurel. TI have found the cap a little underwhelming, though for no reason that has to do with the CapWorld but instead with the model. The only gripes worth posting are, first, that Leer has not bothered to develop an equivalent of their "windoor slider" for the 5-foot bed - I have never felt more inadequate in the very specific selection of my vehicle in my life as at that moment. The other one is a little more fundamental to the design, namely the "scoop effect" created at the front of the bed cap. I am considering using thermal insulation foam used in covering pipes (like this) cut to fit the angle between the Leer cap and my truck's cabin. It would need to be at least 8 feet, more likely 10, to span the length of the gap and to provide sufficient quantity to cover the gap. Next, rather than use 3M tape to seal the gap, I will instead adhere magnetic strip tape (for example) to the edge(s) of the foam and let that to provide a kind of seal against cabin - not a true seal, but one sufficient to my needs. I will do a write-up once I find success.

    3. RCI Full Skid Package (Engine, Transmission, Transfer Case) in black powdercoat steel installed by me and my father. We followed their YouTube video - and it was literally the single easiest armor mod I have ever installed.


    4. OME Heavy Load Lift Kit (OMETAC16HKSB) with the EL112R Dakar Leaf Package ordered courtesy of Bull Run Overland. Installation was done by Aylestock Automotive - an awesome job and I could not be happier with the truck's performance on and off road! The lift worked out the "wandering" effect was having with the new tires (General Grabber A/TX 265/75R16). The lifts the truck 3 inches front, and as much as 3.5 inches in the rear (no cargo). I was told that the ride would be rough on this particular kit since I would not have 600 lbs. of constant weight in the back. Maybe it's the Leer cap (225 lbs., I think...), but yeah, its a little loose in the caboose. Honestly, it just feels like a heavy-duty truck - it's not out of control. Hitting a bump at speed, I don't know, but everything else, it's awesome! With the added weight of gear, the booty dance mostly resolves itself. I have taken this suspension now on as fast as 70-75mph and it drives firm and steady, though it obviously prefers 4H/4L. Really, really pleased with this mod.

    5. ARB Summit Front Bumper which my father and I (with a lot of arguing) installed. I have to say, had I known just how much trouble cutting the fiberglass bit under the lights to fit, I might have considered a different brand entirely. Still got to work out some flaws on the cut piece of the driver's side, but with the bumper itself I am very pleased. Aylestock Automotive takes credit for the wiring of the in-bumper fog lights and the turn-signal indicators.

    6. Freedom Off-Road Front UCAs off Amazon replaced the OE upper control arms, which were angled to the max with the new suspension. Installation once more courtesy of Aylestock Automotive.

    7. A fifth Grabber A/TX serves as a second spare is mounted on a full-steel rim (from Amazon) which I painted with a rattle can in super white to match my truck. That make it two spares: one true full size on the back and the OEM "full-size" under the bed. The Grabber spare is mounted on a folding spare-tire carrier mount fabricated by my father two years ago, using plans we found online for my Cherokee. We used a Black Widow Folding Hitch Adapter as the base, with a CURT Hitch-Mounted Spare Tire Mount with the horizontal portion cut and a hole drilled on both side to provide a point for the locking pin. With the larger size of the 265/75R16 over the Cherokee's 31x10.5 A/TX spare, it was necessary to "elevate" or extend the length of the tire mount to clear the Black Widow's frame. I therefore purchased a 12'' hitch extender, a hitch lock to unite them, and a hitch tightener to stop the rattle-tattle-tattle. A few holes drilled into the hitch extender and the tire easily cleared the Black Widow. The hitch-mount allows for two different position for the tire, a "higher" position for on-road driving (and parking) and a "lower" position for off-roading. On the Cherokee, my father and I fabricated a gas tank carrier, but that ended up smacking into the back of the XJ and so I am more hesitant now to add anything like that.

    Higher Position:
    iE1OD-sq3N0BD6LOpVVN4jLBZj6e56s1ZZrcnJSu_068c3534d30398255d0e7242f9bcfe0bd8a7645f.jpg
    Lower Position:

    FjVgfuLqyg3ZKpH-t5iCZzHChzwMv3DBQ6RHZqQ3_5d8ad2a2821080ea53770178d8147d0292b609da.jpg
    With gas can:
    GbBjDK8G_XEsIgECIOUg_8Z-CDCPjS_5zYyEkd5N_e0ac21609881eaa41804ab14efc773716164f2e1.jpg
     

Products Discussed in

To Top