y=mx+b's 05 4runner Build Thread

Discussion in '4Runner Builds' started by y=mx+b, Feb 3, 2022.

  1. Feb 3, 2022 at 8:40 AM
    #1
    y=mx+b

    y=mx+b [OP] Station Wagon

    Joined:
    Jul 17, 2020
    Member:
    #334787
    Messages:
    1,930
    Gender:
    Male
    First Name:
    Ryan
    Blacksburg, VA
    Vehicle:
    '05 T4R SR5 v6 4wd
    I already have a build thread on T4R.org with a high degree of organization, but I've started spending more time on TacomaWorld because of the local friends I've made over here. There's just more traffic on TW, which makes it easier to bounce ideas around and learn together. My build thread on T4R is also highly organized, which makes me only want to make highly organized posts to maintain that. I'd like to do post more stream of conscious or progress pictures, so that will happen over here as a BS thread of sorts

    My T4R.org built thread: All pictures are hosted externally as to not take up TW server space. If you'd like to see them bigger, you can click and it will open them in imgur!

    So here is the copypasta of what I have from T4R:

    Introduction
    This is a "build" thread for my 2005 Toyota 4runner SR5 v6. Its not really a "build" right now, but I figure before I get too deep into the maintenance and mods, I should start some documentation to record my progress and help some others out. I am a regular dude without any fancy tools (yet) that hopefully can inspire you to do some basic maintenance and eventually off road mods. Getting into home maintenance was daunting for me, so I want to make everything feel as approachable as possible. Don’t hesitate to ask any questions!

    Outside of 4running, I am a Mechanical Engineering Student. I really enjoy learning with my hands, and there is a lot to learn from the engineers that designed the 4runner. Sometimes it's easy to get caught up in the school work, but making connections to my hobbies keeps me engaged and more excited to learn more. After graduating, I’m hoping to earn a hands-on engineering job that makes me excited to go to work every day!

    How it Currently Looks
    Installed some Kenda Klever 35x10.5s!
    [​IMG] [​IMG]

    Older Pics
    Just added some Dobinsons Suspension!
    [​IMG] [​IMG]

    [​IMG] [​IMG]

    Some older pics at stock height:
    [​IMG] [​IMG]
    Pretty much all stock at the moment. Currently have some Falken Wildpeak AT3Ws Mounted on FJ Cruiser/Early 5th gen Trail Wheels. See this post here: [​IMG] [​IMG]

    Background
    I had recently gotten my driver's license (2016) and was wanting to purchase my own vehicle. I had been saving a lot from my job at the Home Depot and custom woodworking on the side, so I was ready. I really wanted a pickup truck to be able to haul woodworking materials, so that's where I began looking. My initial vehicle of choice was an extended cab Ford Ranger. Mom was not on board with this, because a dinky little RWD pickup truck did not seem safe by her standards. Mom’s have the best intentions for their children, listen to them! My family has owned 2 Siennas with good luck and reliability, a 2000 and 2005, so I started looking into Toyotas. Unfortunately, that meant my wallet had to stretch even further. Tacoma’s were way out of my budget so I never looked too hard. 1st gen Tundras on the other hand, are a lot cheaper than Tacomas and have more space. I looked at a few, but all of the ones in my area still had the Toyota truck tax.

    Eventually, I came to the 4runner as a compromise between the carrying capacity of a pickup, and the affordability of an mid-size SUV. The roll down window allowed me to carry 8-10’ foot lumber and I could get plywood cut to fit with the tailgate closed. For anything bigger, I could use the Sienna. After carefully searching and test driving a few, I a relatively clean 2005 Dorado Gold Pearl SR5 v6 4wd with 185k miles. It’s 4wd high, low, and center diff worked, the dash wasn’t cracked, and the dealer was going to replace the front CVs, front wheel bearings, restore headlights, and some other things that I knew were going to be expensive.

    Making the Purchase!
    [​IMG] [​IMG]
    [​IMG] [​IMG]
    The Penn State sticker and rust on the hitch should have been a red flag, but I didn't understand as much about vehicles then, as I do now. I'll elaborate on these items later.

    It felt really good to have paid for my own first vehicle, even if it wasn’t the nicest or newest car in the high school parking lot. Overall, it was in great condition for an 11 year old vehicle. I have daily driven it ever since purchase, but only recently became interested in wrenching on it. A few bigger maintenance items, like an alternator and seized calipers, made me realize how much I can save by doing the work myself. This thread will aim to document all the maintenance and modifications I do to this vehicle.


    Mod, Maintenance, and Project Directory:

    Laundry List (No Particular Order)
    • Regear to 4.88 and add Lockers
    • Continue Rust Mitigation
    • Rebuild Front Skid Mount
    • Rear Diff Breather Relocation
    • Marlin Crawler Cam Tab Gussets
    • Semi-Permanently mount my Smittybilt 2781
    • Repaint Hood?
    • Custom Dirt Bike Hitch Carrier Lift?
    • Coastal Offroad Front Bumper or something custom?
    • NWTI Rear Bumper or something custom?

    My Thread Plans
    I am currently doing a bunch of maintenance items, so eventually there will be some juicy off road articulating, wheel well trimming, tire rubbing, body mount chopping, bumper fabbing goodness. I think I’m going to have this setup where I put some nice pictures and explanations in the build thread and do individual threads for really any in-depth writeups. This will be easier for people to find write-ups / tutorials, and everyone else can get the highlights right here. I already have a thread for the door lock actuator and bushing install, so these will be my experiment.

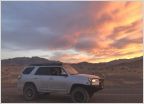
    It seems to like to put the last pic as the cover photo, so heres this
    [​IMG]
     
    Last edited: Feb 3, 2022
    Kolter45 and Roody like this.
  2. Feb 3, 2022 at 8:50 AM
    #2
    y=mx+b

    y=mx+b [OP] Station Wagon

    Joined:
    Jul 17, 2020
    Member:
    #334787
    Messages:
    1,930
    Gender:
    Male
    First Name:
    Ryan
    Blacksburg, VA
    Vehicle:
    '05 T4R SR5 v6 4wd
    Pre-Build Thread
    Plastidip
    3 years into owning the 4runner, I discovered this forum. Seeing all the cool builds, I wanted to spice mine up a bit. I liked the look of the black on tan from Dusty Driftwood, and Plastidip was something easy that I could do. I plastidipped all the badges, the rear valence piece, and the chrome grill. I only took a few pics, since I never envisioned myself making a thread like this. Also peep the Toyoda sticker, it sounded like a good idea when I was 16, but maybe not so much anymore lol.
    [​IMG] [​IMG]

    Adjusting the Parking Brake
    Like a moron, I never used the parking brake because it didn’t seem to do much. Eventually, I got smart and realized how a parking brake can relieve stress on your parking pawl. To address its poor function, I decided to adjust the parking brake in my school apartment parking lot. This was the first real wrenching project on the 4runner, so I bought my first floor jack and stands. It doesn't sound like a big milestone, but having these tools opens up a lot of project opportunities.
    [​IMG]

    My Own Oil Change on My Own! | 205k miles - 4k interval - Castrol High Mileage Synthetic Blend 5w-30
    At this point in time, the 4runner has 205k. There was 4k on the old oil from Firestone, so I decided I wanted to change the oil and use a better filter than their small crappy Pennzoil ones. I bought a case of 5 Toyota 90915-YZZD3 filters, a 10 pack of the drain plug washers, and Castrol High Mileage Synthetic Blend 5w-30. I got an oil analysis report from Blackstone Laboratories and it showed 126ppm Potassium and 59ppm Sodium, signs of a potential head gasket leak. They advised that it is not a big leak, but repeat that interval and keep an eye on it. On the next 4k change at 209k, I used Shell Rotella Gas Truck Full Synthetic 5w-30 and got another report. Oddly enough, the numbers dropped to 50ppm Potassium and 28ppm Sodium. It dropped low enough that Blackstone Labs thought that I fixed it and those numbers were residual. No misfires on startup after sitting, starts right up after sitting for a few days due to this modern apocalypse. I’m keeping an eye on it and definitely going to do it the right way when the time comes. It is a build date 6/05 so I am on the old head gasket design.
    [​IMG]
    This pic is on jack stands, it's not actually lifted like that.

    Differential and Transfer Case Fluid
    I needed another project to do, and this seemed like a good idea. I used the tutorial found here: . From what I fetched on the Toyota Owners site, these were last changed around 110k at the dealer by the previous owner. At 207k, these were overdue. I bought 8qts of Mobil 1 Full Synthetic 75w-90 and an off-brand drain plug washer set. I started with the rear fill, using a 12 point 24mm socket because it's what I had. Anyone who has done this before can see how that worked out. The dumb fill plug doesn’t have any corners on it anyway, so I just rounded it some more. I went out and bought a proper 6 point 24mm and a 6 point 15/16in (=23.8mm) to get this done. I also got a replacement fill bolt from the parts department at the local dealer. After that, everything was smooth sailing with the rear and transfer case. I did need to use a pump for the transfer case, but I could just turn the bottle upside down for the rear. Here is the new plug on my crustnado 4runner, what a nice contrast:
    [​IMG]

    Now to the front, which was not as simple. I broke a bunch of skid plate bolts on the way in, which was not a good start. I drilled and re-tapped the holes for m8x1.25, got new fasteners, and some anti-seize. Onto the diff, the fill came out without issue, but the drain was really stuck. I ground the 10mm hex flat on the end, used a bunch of heat, a breaker bar, but it eventually stripped. Following this, I gave up for a bit. A few weekends later, I bought the Titanium Flux 125 on sale at Harbor Freight to fix a broken seat bracket on Mom's 2005 Sienna. Not the best welder out there, but for the price, its a decent first welder. Now that I had a welder, I welded a nut onto my drain bolt. With the concentrated heat from the weld and better grip on a big nut, the plug came out without issue. I was then able to pump the fluid in like normal.
    [​IMG] [​IMG] [​IMG]

    Door Lock Actuator Replacement
    I did do a write-up on this already and it can be found here: .

    I hadn’t found an in depth write-up on doing this, only a few mediocre youtube videos that didn’t really show everything. I wanted to have something that a novice wrencher, like me, could refer back to.

    I ended up getting a whole actuator assembly, rather than replacing the little actuator motor. I was just starting to gain confidence to do more in depth projects, so it was safer and easier to get the whole unit. This project was pretty rewarding, because there was a noticeable difference when everything was all said and done. Oil and fluid changes don’t make it feel any different, but regaining the ability to use the left rear door sure feels much better. This job wasn’t too hard and I definitely would encourage anyone to do this themselves!
    [​IMG] [​IMG]
     
    Kolter45 and Greg.Brakes.Tacos like this.
  3. Feb 3, 2022 at 8:52 AM
    #3
    y=mx+b

    y=mx+b [OP] Station Wagon

    Joined:
    Jul 17, 2020
    Member:
    #334787
    Messages:
    1,930
    Gender:
    Male
    First Name:
    Ryan
    Blacksburg, VA
    Vehicle:
    '05 T4R SR5 v6 4wd
    Rust Mitigation Part 1
    My 4runner is a bit crusty underneath, and I want to do all I can to preserve it. I have not found any holes in the actual frame parts, but there is a bad spot up where the front skid plate attaches. I want to go over the entire frame and do some serious rust prevention and correction. I do have a welder and lots of time on my hands, so I'm ready!

    Experimental Phase
    I began this process a few months ago by doing a surface prep experiment for POR15 on the driver side wheel well. I figured this was an easy place to start, and it got a decent amount of action to test the longevity. I bought a big ol' needle scaler from Harbor Freight and went to town removing crusties on that wheel well. Starting left, I just had needle scaled the crust off and scuffed with whatever sandpaper I had, just right to the right of the shock tower I got like 50% paint off with a wire wheel, and closest to the body mount I had cleaned down to bare metal. Not seen is the LCA that got no scuffing and a poor needle scale job as a control.
    [​IMG] [​IMG]

    The whole area was then cleaned with soapy water and etched with a 3:1 dilution of water and Klean-Strip Concrete Etch & Metal Prep + Rust Inhibitor. I then put 2 coats of POR15 on, sanding in between coats, and finally covering in some Rustoleum Flat Black rattle can that I had laying around. I was worried about getting paint on the fasteners for the LCA bolts and ball joint, so it turned out sloppy and some areas were unpainted. Now that I am picking back up on the project, I have some new ideas to get this done properly.
    [​IMG]

    Passenger Side
    This side was worse than the driver side, mostly because the A/C drain spits out everything onto the frame. Maybe I’m missing some tubing, but this seems like a dumb design (Fixed it here: ). After the first needle scaling pass, this is what I was left with.
    [​IMG] [​IMG]

    And here is the rough spot. I hear this place rusts out all the time on northern 4runners and there are no holes in the main frame, so I’m not too worried about it. Once I get a tad better at welding this summer, I’ll remake that whole entire front skid plate mount.
    [​IMG]

    A Slippery Slope to Front End Rebuild
    I have a torn CV boot on the passenger side, and I want to replace it myself. The dealer supposedly replaced both when I bought it, but I think my worn suspension is causing the boots to rub. To get the cv out, you have to remove some LCA bolts from the knuckle. This got me thinking that I should just remove the LCA to get everything properly stripped down. The LCAs are also rusty around the bushing area, and there are some areas blocked by their mounting tabs. Furthermore, the cams are seized and bushings could be original with 210k miles on them, so everything in there needed to be replaced. I decided to take the plunge on the bushing and cam replacement.
    [​IMG] [​IMG]
     
    Kolter45 and Greg.Brakes.Tacos like this.
  4. Feb 3, 2022 at 8:55 AM
    #4
    y=mx+b

    y=mx+b [OP] Station Wagon

    Joined:
    Jul 17, 2020
    Member:
    #334787
    Messages:
    1,930
    Gender:
    Male
    First Name:
    Ryan
    Blacksburg, VA
    Vehicle:
    '05 T4R SR5 v6 4wd
    The Build Thread was initiated after I completed the Bushings, so after this point is current with the date of posting

    LCA Rebuild with Whiteline LCA Bushings
    Full LCA Bushing Install and Rebuild Tutorial: I already have a full detailed tutorial on this, but wanted it to be documented in the build thread as well. The process is broken down into 10 steps, and there is a good directory system to move between steps, I am pretty proud of that feature. If you follow that tutorial, please post a few pictures in a reply, I want to see your progress and final outcome! It was in the 4th gen section for a few days, but has been moved to a Sticky in Maintenance/Detailing! Let me know if you need any help with the Whitelines, I would be happy to help. Here is an abridged version with all the best gory pictures! Each step in the build thread will have a link to to the tutorial thread for more information.

    Before and After
    [​IMG] [​IMG]

    Parts

    Step 1: Jack up the Vehicle
    Since we're replacing a suspension component, the front needs to be off the ground. I jacked from behind the just body mount, and placed my jack stands there. More pictures in the actual tutorial, trying to stay under the 20 pic limit.

    Step 2: Loosening Bolts
    There are 6 fasteners that need attention for this job. 2 are the alignment cams, 1 holds the ball joint to an intermediate plate, 2 hold that plate to the knuckle, and one connects the shock to the LCA. I suggest dousing them in a penetrating fluid a few days ahead of time. Once they've soaked, remove as many as you can. The alignment cams will likely be seized, but that's okay, we're going to cut them out. More pictures in the actual tutorial, trying to stay under the 20 pic limit.

    Step 3: Cut Out Old Cam Bolts and Remove LCA
    Its definitely scary to cut out a piece of your vehicle, but its pretty much the only way to get these out. I cut between the bushing and frame mounting tabs. Having the LCA disconnected from the knuckle will allow you to rotate it down for easier access to cut the bolts. Make sure that you buy the Carbide Diablo blades for the sawzall, nothing else is worth it. I used 5 crappy blades just to get one end off, but 2 carbide blades took care of every other cam on both sides. Also make sure to lube up the blade to keep the heat down and extend the life of the blade.
    [​IMG]

    Step 4: Remove Ball Joint
    I rented the 23 piece kit from Advanced Auto, I hear this is the only kit that works properly. Mine was super crusty, but I got it out with just a breaker bar and some heat. I had the LCA vertical so I could use my weight to turn the breaker bar. I got to the point where I couldn't turn anymore, and the ball joint wasn't coming out. I hit with a hammer in the pictured location, and it came out.
    [​IMG] [​IMG]

    Step 5: Press Out Old Bushings
    I used the jack method to press out my bushings, the process is covered with details in the tutorial. Essentially, you use the stock jack to apply pressure to the bushing and heat the LCA around the bushing to release it. Slowly increasing heat and pressure, the bushing will make its way out.
    [​IMG] [​IMG] [​IMG]

    Step 6: Remove Old Bushing Outer Shell
    This is the most challenging part of the process, but it wasn't terrible. I came up with a 5 step process that I believe is the best way to remove these. More details are covered in the tutorial, and I recommend you visit that page for proper instructions. The key to this step is a needle scaler, making some cuts in the bushing shells, and a good phosphoric acid bath!
    [​IMG] [​IMG] [​IMG]

    Step 7: Clean LCA, Remove Rust, and Paint
    I wanted my LCAs to be stripped of all rust and repainted before reinstall. As mentioned before, the LCAs came out so I could strip the frame better. I used the acid again to remove the surface rust, scuffed the surfaces with 150 grit sandpaper, painted with POR15, and finally covered everything in black paint.
    [​IMG]

    Step 8: Install the Whiteline Bushings
    Again, I would refer to the actual tutorial for proper instruction. To help with installation, I froze the bushing and used some grease on the outside of the new shells. In the tutorial, I installed 1 bushing with the jack, and the other with the ball joint press. To get the ball joint press around everything, the bushing needs to be set into the LCA tube about 1/2-3/4" using a jack.
    [​IMG] [​IMG] [​IMG]

    Step 9: Press in New Ball Joint
    I used the ball joint press to do its job. It is important to find an installation tube that fits around the boot, but also on top of the ball joint flange. A little grease on the body helps with insertion and will prevent corrosion.
    [​IMG] [​IMG]

    Step 10: Reinstall LCA
    When reinstalling, use the included grease on the bushing tubes. The suspension will rotate around these, so it is important they are both clean and lubricated. Since the cams are prone to seizing, I covered them in grease and put anti-seize on the threads. Installing the LCAs back in, I first put the cams in and rotated the ball joint end up to the knuckle. There is some fiddling required to get the intermediate plate bolts to line up, but its not terrible.
    [​IMG] [​IMG] [​IMG]


    Next Steps: CV Rebuild
    I'm still looking for more CVs to rebuild as spares, but I managed to pick up one almost new OEM CV for $32 at a local junkyard this week. It was an absolute steal, so I'm really excited to get this project underway. Bought a reboot kit for the old one, before realizing it was too far gone to just reboot. Now the rebuild kit is going on this one and I’ll also rebuild the old CV with tripod wear as a spare. It’s also a Toyota CV, so worth saving. If anyone knows where to get a tripod end without spending an arm and a leg, I'm all ears. There's a Febest kit here, but I've heard their quality is crap. If there's nothing out there, I'll just pack it with grease and call it good, since it's a spare.
    I am planning on making a writeup for the rebuild as well, similar to my past write ups with the door lock actuator and the Whiteline Bushings.
     
    This site contains affiliate links for which the site may be compensated.
    #4
    Kolter45 and Greg.Brakes.Tacos like this.
  5. Feb 3, 2022 at 8:57 AM
    #5
    y=mx+b

    y=mx+b [OP] Station Wagon

    Joined:
    Jul 17, 2020
    Member:
    #334787
    Messages:
    1,930
    Gender:
    Male
    First Name:
    Ryan
    Blacksburg, VA
    Vehicle:
    '05 T4R SR5 v6 4wd
    LCA Project Updates:
    I finally got an alignment after riding around for a 2 weeks with the steering wheel jacked. I haven't driven it a whole lot, but it definitely feels more planted on the road. Changing lanes over a the crown of a highway used to be all over the place, but now it feels much more planted.

    I'm currently on all stock suspension, so I got the Firestone lifetime alignment. I know they don't like touching aftermarket suspension, but I think I'll get good usage out of it before I get into aftermarket UCAs, suspension, and whatnot. The before numbers are just from random cam bolt placement, so don't mind those too much. I do wish I had the alignment numbers from before to compare. As an idiot teenager, I never got it aligned and it had been probably 4 years with the cams seized up. This alignment doesn't look spectacular, but it works fine for mostly street driving on stock everything. I need new tires this summer, so I don't really mind it wears poorly either.
    [​IMG]

    CV Reboot/Rebuild
    Reboot Tutorial: As mentioned in the last post, I finally picked up an almost brand new CV from a junkyard for $32. Not a lot of junkyards in my area have 4runners, so I was actually surprised to find this one already pulled and on the shelf locally. It looked to be almost brand new, but since the condition was unknown, I decided to reboot it. I already bought a reboot for my current CV that ended up being thrashed, so that was just waiting to get used. I have a full reboot tutorial that I've been working on that will be ready tomorrow or the day after, so I will update the post with that. When I get the old CV removed and the rebuilt one in, I also have plans to make a CV installation tutorial. I know these topics have been covered before, but more perspectives can't hurt. Pretty much all of my car/4runner/vehicle knowledge comes from here and facebook groups, so I want give back in some way.
    [​IMG] [​IMG] [​IMG] [​IMG]

    While on my search for used OEM CVs to reboot, I had some trouble with LKQ on ebay. I placed 3 separate orders: 1 was canceled by LKQ the day after it was expected to arrive, 1 canceled by LKQ the day after I ordered, and 1 finally showed up as an O'reilly's CV. They refunded the O'reilly CV and let me keep it, so I may try and nab the tripod bearing for my current thrashed axle.
    [​IMG] [​IMG]

    Wheels
    I also have my eye on some early 5th gen trail edition wheels, I really like them for some reason. I don't hate the stock sr5 wheels, but they're pretty ugly. Wheels don't really offer a lot of performance benefits, so I'm hesitant to spend money on them. They're asking $300 on craigslist, but I dunno if its worth it to me. Includes lugs and center caps, no tires or valve stems. Pic from CL ad:
    [​IMG]
     
    This site contains affiliate links for which the site may be compensated.
    #5
    Kolter45 and Greg.Brakes.Tacos like this.
  6. Feb 3, 2022 at 8:57 AM
    #6
    y=mx+b

    y=mx+b [OP] Station Wagon

    Joined:
    Jul 17, 2020
    Member:
    #334787
    Messages:
    1,930
    Gender:
    Male
    First Name:
    Ryan
    Blacksburg, VA
    Vehicle:
    '05 T4R SR5 v6 4wd
    General Project Updates:
    I have been acquiring 4runner parts and want to get some work done, but its been a million degrees with 200% humidity all last week. I'm also waiting on the differential and knuckle seals I ordered, they somehow went from VA, to OH, to MD, back to VA and are arriving 4 days later than expected. In the grand scheme of things, its not a big deal, but I'm kicking myself for trying to save $15 over buying in person. In that order, I also have the OEM parts for diff breather relocation.

    Here is a layout of all the goodies. From left, a mega torque wrench to get the 173-ftlbs or 217ft-lbs spec for the CV axle nut, my rebuilt CV waiting for the seals, some misc plumbing parts that I'm going to use as seal drivers, Rust Reformer to try instead of POR15, fuel tank straps, drill/taps for when I break the skid plate and strap bolts, and metal to rebuilt the front skid mount.
    [​IMG]

    I figure the front skid mount is a good place to practice some welding on my frame, since its not structural and its only jobs are to hold the skid plate and protect the radiator. There is a small piece of frame above it that's in mediocre shape, so I may cut that out as well. I'm slightly nervous because its near a front body mount, but I figure nothing ventured, nothing gained. Hopefully after completing the skid mount and the CV axle, the passenger side frame can get painted.
    [​IMG]

    Off-Topic Minivan Maintenance
    Only 4runner related because I used one of my YZZD3 oil filters, but I changed the oil on mom's 05 Sienna for the first time. Don't take easy peasy 1GR oil changes for granted kids, the 3MZ oil filter is under the exhaust manifold and above a front cross member. Its hard to see anything in there, so I was screwing it on blindly. Would have helped if I actually jacked it up, but I just drove it up on sections of 2x10 under the front wheels.
    [​IMG] [​IMG]
     
    Kolter45 and Greg.Brakes.Tacos like this.
  7. Feb 3, 2022 at 8:58 AM
    #7
    y=mx+b

    y=mx+b [OP] Station Wagon

    Joined:
    Jul 17, 2020
    Member:
    #334787
    Messages:
    1,930
    Gender:
    Male
    First Name:
    Ryan
    Blacksburg, VA
    Vehicle:
    '05 T4R SR5 v6 4wd
    Fuel Tank Strap Replacement
    Replacement Tutorial: My fuel tank straps were rusted pretty badly. The front strap was barely hanging on, and the rear strap was completely toast. I imagine they've been in that condition for a while, since my interest in doing my own maintenance has only started in the past 8ish months. Surprisingly, I didn't break a single bolt on either the skid or strap mounts. Here are some pictures for your entertainment:

    Crusty Bolts
    [​IMG] [​IMG] [​IMG]

    Rusted Straps
    [​IMG] [​IMG] [​IMG]

    All clean and pretty
    [​IMG] [​IMG] [​IMG]


    CV Replacement Update
    I finally got my seals in a week late, so I can get started on my passenger CV replacement and writeup. Also have pieces for the rear diff breather relocation. May or may not do a writeup on that one, we'll see.
    [​IMG]
     
    Kolter45 and Greg.Brakes.Tacos like this.
  8. Feb 3, 2022 at 8:58 AM
    #8
    y=mx+b

    y=mx+b [OP] Station Wagon

    Joined:
    Jul 17, 2020
    Member:
    #334787
    Messages:
    1,930
    Gender:
    Male
    First Name:
    Ryan
    Blacksburg, VA
    Vehicle:
    '05 T4R SR5 v6 4wd
    Free Wheels!
    Earlier I posted about some Early 5th gen trail / FJ Cruiser stock wheels for sale locally. They were originally listed for $300, then the price dropped to $200. After they dropped price, I contacted the seller and used my school email address without thinking much about it. When asking about the slight scuffing around the rim, the seller offered to just give them to me because they were an alumni of VT! They also came with lug nuts and center caps, which is nice because I have an annoying lug nut that always gets stuck in my socket.
    [​IMG]

    Slight clear coat is chipping around the rim of the wheel, but the faces are in great condition. The seller had them stacked in their garage, which may have caused this. Should I repaint them a different color? I kind of like the aluminum color on tan, but let me know what color would look good with my band aid beige 4runner!
    [​IMG] [​IMG]
     
    Greg.Brakes.Tacos likes this.
  9. Feb 3, 2022 at 8:59 AM
    #9
    y=mx+b

    y=mx+b [OP] Station Wagon

    Joined:
    Jul 17, 2020
    Member:
    #334787
    Messages:
    1,930
    Gender:
    Male
    First Name:
    Ryan
    Blacksburg, VA
    Vehicle:
    '05 T4R SR5 v6 4wd
    CV Axle Replacement</a>
    Replacement Tutorial: I finally got around to replacing my passenger side CV axle with the axle I rebooted recently! I took pictures again to make a tutorial to try and help someone else out. I read a few threads and watched a few videos, but wanted to make something that was my own that I could share with others. So far, the differential seal doesn't leak, so I'm really happy!
    [​IMG] [​IMG] [​IMG] [​IMG]

    Learning from My Mistakes
    Acknowledging and reflecting on mistakes is an important part of the learning process. I did make a few mistakes along the way, but I made sure to note them, so future CV replacers could benefit from them. The main issue was a rusty ring around the inner side of the ADD jackshaft, which was causing my seals to tear along their outer edge. I fixed this by scraping away at the crusties with a little pick, and after I got it cleaned up, I got the seal in first try without issue.
    [​IMG] [​IMG] [​IMG] [​IMG]

    I also got my first negative comment on this post. I try to be as positive and constructive as possible in my posts because I really want to help people tackle their projects. It was frustrating to see others not wanting to be as constructive. Thankfully, I had a good interweb friend back me up!

    Differential Drain Plug Problems
    So when I last changed my gear oil, I rounded the front differential drain and ended up welding a nut on there. I did it while the plug was still in the diff, because that was the only way I could get it out. I changed the crush washer with that gear oil change, but I noticed a really slow leak around the plug.
    [​IMG] [​IMG]

    When pulling the plug to change the CV axle, I took a closer look at the plug. Looking at the plug's flange, there is a slight deviation where the biggest weld concentration is located. For experimentation, I put RTV on a new crush washer to see if it makes a difference. Is it a good idea, probably not, but I like a good experiment. If it doesn't work out, I don't mind draining the fluid and replacing the plug with one of these fancy Lexus plugs that has a protruding head, rather than the socket head. We will see how this plays out, so far no leaks!
    [​IMG] [​IMG]
     
    Kolter45 and Greg.Brakes.Tacos like this.
  10. Feb 3, 2022 at 8:59 AM
    #10
    y=mx+b

    y=mx+b [OP] Station Wagon

    Joined:
    Jul 17, 2020
    Member:
    #334787
    Messages:
    1,930
    Gender:
    Male
    First Name:
    Ryan
    Blacksburg, VA
    Vehicle:
    '05 T4R SR5 v6 4wd
    Old CV Axle Teardown for Science
    I'm kind of an idiot for leaving it for this long, but live and learn. I decided to tear down the old axle to look at the effect of improper lubrication on the tripod joint. I do have an O'reilly's CV courtesy of LKQ thinking it was OEM, me receiving it and realizing it wasn't, and then refunding my money. I may try to cobble a half OEM axle together with the tripod from this axle and the boot saved from the junkyard axle. Theres also a Febest kit on ebay here: CV Joint Febest 0111-GRJ120 where I could get the complete inner joint. If after further analysis the axle is dead, I'll keep it around to show my friends how a CV joint works!

    When I first pulled separated the inner joint, the bearings all fell right off.
    [​IMG]

    Its interesting to compare the grease color, particularly seeing the metal debris in the torn boot axle and how it made the grease dark and shiny.
    [​IMG] [​IMG]

    I also noticed there was some play between the tripod bearing, and the C-clip. Compared to the axle I rebooted, there was no play here.
    [​IMG] [​IMG]

    Looking further into that play in the tripod bearing, we can see the axle shaft has slowly eaten away at the outer edge of the tripod bearing and made a chamfer. I don't have a good picture of the edge of the tripod on the newer axle, but you can still see here there is no chamfer.
    [​IMG] [​IMG]

    Looking inside the tripod bearing cup, there is definitely some significant wear from the un-lubricated bearings. The wear is pretty noticeable, especially when compared to the axle I rebooted.
    [​IMG] [​IMG]
     
    This site contains affiliate links for which the site may be compensated.
    #10
    Kolter45 and Greg.Brakes.Tacos like this.
  11. Feb 3, 2022 at 9:00 AM
    #11
    y=mx+b

    y=mx+b [OP] Station Wagon

    Joined:
    Jul 17, 2020
    Member:
    #334787
    Messages:
    1,930
    Gender:
    Male
    First Name:
    Ryan
    Blacksburg, VA
    Vehicle:
    '05 T4R SR5 v6 4wd
    06+ Headlight Upgrade Coming Soon!
    Old Headlights
    My current headlights are severely cracked for some reason. Surprisingly, they don't leak and have never fogged! The headlights were like that when I bought it, and the dealer had them professionally polished and cleaned before I finally bought it. 4 years later the clear coat is cracking and peeling off, so I wanted to shine up these turds.
    [​IMG] [​IMG]

    Polishing Headlights Fail
    I tried to polish them using a Meguiar's Polishing kit that has worked well on the Sienna in the past, but I failed. Instead of using the Meguiar's headlight coating at the end, I wanted to clear coat them for extra protection. Well, I used a cheap clear coat and accidentally used semi-gloss on half of it. I must have done too thick of a coat as well, because the clear was cracking on me as it dried. Thankfully, the fogs got the gloss and the orange peel just needs to be polished off. For the new headlights, I'll be using the Eastwood 2 part 2k clear.
    [​IMG] [​IMG] [​IMG]

    Projectors!
    Because I screwed up on my current headlights, which were already on their last leg anyway, I set out on the hunt for some 06+ projectors. I managed to find a pair of really good condition locally for $70, they just needed to be polished. I'll be following this tutorial so there is not much need for me to do a writeup on this one, unless someone wants to see my spin on it? I'll be sure to get good pictures for the build thread.

    So far, I have ordered the headlights and bumper fillers, but still need to pull the trigger on the wiring adapters and pieces. I’m debating on opening them up and painting the shroud, but not sure. I’ve seen a few pictures of shrouds color matched to the exterior, and it looks good on the lighter paint colors like silver and white. Maybe that would also look good with the Dorado Gold? I don’t think black shrouds would look good with the band-aid color.
    [​IMG] [​IMG]

    <a id="sealupdate">CV Axle and Seal Updates</a>
    It has been about 300 miles since I replaced the differential seal and RTV'd the front diff drain, and have been monitoring both about every time I go out. The drain plug was leaking a bit, so I tightened it a bit more. Now it doesn't leak anymore! Future me is going to hate current me for doing this, but thankfully I don't have the 10mm hex insert plug anymore. In the future, it would be a good idea to let the RTV cure fully before the final torque, as listed on the packaging. This would allow it to cure as a larger volume, and then be crushed down for better sealing.

    Passenger Differential Seal: I wiped my finger under the seal and didn't feel any moisture or smell any gear oil on it.
    [​IMG] [​IMG]

    RTV'd Drain Plug: Its kind of hard to see in the after picture, but there used to be a small little bubble of gear oil that would collect between the crush washer and the slight embossment in the diff. Now there isn't a bubble there. Its definitely not an end all be all solution, but it works for now. As mentioned before, I'm going to change the plug eventually.
    [​IMG] [​IMG]

    Boots: While in there, I noticed that the inner boot was leaking a small amount of grease from the axle clamp, so I went back to tighten it up with the mini impact and wipe the grease away.
    [​IMG]

    Back to School
    So I'm now back at school and will probably not have as much time for 4runner frivolity. Thankfully, I am living in a little house with a driveway, so activities will not have to cease completely.

    Here is a picture in a uhaul parking lot that I really liked for some reason. I've been doing a lot of work on it recently, and I'm proud of how much I have learned in the past few months. It's nice to look back and see it still in one piece lol.
    [​IMG]
     
    Kolter45 and Greg.Brakes.Tacos like this.
  12. Feb 3, 2022 at 9:01 AM
    #12
    y=mx+b

    y=mx+b [OP] Station Wagon

    Joined:
    Jul 17, 2020
    Member:
    #334787
    Messages:
    1,930
    Gender:
    Male
    First Name:
    Ryan
    Blacksburg, VA
    Vehicle:
    '05 T4R SR5 v6 4wd
    Power Steering Flush
    This is the first project I've completed at school! Don't worry, I'm still working on the welding project too, it just takes a bit longer to get everything setup. I've been doing a lot of homework recently, and just wanted to do something quick this weekend as a break. The steering never felt excessively tight or binding, I just wanted something to do. Here is the apartment setup:
    [​IMG]

    Here are a few before shots of the PS fluid. My guess is the fluid is actual PS fluid and not the required ATF, it didn't smell like ATF and was pretty dark. I will be replacing it with Valvoline Maxlife Synthetic ATF, which meets the Dextron spec.
    [​IMG] [​IMG]

    I used the little pump from a soap dispenser to remove as much old fluid as I could before adding the new fluid. The old stuff looks kinda red in this picture, but that must have been the lighting, it was pretty brownish yellow as seen in the next pictures.
    [​IMG] [​IMG]

    When the fluid first came out, there was some grody whiteish fluid that initially came out of the reservoir. I didn't get any good pictures of it on the way out, but when pouring into a waste oil container, I snapped these after seeing some of the nastiness flow into the container. Unfortunately, most of what I am talking about already fell into the container.
    [​IMG] [​IMG]

    I capped the PS return line with this little cap piece I whipped up. The return from the rack was then mated with a 3/8" splice barb to some 3/8" ID tubing down to an oil collection container. I ran the tubing through an opening in the radiator support and down between the bumper and radiator. Seems the theme of this project was not getting enough pictures, because I don't have any of the tube routing. Normally I overtake on pictures, but I guess I was wanting to get back to the homework grind today. it sucks having 4 assignments due after a 3 day weekend.
    [​IMG] [​IMG]

    I jacked the front wheels off the ground, set the key to the on position, and filled the reservoir up as I turned the wheels. Seems lock to lock 2 times was enough to drain the reservoir completely, but I did every lock to lock just in case. I used about 2qts of the AFT. When I was done, disconnected my drain system and pushed the return hose back onto the reservoir. After cleaning out the soap dispenser, I pumped the fluid down to just under the Cold Max line.
    [​IMG] [​IMG]

    I also figured a power steering flush wasn't much good without a lube of the steering U-Joint. Its pretty crusty and probably bottle-necking the steering feel, but as I mentioned, the steering isn't really bad and/or stiff. I used some spray white lithium grease, since its what I had on hand, and turned the wheel to several positions while spraying.
    [​IMG] [​IMG]

    A/C Drain Relocation and Rust Mitigation 2
    As many of us know, the A/C drain is not in an ideal location. It just drips on the frame and causes it to rust. A few weeks ago I got everything needle scaled down to bare metal, but never got time to paint it up.

    Cleaning the Frame
    Today, I wire wheeled and brushed the areas again to get it down to paintable metal. Thankfully there wasn't much to do, since working conditions at school are not as ideal as at home. Didn't get a good before picture today, accidentally started spraying first. I've included the one from needle scaling a few weeks ago.
    [​IMG] [​IMG]

    After painting, it looks really good. There are some areas that got a tad pitted from the 15 years of abuse, but I'm not really worried about it.
    [​IMG] [​IMG]

    Relocating the Drain
    A 3/8" splice barb fits perfectly into the A/C drain hose. This was actually the same one I used to connect to the PS return, I just cleaned it out lol. I connected some extra 3/8" vinyl tubing from the power steering flush with the barb, and zip tied it in two spots to the frame. I'm missing a splash guard, so didn't have clearance issues with that. It also clears the tire without issue, probably because I'm still on 265/65r17s lol
    [​IMG] [​IMG]


    A Few Random Updates
    06+ Headlight Upgrade
    I have all the parts, just waiting on the bulbs to show up. For some reason they have really slow shipping on Amazon and should be here 9/17. I also bought an LED interior light set and some brighter white LED reverse lights so I can actually see backing up.

    4th Gen Maintenance Tutorials, Writeups, and Picture Threads
    Just before school started and not many people had moved in yet, I was getting bored. I had the welding project to do on nice days, but it was getting kinda rainy. I have saved a few writeups in my bookmarks, and wanted to share them with everyone else. There was a similar thread stickied at one point, but it got unstickied at one point. I created this thread: with an organization system to hopefully make finding information easier. It got a lot of likes, but unfortunately not a lot of general attention, so I fear it may die lol and no one will see it looking for maintenance help.
     
    Kolter45 and Greg.Brakes.Tacos like this.
  13. Feb 3, 2022 at 9:02 AM
    #13
    y=mx+b

    y=mx+b [OP] Station Wagon

    Joined:
    Jul 17, 2020
    Member:
    #334787
    Messages:
    1,930
    Gender:
    Male
    First Name:
    Ryan
    Blacksburg, VA
    Vehicle:
    '05 T4R SR5 v6 4wd
    Tires!
    I finally got some tires to mount on the free FJ Cruiser/Early 5th gen trail wheels (See for more info in picking up the wheels). Picked up some 265/70r17 Falken Wildpeak AT3Ws lightly used on Facebook Marketplace to replace my current tires. I'm still on the stock suspension, so anything bigger would probably run into issues. I bought them off a pavement princess 5th gen owner that changed them out for something else. Hopefully thats not a bad sign haha. The Falken's have a date code of 5219, so they're just about 9 months old now. I'm pretty satisfied and they still have the little fingers on the side too! I'll be getting them mounted soon, and will update with pictures!
    [​IMG] [​IMG]

    Old Tire Info
    Just some interesting information on the old Wild Country Sport XHT tires. They were on the 4runner when I bought it in 2016, the date code is sometime in earlyish 2015, and I found on old Goodyear receipt from 186,411 miles dated 7/30/16 with a tread depth of 10/32. They currently have 3-4/32 on them. After some googling, the original tread depth was around 12/32, so with 211,800ish miles at the moment, these tires only lasted probably 30,00ish miles. Definitely not the highest quality tire, both in terms of tread wear and traction, but they worked for the 4 years I've had them.

    06+ Headlight Update
    Headlight bulbs are delayed in shipping. I recently learned from a local subreddit that Amazon is no longer routing through a UPS distribution center in my area, so things are going to take 2 weeks even when using prime shipping.
     
    Kolter45 and Greg.Brakes.Tacos like this.
  14. Feb 3, 2022 at 9:03 AM
    #14
    y=mx+b

    y=mx+b [OP] Station Wagon

    Joined:
    Jul 17, 2020
    Member:
    #334787
    Messages:
    1,930
    Gender:
    Male
    First Name:
    Ryan
    Blacksburg, VA
    Vehicle:
    '05 T4R SR5 v6 4wd
    Wheels and Tires Mounted!
    I finally ended up getting the wheels and tires mounted up! I got them mounted at Walmart, and they did a surprisingly good job. I've heard the Wildpeaks are a bit tricky to balance, but I've had them up to 70mph without any vibration issues. I was a bit worried, considering they removed the stick on wheel weights from one of the FJ wheels and left another on, while adding their own weights too. Everything ended up great, here's some pictures
    [​IMG] [​IMG]

    Before: 265/65r17 Wild Country Sport XHT on 17x7.5 +30 Stock SR5 Wheels
    Was hoping to get some good pictures on top of this parking garage for some natural lighting, but they had the top floor blocked off.
    [​IMG] [​IMG]

    [​IMG] [​IMG]

    [​IMG] [​IMG]

    After: 265/70r17 Falken Wildpeak AT3W on 17x7.5 +15 FJ Cruiser/Early 5th gen Trail Edition Stock Wheels
    The parking garage pictures turned out much better at night! I am really liking the FJ wheels and the silver wheel on band-aid beige seem to work well together. The 265/70r17s don't rub much on pavement on pavement, I'm sure that will be different off road. Suspension is still stock with 212k miles on it.
    [​IMG] [​IMG]

    [​IMG] [​IMG]

    [​IMG] [​IMG]

    I also am not sure how I feel about the center caps. Initially, I didn't like them because they poked out a lot, but they're growing on me! Here are some pics before I put the caps on:
    [​IMG] [​IMG]

    Rub Report: 265/70r17 on Sock Suspension
    I'm editing this in after having them on for a monthish and will update with any rubbing I encounter on this setups.

    I only notice rubbing when turning close to full lock in an off camber situation on pavement and when braking hardish and turning. Slowing down from 50ish mph, which dove the nose a little, and u-turning caused a decent amount of rubbing. I need to move the inner fender liner forward, just haven't gotten to it yet.


    700 Mile Drive Without Issue!
    I recently took a 700 mile round trip to a second round of job interviews for a potential internship, which means more money to throw at the 4runner! As expected, there were no major issues with the 4runner along the way. Everything went smoothly and I managed to cross 212k miles! This was the last drive on the old tires as well! I also passed an interesting towing arrangement while out an about: an RV, pulling a trailer/dolly combo, pulling a jeep, with a hitch carrier, holding a grill.
    [​IMG] [​IMG]

    Valve Cover Leak
    I like to check the oil every time I fill up the tank, whats the point of a dipstick if it doesn't get used? While doing this for the past few months, I noticed a slight valve cover leak that I need to attend to at some point. Although its been about 3200 miles since the last oil change and the level is only down about 1/8" on the dip stick
    [​IMG]

    *Sad Evaporator Core Noise*
    One of the reason's I relocated the A/C drain with clear hose, was to help me see if there was any dye leaking from the system into the drain. I've had the A/C recharged at a shop about once every year in the mid summer, and it always lasts for the rest of the year. This was before I really knew about 4runners and figured it was just because it was an old A/C system. Now that I know what I know now, I pieced together I must have the dreaded evap core leak. It finally gave out this year during my trip. I figured exap core, and when I went to change the tires and wheels, the clear drain hose confirmed dye was escaping the system. I figure I should probably replace everything in the system, evap core, lines, heater core since its in there too, compressor maybe, but am interested in any opinions. I'll do a full writeup on the evap core replacement when I get to it, although I might just recharge it as a band-aid for now. If its still only a once a year recharge, I might limp it to next spring, just after plastic breaking season but before hot as balls summer.
    [​IMG]
     
    Kolter45 and Greg.Brakes.Tacos like this.
  15. Feb 3, 2022 at 9:05 AM
    #15
    y=mx+b

    y=mx+b [OP] Station Wagon

    Joined:
    Jul 17, 2020
    Member:
    #334787
    Messages:
    1,930
    Gender:
    Male
    First Name:
    Ryan
    Blacksburg, VA
    Vehicle:
    '05 T4R SR5 v6 4wd
    LED Interior Lights
    This ones is not a super cool or interesting project, but it was something simple to do in between school work. Online/Virtual school is pretty rough, just feels like doing assignments instead of learning, which I usually really enjoy. I also really like typing up these picture threads, so its something to get away from school for a bit. Thankfully, I have some time this weekend, so hopefully I can get back at the welding project and show all the pictures from the process. I already have most of it typed up, just have to do some final gusseting and finish welding.

    Parts
    I used this kit from Amazon: AUTOGINE Super Bright 6000K White LED Interior Light Bulbs Kit Package for 2003 2004 2005 2006 2007 2008 2009 Toyota 4Runner + Install Tool.

    It came with 2 map lights, 4 door lights, 3 cargo/dome lights, 2 license plate, 2 vanity mirror lights, 2 puddle lights, and a little install tool. I only used the 2 map lights, the 4 door lights, 2/3 cargo/dome lights, and a little sheet labeling all the bulbs that was the "instructions". I stripped the head on one crusty license plate light bolt, so that will be a project for another day. The rest, I didn't have sockets for. I don't ever use the vanity mirrors, so I never noticed they didn't have lights. Is this just an lower trim SR5 thing? Or do none of the 4th gens have mirror lights?
    Heres a sneak peak at the final outcome:
    [​IMG]

    Map Light
    Popping of the map light cover. Push up and insert the plastic spoon tool, then can pry the little cover off. Its is attached with 4 little plastic clips. when it gets warmer tomorrow, I'll remove it again and update with pictures of the clips
    [​IMG]

    Removing the bulb, I was able to just grab one of them out, the other I used the plastic tool to pry out of its socket. From there, just push in the new one. These LEDs were also reversible, even though LED is light emitting DIODE, so maybe theres some electric magic in there.
    [​IMG] [​IMG]

    Dome / Cargo Light
    To remove the cargo/dome light covers, there are 4 tabs in the corners. I inserted the install tool near one of the clips and popped the cover off. Excuse the dirty headliner, I still haven't cleaned it from the tires in the back.
    [​IMG] [​IMG]

    Here are the clip locations and a closeup
    [​IMG] [​IMG]

    Sorry one of these is kinda blurry, but theres a fixed and a bendable tab that retains the light. The ends of the light are conical, and fit in some small holes in the tabs
    [​IMG] [​IMG]

    These are a tad tricky to install, its easy to get them sideways. On the left is an example of one not fully set into the tabs, and the right is a fully installed bulb. Note: the right is one of the old filament bulbs, I'll try and grab a picture of the new bulb fully installed.
    [​IMG] [​IMG]

    Door Lights
    Option 1: Diffuser Removal Only
    I popped the diffuser off with a small screwdriver successfully on 3/4 doors. The last on I did at a separate time, and it was much colder, and I got a small crap on the side of the plastic. If this happens, go to the <a target="_self" href="!m287301!4th-gen-t4rs/287301-y=mx-bs-build-thread-4.html#doorlighthousing">Option 2: Housing Removal</a>
    [​IMG] [​IMG]

    Close up of the booboo. Removing the housing is easy, so if this happens, its no sweat. You can't even see it when installed.
    [​IMG]

    Here is the light in its housing, these were tight to remove, I used a flat part of a hooked pic on the back of the bulb to help pull it out.
    [​IMG] [​IMG]

    The new bulb can be inserted and the cover pushed back on with your fingers.
    [​IMG] [​IMG]
     
    Greg.Brakes.Tacos likes this.
  16. Feb 3, 2022 at 9:06 AM
    #16
    y=mx+b

    y=mx+b [OP] Station Wagon

    Joined:
    Jul 17, 2020
    Member:
    #334787
    Messages:
    1,930
    Gender:
    Male
    First Name:
    Ryan
    Blacksburg, VA
    Vehicle:
    '05 T4R SR5 v6 4wd
    Option 2: Housing Removal
    Another option for replacing the door lights is to pull out the little housing. To start, I removed the arm rest, it just pulls up from the handle side. For location reference, this is the rear left door. These are old pics I have from the lock actuator replacement, but its all the same for every door.
    [​IMG] [​IMG]

    The door light housing I'm removing is actually the rear passenger side, but the above pics are the rear driver side. I hope that's not too disorienting. I started removing the rearward plastic tab through the larger tab, I just pushed it out with a screwdriver.
    [​IMG] [​IMG]

    The frontward tab is metal and I pushed this through second, again just used a long screwdriver to get it through.
    [​IMG] [​IMG]

    Once it comes through, there's a little power cable for the light, that just comes out after pushing a retention tab. Then pop the diffuser and replace the bulb as normal
    [​IMG] [​IMG]

    Current Measurements
    I'm taking an electrical theory class in school, and now have a better multimeter for doing all sorts of fun activities. I decided for fun, I was going to measure the current draw of the old filament bulbs vs the new led bulbs.

    Map / Door Lights
    Since the map lights and door lights use the same bulbs, I only measured the current on the door lights and dome lights.

    The setup was alligator clips into the contacts in the housing, to the bulb. For current measurements, the multimeter goes in series, so I had it between the end of the alligator clip and the other lead on the bulb
    [​IMG] [​IMG]

    Excuse my apparently backwards leads. The old filament bulbs drew about 0.235 A = 235 mA, whereas the LED bulbs drew 0.047 A = 47 mA
    [​IMG] [​IMG]

    Dome Lights
    Same deal with the dome lights, alligator clips to the socket with the multimeter in series. The dome light was a tad too big for my alligator clips to get around the ends, so it was a bit difficult to just pinch them on there.
    [​IMG]

    The old filament bulbs drew around 0.580 A = 580 mA, whereas the LED bulbs drew 0.128 A = 128 mA.
    [​IMG] [​IMG]

    After Pictures
    I took some before pictures, but they ended up having the aperture/white balance/brightness off, because they make the old filament bulbs look super bright, when in fact, they were kinda dim. Here are the after pictures, they're much brighter than before! Now I probably need to get around to the map light mod, since I like how bright it is when entering at night with the map lights on.
    [​IMG] [​IMG]
    [​IMG] [​IMG]
     
    Greg.Brakes.Tacos likes this.
  17. Feb 3, 2022 at 9:07 AM
    #17
    y=mx+b

    y=mx+b [OP] Station Wagon

    Joined:
    Jul 17, 2020
    Member:
    #334787
    Messages:
    1,930
    Gender:
    Male
    First Name:
    Ryan
    Blacksburg, VA
    Vehicle:
    '05 T4R SR5 v6 4wd
    I've got some updates to share. Nothing very exciting, since school kinda eats up most of my time. However, school is done for the semester as of today, so I've got some free time for projects in the near future. Also, I haven't had much time to dive into a lot of cool off-roading stuff, but hopefully these updates are somewhat enjoyable to read. Heres a recap of semi-interesting 4runner things that have happened since my last post:

    Oil Change Analysis - 213k miles - 4k interval
    Nothing super exciting about an oil change, but thought I should share the analysis results. Now that I'm doing my own oil changes, I can use the same oil for more consistent results. The next change will be the second one of the Shell Rotella Gas Truck Synthetic 5w-30 for more consistent data. I was surprised at how stable the Sodium and Potassium levels were in the past 2 changes, especially since the driving conditions were very different. I've been meaning to contact Blackstone and ask about how many ounces of coolant this actually amounts too, or if that is even predictable from the data. On the 11/28/2019 to 2/29/2020 oil, I was commuting to work 30 miles a day and oil was in there for 3ish months. From 2/29/2020 to 11/14/2020 the 4runner did a lot of sitting and short drives, since I wasn't commuting to work with COVID or marching band practice during school. The oil was in there about 8.5ish months.
    [​IMG] [​IMG]

    06+ Projectors
    Over Thanksgiving break I wet sanded the lenses, painted the 06+ trim, clear coated it all with Spraymax 2k Clear, and they are waiting at home to install. They look kinda foggy and orange peel-y in these pics, but as they dried that cleared up and smoothed out. I still might sand some orange peel and buff, but I'll have to re-evaluate once I see them again. The trim pieces I don't have pics of, but these I painted with some Nissan Color Duplicolor Perfect-match. No one carries Toyota Dorado Gold Pearl, but whatever this Nissan color is pretty darn close. Not a lot of band-aid color fans out there haha.
    [​IMG] [​IMG]

    Random Stuff
    I also somehow broke the grease zerk in half on my floor jack. While greasing my driveshaft (hehe) I figured I'd hit the jack zerk really quick, turned into an interesting endevour.
    [​IMG] [​IMG]

    Also saw a neat FJ40 just chilling at the ethanol free station in town. 4runner doesn't get ethanol free, but the bikes do!
    [​IMG]
     
    Greg.Brakes.Tacos likes this.
  18. Feb 3, 2022 at 9:08 AM
    #18
    y=mx+b

    y=mx+b [OP] Station Wagon

    Joined:
    Jul 17, 2020
    Member:
    #334787
    Messages:
    1,930
    Gender:
    Male
    First Name:
    Ryan
    Blacksburg, VA
    Vehicle:
    '05 T4R SR5 v6 4wd
    I haven't been able to get on here much recently, which is a bummer. I really like reading all the posts and helping where I can. Over Christmas break I didn't really want to set up my desktop computer at home, since I knew I would be packing it up shortly with all of my other crap to move to Annapolis. I'm currently in Annapolis MD doing a Mechanical Engineering Internship for 6 months, which is a great step towards building more experience and offsetting school cost. So far I am really enjoying it! I also found a few local offroad groups, so planning to go out with one of them this weekend. Here are some teaser updates on some of my projects, I'll make more detailed posts later. I just got my internet working lol

    06+ Headlights
    I got these and the trim pieces installed over winter break. I've got a bunch of installation pics and output shots to come shortly! Heres a half and half pic and them both installed
    [​IMG] [​IMG]

    The trim piece isn't an exact match because its hard to track down Dorado Gold Pearl to paint with. Its some Nissan gold thats close enough, but I think its the pearl or sheen that makes it stand out. Maybe if I actually cleaned the 4runner they might be closer.
    [​IMG] [​IMG]

    Lock Actuator #2
    I managed to kill off another door lock actuator. This time is was the passenger rear, the first was driver rear. Not having automatic door locks is pretty annoying, so I ordered another one from eBay and installed it this past weekend. I'll be updating that writeup with some new and better pics I took while in there again.
    [​IMG] [​IMG]

    Rusties :(
    Friggen crusties. Needle scaled, wire wheeled, and painted with a thick Rustoleum Rust Reformer. Stay tuned for some slightly bad spots that make me sad on the inside. Also still planning on welding up a new crossmember, just haven't gotten the time yet with school.
    [​IMG] [​IMG]
     
    This site contains affiliate links for which the site may be compensated.
    #18
    Greg.Brakes.Tacos likes this.
  19. Feb 3, 2022 at 9:08 AM
    #19
    y=mx+b

    y=mx+b [OP] Station Wagon

    Joined:
    Jul 17, 2020
    Member:
    #334787
    Messages:
    1,930
    Gender:
    Male
    First Name:
    Ryan
    Blacksburg, VA
    Vehicle:
    '05 T4R SR5 v6 4wd
    Stretch Fender Liners
    I should have done this when I put the slightly bigger tires on, since it rubbed on reverse full lock turn or reverse turning at angle, and I had to do both in my driveway at school. While my headlights were out, there was great access to the fender liner from both the top and bottom!

    Before and After
    [​IMG] [​IMG]

    Stock Hole Position vs New Hole. I only used one clip. I know some people drill the bumper cover, but I'm still a weenie and didn't want to mess it up. I know its on the bottom, like I said, I'm a weenie. Drilling the liner worked just as well
    [​IMG] [​IMG]

    And this is the driver side from the bottom
    [​IMG]

    The passenger side is very similar, although it has 3 clips between the liner and bumper vs the 2 on the driver side. I used 2/3 clips on this side
    [​IMG]


    Door Lock Actuator #2
    The first time, when my driver rear lock actuator died, I waited probably 5 months to replace it. This time it was the passenger rear. With the beginning of COVID I wasn't driving a lot, and I don't normally carry a lot of passengers, so it was a non-issue for the first one. This time, I knew I would be moving in two-ish weeks, and I like loading from the side doors with the seats flat. I took more pictures this time and updated my original writeup with a combination of all the best photos from both actuator jobs: My Original on left and Refurbished on right. This refurbished one was a little more beat up than the first one I got for the other side, but it all works fine and is covered up
    [​IMG] [​IMG]

    [​IMG] [​IMG]

    Pick to remove handle cover instead of the screwdriver
    [​IMG] [​IMG] [​IMG] [​IMG]

    May want to put something soft on the back of the panel clip pliers, I sprayed it with some black really quickly since its covered up and won't see it
    [​IMG]

    Got a pic of the clip locations for the door card
    [​IMG] [​IMG]

    The pin that needs to go into the plastic arm. Had to use something in the background for contrast. In the spirit of 2020/1, I had a mask in my car
    [​IMG] [​IMG]

    Managed to drop that little foam ring (from around the lock actuator plug) down into the door. Quite an interesting endeavor to get that out!
    [​IMG]
     
    Greg.Brakes.Tacos likes this.
  20. Feb 3, 2022 at 9:09 AM
    #20
    y=mx+b

    y=mx+b [OP] Station Wagon

    Joined:
    Jul 17, 2020
    Member:
    #334787
    Messages:
    1,930
    Gender:
    Male
    First Name:
    Ryan
    Blacksburg, VA
    Vehicle:
    '05 T4R SR5 v6 4wd
    Rust Mitigation #3
    So I'm slowly chipping away (pardon the pun haha) at this rust. I hate that its got the crusties, but this is the 4runner I have. Part of my wants to fly out south and find a minty one, but the other part of me is rational and realizes its not as bad as it could be. I'm also slightly attached to this stock turd; Its my first car, purchased with money I printed in my basement worked for, learned some wrenching on, etc. Now this is just another opportunity to learn how to weld more.

    This session was working on the front, which is really the worst part. I was also at home, so I had access to all tools, compressed air, and a good place to work.

    I needle scaled everything chunky and then wire wheeled until I was satisfied. Then blew all the junk out with compressed air. We can see the front crossmember is swiss cheesed a little. I've mentioned a few times that I have metal and plans to remake this piece, just got caught up with school and work. Hopefully I can meet someone in this Maryland off road group with a driveway or something. I will rebuild control arms for friendship haha.
    [​IMG] [​IMG]

    [​IMG] [​IMG]

    Then painted with Rustoleum Rust Reformer. The second picture with the more rearward of skid mounting crossmember wasn't really that bad. Can see slight pitting on the right side, but overall solid.
    [​IMG] [​IMG]

    [​IMG] [​IMG]

    Even swiss cheese metal looks good with paint on it!
    [​IMG]

    Also went ahead and sprayed the front diff. I'm not worried about this rusting through because its a big ol chunky metal, but it looks pretty now! For whatever reason, I didn't paint those arms
    [​IMG]

    This part I'm really embarrassed to share, but I want to show everything here, so here goes: My big bad hole. The main problem with this is its right behind a cat, which would make welding difficult without removing that crap. And like all exhausts in salty areas, mines a bit crusty.
    [​IMG] [​IMG]

    AOAA with MORE
    I'm going with the Maryland Off Road Enthusiasts (MORE) to AOAA this weekend. They're planning to do some green trails to start off the year and get some new members involved, so this is the perfect time for me to hop in. I'm an off-roading newb when it comes to 4 wheels. I do alright on 2, but this is new for me.

    I started by taking my front sway bar off! Hopefully this allows the IFS more freedom to flex off road. So far road manners aren't terrible with it off. I was really worried about removing it, since I was doing it in my apartment parking garage and I had previously broken a lot of the skid bolts due to them being seized in there. Thankfully the sway bar bolts were larger than I anticipated. I thought they were the same size m8 as the skids, but they ended up being m10 (Whatever JIS 14mm head equates to). They all came out fine, just wish I had moved outside so I could have used my mini impact without as much echo. I ended up doing them all with a ratchet. One of them was hard to get out, I wonder why?
    [​IMG] [​IMG]

    For the links, the passenger side came out easily since I had it out when I did the CV. The driver side 6mm hex stripped on my, so I grabbed the boot area with vice grips and was able to get the nut off that way. Old pics, but I like pictures that show everything in case any reader hasn't seen these before
    [​IMG] [​IMG]

    Lastly I picked up some recovery gear. I got a hitch shackle with a 3/4" shackle, an extra 3/4" shackle, and a recovery strap. I would have liked buy some soft shackles and a kinetic rope, but they wouldn't have arrived in time. Eventually I will upgrade and expand my recovery gear collection
    [​IMG]

    Not pictured, but I picked up some cheap handheld GMRS radios. I would have liked to get a nice permeant mount one, but I was limited on time, and this is what I could get here this week. I also bought a 4lb fire extinguisher in hopes that I never need it. I'd like to make a mount for this, and that could be a nice apartment capable project haha.
     
    Greg.Brakes.Tacos likes this.
To Top