

-
Welcome to Tacoma World!
You are currently viewing as a guest! To get full-access, you need to register for a FREE account.
As a registered member, you’ll be able to:- Participate in all Tacoma discussion topics
- Communicate privately with other Tacoma owners from around the world
- Post your own photos in our Members Gallery
- Access all special features of the site
Quick Links: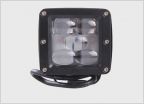 Replacement fog lights for 2014 Help with 6 speed....
 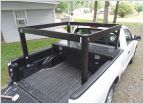 DIY Wood Bed Rack for Hauling Kayak/Canoe/Surfboards
  Blower fan keeps stopping
  Anyone know where I can find a no drill front license plate bracket for my 2012 Tacoma?
  Transfer Case and front Differential Lubricants for severe cold weather.
ECGS install advice
Discussion in '2nd Gen. Tacomas (2005-2015)' started by TnShooter, Mar 15, 2021.
Page 4 of 5
Page 4 of 5


