1. Welcome to Tacoma World!

    You are currently viewing as a guest! To get full-access, you need to register for a FREE account.

    As a registered member, you’ll be able to:
    • Participate in all Tacoma discussion topics
    • Communicate privately with other Tacoma owners from around the world
    • Post your own photos in our Members Gallery
    • Access all special features of the site

Footwell Lights That Don’t Suck

Discussion in '3rd Gen. Tacomas (2016-2023)' started by kmorgan3, Sep 2, 2021.

?

What colors would you be interested in?

  1. White (5500K)

  2. Blue

  3. Red

Multiple votes are allowed.
Results are only viewable after voting.
  1. Feb 28, 2022 at 8:12 AM
    #1001
    AbnMP13

    AbnMP13 Well-Known Member

    Joined:
    Sep 11, 2020
    Member:
    #340464
    Messages:
    357
    Gender:
    Male
    First Name:
    Shelby
    Vehicle:
    2020 TRD Crew Long Bed
    Got my rear set today Sir.

    Where's the install tutorial?
     
  2. Feb 28, 2022 at 11:55 AM
    #1002
    Devious6

    Devious6 Not your Average College President Emeritus

    Joined:
    Jul 15, 2011
    Member:
    #59910
    Messages:
    6,785
    Gender:
    Male
    First Name:
    Mark
    Northeast Pennsyltuckyvania
    Vehicle:
    2020 Army Green TRD Pro
    Received the two 4' extensions I ordered from VLEDS today. Garage temp is in the 30s today so I'm going to finish up the rear install tomorrow!
     
  3. Feb 28, 2022 at 2:08 PM
    #1003
    TheCochese

    TheCochese The Bronze T4R OG

    Joined:
    Apr 23, 2018
    Member:
    #251472
    Messages:
    3,325
    Gender:
    Male
    Attempting to flee the south
    Vehicle:
    Cavalry Blue soccer machine
    Fine corinthian leather
    As soon as the rear aquas come in tomorrow I'll post detailed pics. Got a secret weapon on standby.
     
  4. Feb 28, 2022 at 2:39 PM
    #1004
    Devious6

    Devious6 Not your Average College President Emeritus

    Joined:
    Jul 15, 2011
    Member:
    #59910
    Messages:
    6,785
    Gender:
    Male
    First Name:
    Mark
    Northeast Pennsyltuckyvania
    Vehicle:
    2020 Army Green TRD Pro
    I'll be working it tomorrow.
     
    AbnMP13[QUOTED] likes this.
  5. Mar 1, 2022 at 8:46 AM
    #1005
    TheCochese

    TheCochese The Bronze T4R OG

    Joined:
    Apr 23, 2018
    Member:
    #251472
    Messages:
    3,325
    Gender:
    Male
    Attempting to flee the south
    Vehicle:
    Cavalry Blue soccer machine
    Fine corinthian leather
    Hey @kmorgan3 I have an idea for a new SKU. Interested?
     
  6. Mar 1, 2022 at 9:55 AM
    #1006
    kmorgan3

    kmorgan3 [OP] Redside Electric, LLC | VLEDS

    Joined:
    Aug 22, 2019
    Member:
    #302994
    Messages:
    1,952
    Gender:
    Male
    First Name:
    Kyle
    PNW
    Vehicle:
    2020 4Runner SR5 Premium | RAM 1500
    The general goal of everything I build is to make it how people want, so yes — if you have an idea just let me know! And we haven’t forgotten all of the other suggestions (like switches, dual color, etc.). We’re wrapping up the 4Runner and will have bandwidth to explore alterations pretty soon.
     
    BOMBS, TheCochese[QUOTED] and Barsoom like this.
  7. Mar 1, 2022 at 2:07 PM
    #1007
    TheCochese

    TheCochese The Bronze T4R OG

    Joined:
    Apr 23, 2018
    Member:
    #251472
    Messages:
    3,325
    Gender:
    Male
    Attempting to flee the south
    Vehicle:
    Cavalry Blue soccer machine
    Fine corinthian leather
    OK, so you've installed the fronts and now you want to install the rears. Luckily for you, you've done all the hard work. This part is easy, at least if you want to do it this way where the lights are attached to the rear seats.

    You will need:
    • one rear footwell kit
    • the 2 foot extension you didn't use for the front - or, an additional purchase of at least 2 feet
    • one four foot extension (optional)
    • trim tool, or other non-sharp pokey object
    • thirty minutes, at most
    Remove your front and rear passenger sills, and your passenger trim kick plate. Flip your rear seat forward, and remove the storage insert using the trim tool on the plastic screw-serts. You will need to undo the rubber holder for the lug wrench.

    Use one of the eight foot extensions included in the rear footwell kit at the passenger front light. Secure, and run behind kickplate where your passenger door lock actuator connector is. Don't take up any slack by securing the wire at this time.

    Pinch the white brackets in the sill area to allow for securing the wire down the passenger side, both front and rear. The extension wire can just be pushed under the b-pillar trim at the carpet.

    You will then use either the two foot extension you had left over, or one you purchase separately of at least this length. Snake down inside the corner of the storage area, the head of the extension should just barely fit between the metal pieces. Fish out under the carpet at the sill plate. Your junction between this extension and the eight foot extension should be just at the end of the white plastic carpet anchor.

    Now it's time to install the lights themselves. Use the included foam adhesive and apply the lights just to the inboard side of the outermost seat hinges. Play around with the positioning before you remove the adhesive back, you'll note how well it sits against the metal there and is tucked out of the way.

    Use a four foot extension (or longer, the other eight foot one is fine, but you'll need to secure the extra length) between the two lights. When you put the storage compartment back in, this wire will sit below the front lip, and my recommendation is to tuck it behind the screw-serts when you put those back in. Test for proper illumination, and adhesion to the seat. Satisfied, you can secure any other loose wiring and put everything back together. I used black hot glue to secure the light pigtails behind the hinge. There is a gap between the hinge sides where this is a perfect spot for it.

    Enjoy.
     
  8. Mar 1, 2022 at 2:37 PM
    #1008
    tclavell

    tclavell Assistant to the Assistant Manager

    Joined:
    Aug 7, 2020
    Member:
    #336897
    Messages:
    12,228
    Gender:
    Male
    First Name:
    Troy
    Phoenix, AZ
    Vehicle:
    G70
    Excellent write up. Thank you, sir! :hattip:
     
  9. Mar 1, 2022 at 3:31 PM
    #1009
    Devious6

    Devious6 Not your Average College President Emeritus

    Joined:
    Jul 15, 2011
    Member:
    #59910
    Messages:
    6,785
    Gender:
    Male
    First Name:
    Mark
    Northeast Pennsyltuckyvania
    Vehicle:
    2020 Army Green TRD Pro
    Not much for me to add here - great write up.

    I was not able to find a route to get the wire through the area of the B Pillar - so I just hid the wire under the plastic trim and then ran it back into the channel and up to the front of the truck. I used 3M tape to secure my wires along the lip of the storage box - zip tied the extra wire since I was using 4' extensions.

    I opted to place my lights (at least for now) at the top of the forward facing wall under the back seats. You'll also find that there are some nicely-placed slips in the carpeting along the top of the storage box where you can slip the wires through. You can see them in this picture.

    274948995_10223680696700204_4519932767324267766_n.jpg

    I may eventually move the lights under the seats - but for now I like how they look, especially with the MESO Dual Color Dome.

    274952198_10223680696460198_5182309281313442411_n.jpg
     
    MGMDesertTaco, BOMBS, AbnMP13 and 4 others like this.
  10. Mar 1, 2022 at 4:07 PM
    #1010
    TheCochese

    TheCochese The Bronze T4R OG

    Joined:
    Apr 23, 2018
    Member:
    #251472
    Messages:
    3,325
    Gender:
    Male
    Attempting to flee the south
    Vehicle:
    Cavalry Blue soccer machine
    Fine corinthian leather
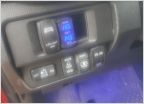
    Also did this. It’s very subtle, but if you know, you know.

     
  11. Mar 1, 2022 at 4:27 PM
    #1011
    RushT

    RushT Amateur Everythingist

    Joined:
    Dec 10, 2017
    Member:
    #238171
    Messages:
    5,650
    Gender:
    Male
    North Texas
    Vehicle:
    '18 DCSB TRDOR Inferno
    X-files? :rofl:
     
  12. Mar 1, 2022 at 4:34 PM
    #1012
    TheCochese

    TheCochese The Bronze T4R OG

    Joined:
    Apr 23, 2018
    Member:
    #251472
    Messages:
    3,325
    Gender:
    Male
    Attempting to flee the south
    Vehicle:
    Cavalry Blue soccer machine
    Fine corinthian leather
    I want to believe.
     
    BOMBS likes this.
  13. Mar 1, 2022 at 4:52 PM
    #1013
    ljh824

    ljh824 Regular Guy

    Joined:
    May 8, 2012
    Member:
    #78409
    Messages:
    1,038
    Gender:
    Male
    First Name:
    Lou
    Kabul, Afghanistan / Oviedo, Florida
    Vehicle:
    -21 AG Sport 4x4 DC
    Okay, how did you access that light and what bulb does it take? Couldn't figure it out, so put a piece of red clear tape over mine.
     
  14. Mar 1, 2022 at 5:29 PM
    #1014
    caribe makaira

    caribe makaira Well-Known Member

    Joined:
    Feb 13, 2011
    Member:
    #51121
    Messages:
    11,753
    Gender:
    Male
    Caribbean, Puerto Rico
    Vehicle:
    05 PreRunner TRD Offroad AutoTrans
    Hood Struts, My version Fogs always ON, Map & Overhead Light Mod,
    upload_2022-3-1_21-29-22.jpg
     
  15. Mar 1, 2022 at 5:43 PM
    #1015
    TheCochese

    TheCochese The Bronze T4R OG

    Joined:
    Apr 23, 2018
    Member:
    #251472
    Messages:
    3,325
    Gender:
    Male
    Attempting to flee the south
    Vehicle:
    Cavalry Blue soccer machine
    Fine corinthian leather
    It's a connector with an LED built into it, I'm sure more skilled minds and hands than mine could swap it out, but that wasn't necessary for my case. I reached in through the head unit hole and swapped it out, and my hands/arms took a beating.

    Tacoma part number is 81080-12100 with white illumination.
    RAV4 part number is 81080-42040 with blue illumination.

    Direct swap.
     
  16. Mar 1, 2022 at 7:46 PM
    #1016
    RushT

    RushT Amateur Everythingist

    Joined:
    Dec 10, 2017
    Member:
    #238171
    Messages:
    5,650
    Gender:
    Male
    North Texas
    Vehicle:
    '18 DCSB TRDOR Inferno
    Uduhman!
     
    TheCochese[QUOTED] likes this.
  17. Mar 1, 2022 at 9:48 PM
    #1017
    MiTacoTRD

    MiTacoTRD Well-Known Member

    Joined:
    Aug 24, 2019
    Member:
    #303129
    Messages:
    1,356
    Gender:
    Male
    N. Idaho
    Vehicle:
    2019 Tacoma TRD Off-Road DCSB
    Dude, I love this forum! Thx!
     
    JJ Diablo and TheCochese[QUOTED] like this.
  18. Mar 2, 2022 at 7:19 AM
    #1018
    vanrynd

    vanrynd Well-Known Member

    Joined:
    Nov 19, 2018
    Member:
    #273173
    Messages:
    307
    Gender:
    Male
    First Name:
    dan
    West Chester, Pa
    Vehicle:
    2017 Off Road DCLB
    WIP
    Been a few weeks installed, and even now, when I open my doors at night, I smile...a good Mod. Thank you !
     
  19. Mar 2, 2022 at 8:21 AM
    #1019
    kmorgan3

    kmorgan3 [OP] Redside Electric, LLC | VLEDS

    Joined:
    Aug 22, 2019
    Member:
    #302994
    Messages:
    1,952
    Gender:
    Male
    First Name:
    Kyle
    PNW
    Vehicle:
    2020 4Runner SR5 Premium | RAM 1500
    Nice touch!

    So that thing is surface mounted. If you really wanted to get a different color you could, you'd just need a hot air station to melt off the old one and then melt the solder for a new one:
    Screen Shot 2022-03-02 at 8.20.38 AM.jpg
     
  20. Mar 3, 2022 at 7:48 PM
    #1020
    Ahomeofbones

    Ahomeofbones Member Well-Known

    Joined:
    Aug 11, 2021
    Member:
    #373925
    Messages:
    500
    Gender:
    Male
    Vehicle:
    2021 TRD OR
    With Meso Duals.

    20220303_185646.jpg
     
To Top