

-
Welcome to Tacoma World!
You are currently viewing as a guest! To get full-access, you need to register for a FREE account.
As a registered member, you’ll be able to:- Participate in all Tacoma discussion topics
- Communicate privately with other Tacoma owners from around the world
- Post your own photos in our Members Gallery
- Access all special features of the site
 Necessary Equipment to keep?
 Another toyotacare issue........
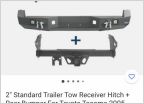 Hooke Road steel rear bumper, who here has one?
 Tires for 2015 Base 4x4 Tacoma
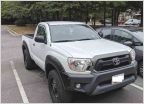 Maintenance Advice on my new Tacoma
Oldie2007 - The Little Big Red Readers Digest Renovation, Revival, and Restoration Thread.
Discussion in '2nd Gen. Tacomas (2005-2015)' started by Oldie2007, Sep 21, 2018.
Page 15 of 17
Page 15 of 17
Products Discussed in


