1. Welcome to Tacoma World!

    You are currently viewing as a guest! To get full-access, you need to register for a FREE account.

    As a registered member, you’ll be able to:
    • Participate in all Tacoma discussion topics
    • Communicate privately with other Tacoma owners from around the world
    • Post your own photos in our Members Gallery
    • Access all special features of the site

Garage Shop: Tools

Discussion in 'Garage / Workshop' started by T4RFTMFW, Jan 26, 2019.

  1. May 15, 2022 at 7:54 PM
    #5341
    Blue_Steel_Taco

    Blue_Steel_Taco Well-Known Member

    Joined:
    Feb 28, 2022
    Member:
    #391447
    Messages:
    59
    Gender:
    Male
    First Name:
    Nick
    Vehicle:
    2021 Voodoo Blue Tacoma TRD Off-Road
    6" ReadyLift w/ Bilstein Rear Shocks Toyo Open Country M/T 35x12.5xr18 Method 305 Wheels 18x9 -12 offset Other small mods!
    I know you posted this years ago but curious as to why the Makita Impact was so high praised? What did you like so much about it?
     
  2. May 16, 2022 at 6:13 PM
    #5342
    RustyGreen

    RustyGreen A breaker point guy in a Bluetooth world

    Joined:
    Aug 12, 2020
    Member:
    #337468
    Messages:
    14,171
    Gender:
    Male
    sleeping in a chair
    Vehicle:
    2017 AC 4x4 Sport 6M Inferno
    Pavement Princess
    I know you didn't address to me but thought I could reply as well.

    I used DeWalt tools at my work, they were there when I started so I stayed with the system. They held up well in an industrial environment. DeWalt also made adapters so you could use your old tools with new batteries so a point to them.

    That said I respected the tools but didn't like them much. It seemed to me that they consistently fell down on the ergonomic side.

    Examples:
    The new tools come with a "fuel gauge", 3 or 4 small lights recessed in the battery that show the state of charge when you push the button, only when you push the button. The button is recessed right next to the lights -- try holding the tool, pushing the button and keeping your hand out of the way all at the same time. Sure you can do it and it works but why didn't they do it a bit better?

    The DeWalt drills never came with a belt clip, don't know if it was an option.

    Silly things like hard edges directly under your hand grip, and poor weight balance that just make the work day longer.
    To round out my bashing of some very reliable tools, I never used any DeWalt cutting tool that didn't seem to be designed to blow sawdust in my face.

    My personal tools are Makita with the same light/push button setup -- except the lights stay illuminated 4 or 5 seconds after you push the button. My almost 20 year old Makita drill came standard with a sturdy belt clip, so handy almost every time you use the tool, my 2 year old impact driver came with the same.

    The Makita impact driver has a small light to illuminate the work, just touch the trigger briefly and the light will stay on a few seconds as you line up your bit.

    The Makita tools feel nice and balanced in the hand, I feel are better thought out and have superior ergonomics -- overall it is a nice tool to use.

    Not wanting to start a :crapstorm: with tool fan boys, just stating my observations over the years.
     
    Last edited: May 16, 2022
  3. May 16, 2022 at 6:19 PM
    #5343
    Blue_Steel_Taco

    Blue_Steel_Taco Well-Known Member

    Joined:
    Feb 28, 2022
    Member:
    #391447
    Messages:
    59
    Gender:
    Male
    First Name:
    Nick
    Vehicle:
    2021 Voodoo Blue Tacoma TRD Off-Road
    6" ReadyLift w/ Bilstein Rear Shocks Toyo Open Country M/T 35x12.5xr18 Method 305 Wheels 18x9 -12 offset Other small mods!
    Hey I appreciate the thorough response man!
    Ergonomics is huge. I've been using Ryobi tools for years now, and I do love them. I know the hardcore guys probably bash Ryobi but, I like what they make. Honestly for the biggest reason you mentioned, ergonomics.

    I might have to check out some Makita stuff as well. Thanks.
     
    RustyGreen[QUOTED] likes this.
  4. May 16, 2022 at 6:46 PM
    #5344
    RustyGreen

    RustyGreen A breaker point guy in a Bluetooth world

    Joined:
    Aug 12, 2020
    Member:
    #337468
    Messages:
    14,171
    Gender:
    Male
    sleeping in a chair
    Vehicle:
    2017 AC 4x4 Sport 6M Inferno
    Pavement Princess
    Glad to help.
    The Makita stuff costs a good bit of coin, right up there with comparable Milwaukee and DeWalt tools.

    It has been a few years since I researched these but when I did in the 18 volt line Makita and Milwaukee only offered one family of tools each.

    DeWalt on the other hand offered several 18 volt lines that at first glance looked almost identical but the prices could be double or more. I'm a specification digger and I dug in. The difference was in the gearing, the low priced models used plastic gearing, the high priced models used metal, the mid line used a mixture.

    DeWalt also made it very difficult to compare the models, although the information was available it wasn't available all in one location nor was it presented in even remotely the same format between different tool models. This seemed to be by design in my opinion as it was just so obviously difficult to navigate and obtuse.

    Additionally the way the tools were marketed as kits with drill, driver, charger and batteries was again obtuse. Say you decided that #-- was the best impact driver, it might only be packaged with a low line drill or the lowest capacity batteries for example.

    Many people when faced with confusing or difficult to obtain information will select a more expensive model "to make sure they get a good one", perhaps that is part of their marketing strategy.

    As cordless tools now seem to be marketed as bare tools with batteries separate the marketing angle might be less important.
     
  5. May 22, 2022 at 12:44 PM
    #5345
    super_white

    super_white Well-Known Member

    Joined:
    Feb 6, 2012
    Member:
    #72230
    Messages:
    8,270
    Gender:
    Male
    First Name:
    Harry
    Connecticut
    Vehicle:
    2012 Tacoma 4X4
    Took a ride to HF after work on Friday and bought two sets of "wheel stud pilot pins" and 4 small (4" round) magnetic trays. Cars have 4 wheels, I don't know why one set comes with only two pins of each size.
     
  6. May 22, 2022 at 1:48 PM
    #5346
    clenkeit

    clenkeit Well-Known Member

    Joined:
    Apr 30, 2019
    Member:
    #291841
    Messages:
    2,441
    First Name:
    Colin
    Lakewood, CA
    Vehicle:
    2010 White DCLB TRD Sport
    Why would you need more? You use two per wheel but since you are only one person and can only work on one wheel at a time you therefore would only need two pins.

    Or is there something I’m misunderstanding regarding how these are used?
     
    4WALKER and Blkvoodoo like this.
  7. May 22, 2022 at 3:19 PM
    #5347
    super_white

    super_white Well-Known Member

    Joined:
    Feb 6, 2012
    Member:
    #72230
    Messages:
    8,270
    Gender:
    Male
    First Name:
    Harry
    Connecticut
    Vehicle:
    2012 Tacoma 4X4
    If I'm taking all 4 wheels off at a time (which is usually the case) then I need four, one per wheel.
     
    joeyv141 likes this.
  8. May 22, 2022 at 4:15 PM
    #5348
    clenkeit

    clenkeit Well-Known Member

    Joined:
    Apr 30, 2019
    Member:
    #291841
    Messages:
    2,441
    First Name:
    Colin
    Lakewood, CA
    Vehicle:
    2010 White DCLB TRD Sport
    My understanding is that you use two per wheel, not just one. There’s no reason for pins to be on the hubs you’re not actively working on.
    1. Loosen all wheel bolts.
    2. Remove two wheel bolts from one wheel.
    3. Install two pins in place of the bolts you just removed.
    4. Remove remaining bolts, then remove the wheel.
    5. Repeat with remaining 3 wheels.


    Then to install wheels:
    1. Install two pins on one hub.
    2. Place wheel on pins/hub.
    3. Install wheel bolts in the empty holes not filled with the pins. Remove pins and then install remaining bolts in those two spots.
    4. Repeat with remaining 3 wheels.
     
  9. May 22, 2022 at 10:53 PM
    #5349
    gotblika

    gotblika Well-Known Member

    Joined:
    Apr 28, 2011
    Member:
    #55716
    Messages:
    890
    Gender:
    Male
    Maui
    Vehicle:
    2015 DCLB Sport 4X4
    5100'S 887 SPC B110 EL096R
    You only use 1 at a time to aid in installing a single wheel at a time. No reason to even use the 2, I think it’s supplied as a spare.
     
  10. May 23, 2022 at 2:59 AM
    #5350
    super_white

    super_white Well-Known Member

    Joined:
    Feb 6, 2012
    Member:
    #72230
    Messages:
    8,270
    Gender:
    Male
    First Name:
    Harry
    Connecticut
    Vehicle:
    2012 Tacoma 4X4
    My thought is that I don't want to remove a wheel bolt install the pin and then remove the wheel bolts and the wheel, then take the pin out and repeat the process on another wheel. I'd like to remove a bolt, install the pin (leave it there) and move on to the next wheel leaving a pin in each hub. I will see if my method works the way I think it will.
     
  11. May 23, 2022 at 8:48 AM
    #5351
    cynicalrider

    cynicalrider #NFG

    Joined:
    Jul 25, 2012
    Member:
    #83399
    Messages:
    17,078
    Gender:
    Male
    Jersey
    Vehicle:
    01 SR5 TRD 4x4, '23 Bronco Wildtrak, 2017 HSQV FE350
    Drop bracket lift and booger welds
    I was really puzzled on what the fuck these were used for only to learn that some hubs are studless and use bolts to attach the wheel to the car. Learn something new every day I guess.

    My new garage addition which I still need to install:

    [​IMG]Untitled by Michael Halat, on Flickr

    Compared to my old one I broke... rofl:

    [​IMG]Untitled by Michael Halat, on Flickr
     
  12. May 23, 2022 at 8:50 AM
    #5352
    J88logue

    J88logue NorthWest Member

    Joined:
    Jan 3, 2012
    Member:
    #69877
    Messages:
    5,434
    First Name:
    Johnny
    HWY 30
    Vehicle:
    02 D.C. TRD
    Clicko BUILDo
    I'm desperate for one on my tool bench.
     
  13. May 23, 2022 at 9:22 AM
    #5353
    y=mx+b

    y=mx+b Station Wagon

    Joined:
    Jul 17, 2020
    Member:
    #334787
    Messages:
    1,936
    Gender:
    Male
    First Name:
    Ryan
    Lafayette, IN
    Vehicle:
    '05 T4R SR5 v6 4wd
    I'm gonna preface by saying there's I think there is no "right way" to do the locating studs for wheel bolts and whatever workflow works for the individual user is the true "right way" to use them

    -With no studs, the wheel has infinite degrees of freedom relative to the mounting surface and before seating on the hub bore. When trying to put it on, it's just floating in space until it gets on the hub

    -With one stud, before seating onto the hub bore, the wheel then has one rotational degree of freedom around that stud and one degree of freedom to move axially along the stud. So you could slide a wheel on and would just need to rotate it about the locating pin accordingly to get the hub to line up

    -With two studs, the rotational degree of freedom is eliminated and now you only have can translate the wheel along the studs until it seats on the hub. However, you have to line up the two studs at once while holding the wheel floating in space

    World according to y=mx+b: two studs of unequal length combines the ease of getting the wheel on a single stud at a time, while also gaining the stability of two studs when seating the wheel to the hub
     
    RustyGreen, spencermarkd and clenkeit like this.
  14. May 23, 2022 at 9:25 AM
    #5354
    super_white

    super_white Well-Known Member

    Joined:
    Feb 6, 2012
    Member:
    #72230
    Messages:
    8,270
    Gender:
    Male
    First Name:
    Harry
    Connecticut
    Vehicle:
    2012 Tacoma 4X4
    Used the pins just now. Makes it easy to do a quick rotation without having to swap pins back and forth.
     
  15. May 23, 2022 at 4:05 PM
    #5355
    6 gearT444E

    6 gearT444E Certified Electron Pusher

    Joined:
    Feb 3, 2018
    Member:
    #243372
    Messages:
    7,776
    Deep South
    Herculiner Hootus
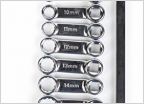
    6 pointer extended length flex head ratcheting wrenches. Say that 5 times fast:laugh:
    12B7E481-EB27-4B9B-A89F-FB5F20725E81.jpg
     
  16. May 23, 2022 at 7:11 PM
    #5356
    mjbtaco

    mjbtaco low and slow

    Joined:
    Mar 21, 2008
    Member:
    #5423
    Messages:
    4,812
    Gender:
    Male
    First Name:
    Michael
    Montclair , so cal
    Vehicle:
    Turbo'd 95.5 extra cab and 2013 Silver DCSB TRD Sport
    PERFORMANCE Custom Turbo Setup FRONT SUSPENSION Drop Spindles by Aaron Carswell 01-04 Swaybar Endlinks Energy Suspension Endlink Bushings Cando Upper Control arms QA1 coilovers with 8" spring Custom 4 pot Brembo BBK Modified lower control arms with mjbfab qa1 mounting plates and Poly bushing sleeves REAR SUSPENSION Chasis Tech drop leafs QA1 adjustable shocks weld in drop notch Gas tank cross member bridge 3" angled blocks 2013 Double Cab Short Bed TRD Sport Eibach Pro Truck Shocks front and rear Lifted to the 3rd setting on the front shocks
    Finally mounted my vise to my welding table after like 3 years lol

    20220521_151002.jpg
     
  17. May 25, 2022 at 2:17 PM
    #5357
    LarryDangerfield

    LarryDangerfield One Larry a day keeps the money away ™ Moderator

    Joined:
    Apr 16, 2017
    Member:
    #216434
    Messages:
    8,479
    Gender:
    Male
    First Name:
    Tyler
    Northern Wisconsin
    Vehicle:
    Black 2020 Nightshade Edition 4Runner
    Oh there will be some mods all right
  18. May 26, 2022 at 8:30 AM
    #5358
    Madjik_Man

    Madjik_Man The Rembrandt of Rattle Can

    Joined:
    Dec 2, 2009
    Member:
    #26893
    Messages:
    19,611
    Gender:
    Male
    Colorado Front Range
    Vehicle:
    1998 Ext Cab 3.4 4x4 TRD 5MT, 2004 DC 3.4 4x4 TRD
  19. May 29, 2022 at 7:06 AM
    #5359
    Blkvoodoo

    Blkvoodoo a Hooka smoking caterpillar has given me the call

    Joined:
    Jul 23, 2015
    Member:
    #160098
    Messages:
    4,187
    Gender:
    Male
    First Name:
    Kevin
    Near Clayton NC
    Vehicle:
    08 PreRunner SR5 DCSB
    Last edited: May 29, 2022
    shakerhood and Coolerman like this.
  20. May 29, 2022 at 7:18 AM
    #5360
    Toyko Joe

    Toyko Joe Here for the pictures

    Joined:
    Sep 19, 2014
    Member:
    #138654
    Messages:
    5,264
    I
    I did a similar thing with a high flow bathroom fan in my basement when staining trim in the winter. Plastic drop cloth made the paint booth. Those pre filters are very important to not create a mess of your fan or the outside of your building.

    If you notice those fumes / debris would be blowing on anyone who walks into that shop just outside the door.
     

Products Discussed in

To Top