1. Welcome to Tacoma World!

    You are currently viewing as a guest! To get full-access, you need to register for a FREE account.

    As a registered member, you’ll be able to:
    • Participate in all Tacoma discussion topics
    • Communicate privately with other Tacoma owners from around the world
    • Post your own photos in our Members Gallery
    • Access all special features of the site

Show off your aux fuse panels.

Discussion in 'Lighting' started by Newlife, Dec 29, 2013.

  1. Sep 13, 2022 at 9:53 PM
    #1621
    Mudman

    Mudman Well-Known Member

    Joined:
    Dec 5, 2010
    Member:
    #47201
    Messages:
    625
    Gender:
    Male
    Cerritos
    Vehicle:
    08 4X4 TRD Sport
    I'll check that thread out, thank you very much. Right now the relay grounds are just wired into the ground side on the fuse block.
    This whole project ended up being way more intensive than originally thought. Seemed like a fun thing to try and build on my own.
     
    bagleboy[QUOTED] likes this.
  2. Sep 13, 2022 at 9:53 PM
    #1622
    bagleboy

    bagleboy Well-Known Member

    Joined:
    Aug 5, 2017
    Member:
    #226018
    Messages:
    7,218
    Gender:
    Male
    First Name:
    Scott
    Norcal, Santa Rosa
    Vehicle:
    2014 5-lug AC 2.7L VVTI
    Snug top Rebel, Thule tracks, ditch tracks, Bagged rear suspension, F/R anytime camera, intermittent wiper switch...
    Eliminate the buss bar feeding the switches. Fuse one wire and run it to the first switch with a jumper also crimped to that first switch connector and a jumper in each connector after that. Same thing for all of the pin 86 wires, each one goes to the next relay in line with the last one going back to the ground bar. You can allow for additional relays and switches in the future by crimping in a wire that is capped. When you add a switch and relay, add another capped wire to allow for more. When you’re sure that’s it, don’t add the extra wire anymore.
     
    soundman98 and Mudman[QUOTED] like this.
  3. Sep 13, 2022 at 9:55 PM
    #1623
    bagleboy

    bagleboy Well-Known Member

    Joined:
    Aug 5, 2017
    Member:
    #226018
    Messages:
    7,218
    Gender:
    Male
    First Name:
    Scott
    Norcal, Santa Rosa
    Vehicle:
    2014 5-lug AC 2.7L VVTI
    Snug top Rebel, Thule tracks, ditch tracks, Bagged rear suspension, F/R anytime camera, intermittent wiper switch...
    It’s a great learning process and comforting to really know how it’s put together. This forum and that thread in particular were real eye openers for me.
     
    Mudman[QUOTED] likes this.
  4. Sep 13, 2022 at 10:09 PM
    #1624
    Mudman

    Mudman Well-Known Member

    Joined:
    Dec 5, 2010
    Member:
    #47201
    Messages:
    625
    Gender:
    Male
    Cerritos
    Vehicle:
    08 4X4 TRD Sport
    Brilliant! I remember seeing that somewhere and totally forgot about it. That would save me a ton of wires and no bus bar.
    I understand removing the bus bar part, but for Pin 86: wouldn't one switch turning on trigger all the relays at once if they are jumped to one another?
    This place has saved me a lot of money and been invaluable for info. I'm a visual and very slow learner, but sure enough I'm getting it sorta. Albeit very very slowly.
     
  5. Sep 13, 2022 at 10:39 PM
    #1625
    Dtax

    Dtax Well-Known Member

    Joined:
    Dec 1, 2016
    Member:
    #203738
    Messages:
    253
    Gender:
    Male
    Massachusetts
    Vehicle:
    2017 Black Tacoma Sport
    Meso Bucket Tray
    Great thread - sub'd - thanks for all the info - very helpful!
     
  6. Sep 14, 2022 at 1:54 AM
    #1626
    bagleboy

    bagleboy Well-Known Member

    Joined:
    Aug 5, 2017
    Member:
    #226018
    Messages:
    7,218
    Gender:
    Male
    First Name:
    Scott
    Norcal, Santa Rosa
    Vehicle:
    2014 5-lug AC 2.7L VVTI
    Snug top Rebel, Thule tracks, ditch tracks, Bagged rear suspension, F/R anytime camera, intermittent wiper switch...
    Sorry, you’re right. See you do understand.
    For you the switched positive sides (pins 86) are all on separate wires from each switch. The ground sides of each relay(pins 85) are already all connected to ground, daisy chaining just eliminates a bunch of excess wire on the ground side of each relay and the positive side of each switch. Daisy chaining all the pin 86 wires would definitely have the effect of any switch activating all the relays so that’s to be avoided.
     
    Mudman[QUOTED] likes this.
  7. Sep 14, 2022 at 3:38 AM
    #1627
    Mudman

    Mudman Well-Known Member

    Joined:
    Dec 5, 2010
    Member:
    #47201
    Messages:
    625
    Gender:
    Male
    Cerritos
    Vehicle:
    08 4X4 TRD Sport
    Appreciate the confirmation, electrical definitely confuses me. I am barely grasping the new to me concept. Much respect to the wizards of this stuff, especially wiring diagrams. I have the confidence to build a knife from scratch, but tell me to wire up more than one relay and my brain takes a dive.

    The relay block thread has me rethinking this build. I suppose that will be a future project for fun. Ultimately I plan to run a switch pros or spod, just out of my price range right now.
     
  8. Sep 14, 2022 at 8:16 AM
    #1628
    bagleboy

    bagleboy Well-Known Member

    Joined:
    Aug 5, 2017
    Member:
    #226018
    Messages:
    7,218
    Gender:
    Male
    First Name:
    Scott
    Norcal, Santa Rosa
    Vehicle:
    2014 5-lug AC 2.7L VVTI
    Snug top Rebel, Thule tracks, ditch tracks, Bagged rear suspension, F/R anytime camera, intermittent wiper switch...
    There are good reasons for using any of the options out there. Understanding your choice and how to maximize its potential is key to minimizing frustration later on. A really common problem is having space for the panel but finding you don’t have room for all of the accessory cables and connectors that feed to/from it. Having a few different small panels akin to sub panels in a house can help with this. It can also serve to separate in-cab accessories from those outside or provide ready access to always hot power vs ignition hot power. Controlling which of these is fed to a daisy chained switch bank let’s you organize switch banks accordingly.
     
    soundman98 and Mudman[QUOTED] like this.
  9. Sep 14, 2022 at 12:52 PM
    #1629
    demo243

    demo243 Well-Known Member

    Joined:
    Dec 23, 2011
    Member:
    #69298
    Messages:
    671
    Gender:
    Male
    First Name:
    Devon
    Topsfield MA
    Vehicle:
    2015 DCLB TRD 4x4
    Updated mine to add a few more fuses. Was tired of how dirty the panel got, so I built this one in a project box. Also finally replaced my stock battery.

    B40C4B30-337B-48FD-8354-3BAF5E61969C.jpg 18AD3763-5A7B-467D-8D04-D5DE6091D626.jpg 78B0EC25-C03D-4E5A-A576-9B42ADB03DA0.jpg
     
  10. Sep 14, 2022 at 1:53 PM
    #1630
    Mudman

    Mudman Well-Known Member

    Joined:
    Dec 5, 2010
    Member:
    #47201
    Messages:
    625
    Gender:
    Male
    Cerritos
    Vehicle:
    08 4X4 TRD Sport
    That's a nice setup! What plug/connector are you using for the relays?
     
  11. Sep 14, 2022 at 3:15 PM
    #1631
    demo243

    demo243 Well-Known Member

    Joined:
    Dec 23, 2011
    Member:
    #69298
    Messages:
    671
    Gender:
    Male
    First Name:
    Devon
    Topsfield MA
    Vehicle:
    2015 DCLB TRD 4x4
    Mudman likes this.
  12. Sep 14, 2022 at 5:04 PM
    #1632
    switch

    switch Well-Known Member

    Joined:
    Oct 12, 2009
    Member:
    #24216
    Messages:
    485
    Gender:
    Male
    Norther California
    Vehicle:
    2022 Tacoma Access Cab
    Nice work!

    I used a project box for the aux fuse block on my 06 Tacoma.
    Taco_Dual_Battery_Figure_20_e74bf61082a15d82137c1c1b1f178349e96f2533.jpg

    I only needed one relay so I used the empty relay position in the factory RelayBlock#2
     
    Mudman and demo243[QUOTED] like this.
  13. Sep 14, 2022 at 7:17 PM
    #1633
    Mudman

    Mudman Well-Known Member

    Joined:
    Dec 5, 2010
    Member:
    #47201
    Messages:
    625
    Gender:
    Male
    Cerritos
    Vehicle:
    08 4X4 TRD Sport
    Sweet, I totally forgot I had a small Deutsch connector kit. Gonna try that out now, I dig the way yours is setup.

    I'm trying to run that braided sleeving on everything, looks like crap if you suck at it. But I'm not ready to redo it all yet.
    20220914_191245.jpg
     
    Last edited: Sep 14, 2022
    bagleboy likes this.
  14. Sep 14, 2022 at 8:06 PM
    #1634
    CAG Gonzo

    CAG Gonzo Ascendant Spaghetti

    Joined:
    Oct 25, 2018
    Member:
    #270558
    Messages:
    1,688
    Gender:
    Male
    Vehicle:
    2018 OR DCLB BarRed
    Very solid advice. Definitely don't forget to take into account wiring taking up a bunch of space. An RFRM with 10 relays and 5 fuse slots wired barely fits but it's not pretty. If I had to do it over, I'd definitely use an RTMR and maybe a fuse block in the cab.
     
    rob1208 likes this.
  15. Sep 21, 2022 at 11:31 PM
    #1635
    switch

    switch Well-Known Member

    Joined:
    Oct 12, 2009
    Member:
    #24216
    Messages:
    485
    Gender:
    Male
    Norther California
    Vehicle:
    2022 Tacoma Access Cab
    I started working on the fuse/relay setup for the bed. This is a separate fuse/relay location located behind the driver's side taillight.

    We use our bed as a sleeping platform with an ARE Z-Series Truck cap so we need power for:
    1: Always on USB ports
    2: Always on 12V cigarette adaptor as a universal fit for random stuff
    3: Lights inside the bed

    Also since I'm running 12V to the rear of the truck, I'll use that as the power source for:
    1: Rear lights (when I get the new rear bumper)
    2: Side lights that are mounted to the ARE truck cap

    I didn't want to crowd the fuse/relay block located in the engine bay or run all of those wires to the rear of the truck. So I ran one 10AWG wire to a secondary fuse box located in the bed.

    To power all of this stuff and provide switches, I ran a 10AWG wire from the front Aux fuse block to a new aux fuse block located behind the driver side taillight.

    In addition to the 10AWG wire, I ran multiple wires to power lower amperage switches and relays. Here I'm wrapping that wire harness with multiple layers of sheathing. The copper pipe is just used to make it easier to add sheathing to the wound wire harness by running the wire though the pipe and the sheathing over the outside.

    upload_2022-10-24_22-18-21.jpg

    So here is the fuse block and a couple or relays I installed behind the driver side taillight on my 2022 Tacoma.

    The fuse block housing was designed using FreeCAD software and 3D printed using a Prusa MK3S 3D printer:
    upload_2022-9-21_22-37-58.jpg

    I started by looking at prefabricated project boxes but none fit my exact dimensions and all would have required extensive cutting for all of the holes I need. In the end is was easier to pre-fab what I wanted in cardboard and then print the fuse box with all of the holes right where I wanted them.

    upload_2022-9-21_22-37-0.jpg

    upload_2022-9-21_22-38-27.jpg


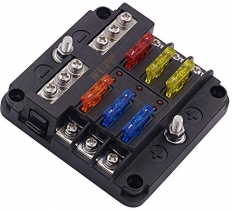
    This fuse block housing was designed for a WUPP 12 Volt Fuse Block that I got on Amazon. It is slightly more compact than the Blue Sea fuse block that I used in the cab.

    upload_2022-9-21_22-41-44.jpg

    Here the fuse block housing is installed behind the driver's side taillight. I'm using existing holes for the bolts that hold this in place.
    upload_2022-9-21_22-42-50.jpg


    10AWG wire from front Aux fuse block
    upload_2022-9-21_22-43-34.jpg

    And starting to run wires from a switch panel in the bed to the new fuse block:

    upload_2022-9-21_22-44-38.jpg

    The 18AWG wires shown above go to a switch panel installed in the bed.

    The new switch panel is a FXC Rocker Switch Aluminum Panel 4 Gang I bought on Amazon.

    I designed and printed a housing for it that fits in that cut out in the bed near the tailgate.
    upload_2022-9-21_22-46-19.jpg


    upload_2022-9-21_22-49-40.jpg

    Here is the hole in the bed near the tailgate that I'm using
    upload_2022-9-21_23-20-58.jpg

    And here is the switch panel installed
    upload_2022-9-21_23-21-39.jpg


    I hope is is OK that it will take multiple post to document this but I didn't want to start a whole new post on this project. That's all I have for now.
     

    Attached Files:

    Last edited: Oct 24, 2022
    cmonjack, Criera, Roof Walker and 7 others like this.
  16. Sep 22, 2022 at 1:21 AM
    #1636
    CAG Gonzo

    CAG Gonzo Ascendant Spaghetti

    Joined:
    Oct 25, 2018
    Member:
    #270558
    Messages:
    1,688
    Gender:
    Male
    Vehicle:
    2018 OR DCLB BarRed
    That looks well thought out and nicely executed.
     
  17. Sep 22, 2022 at 9:48 AM
    #1637
    Aws123

    Aws123 Well-Known Member

    Joined:
    Jul 25, 2020
    Member:
    #335564
    Messages:
    136
    Gender:
    Male
    First Name:
    Adam
    Colorado
    Vehicle:
    2019 tacoma trd off road
    Looks like it will be a nice setup! Not sure if you planned on it, but make sure you use some wire loom back there. Lots of sharp edges.
     
  18. Sep 22, 2022 at 10:28 AM
    #1638
    bagleboy

    bagleboy Well-Known Member

    Joined:
    Aug 5, 2017
    Member:
    #226018
    Messages:
    7,218
    Gender:
    Male
    First Name:
    Scott
    Norcal, Santa Rosa
    Vehicle:
    2014 5-lug AC 2.7L VVTI
    Snug top Rebel, Thule tracks, ditch tracks, Bagged rear suspension, F/R anytime camera, intermittent wiper switch...
    :thumbsup: Good job, a few strategically placed sub panels does wonders for reducing the overcrowding of wiring to any one panel as well as cutting down on the amount of wire used overall.
     
  19. Sep 23, 2022 at 9:00 PM
    #1639
    switch

    switch Well-Known Member

    Joined:
    Oct 12, 2009
    Member:
    #24216
    Messages:
    485
    Gender:
    Male
    Norther California
    Vehicle:
    2022 Tacoma Access Cab
  20. Sep 26, 2022 at 7:36 PM
    #1640
    switch

    switch Well-Known Member

    Joined:
    Oct 12, 2009
    Member:
    #24216
    Messages:
    485
    Gender:
    Male
    Norther California
    Vehicle:
    2022 Tacoma Access Cab
    getting to the final stages on this project. Power to the rear auxiliary fuse block is complete, power to the switch panels and interior lights, and switching of the rock lights from both drivers' side and passenger's side are complete. I still need to wire the relay for the rear lights but I' waiting until November to the the rear bumper installed. I also want to have switches and power for side lights that are mounted on the Yakima rails, but I've had a hell of a time finding a mounting for the rails themselves.

    Anyway, the two most important switches are working now.


    upload_2022-9-26_19-27-27.jpg

    upload_2022-9-26_19-34-30.jpg
    upload_2022-9-26_19-35-11.jpg
    upload_2022-9-26_19-35-55.jpg

    Next is wiring the 12V cigarette adaptors and USB ports inside the bed for powering accessories and 110V inverter.
     
    cmonjack, RyanDCLB, wi_taco and 3 others like this.

Products Discussed in

To Top