1. Welcome to Tacoma World!

    You are currently viewing as a guest! To get full-access, you need to register for a FREE account.

    As a registered member, you’ll be able to:
    • Participate in all Tacoma discussion topics
    • Communicate privately with other Tacoma owners from around the world
    • Post your own photos in our Members Gallery
    • Access all special features of the site

Building Ron Burgundy

Discussion in '2nd Gen. Builds (2005-2015)' started by Codolten, May 31, 2021.

  1. Jul 17, 2021 at 1:33 PM
    #21
    Codolten

    Codolten [OP] Well-Known Member

    Joined:
    May 27, 2021
    Member:
    #366997
    Messages:
    238
    Gender:
    Male
    First Name:
    Colten
    Orangevale, Ca
    Vehicle:
    08 Tacoma
    Update:

    I finally got a hold of my rear suspension parts. I added Icon RXT on stage 3, Fox 2.0 res, wheelers super bumps and the wheelers u-bolt flip kit. It was somewhat of a nightmare trying to do this with limited jack stands and floor jacks. I couldn’t get the rear axle to drop low enough for the leafs to go in smooth so I was fighting them. In total, this has taken me about 10 hrs, which is like double what it should take hahaha. But! It is done.
    I have about the full 2.75 Icon advertised, but I am also adding the decked drawers shortly (I have it in my shop, I just need to spend the time to assemble). Once the drawers are in and I’ve loaded them with gear, I imagine I’ll be sitting around 1.5” lifted. Shout out to @Vegasstunts for the Fox 2.0 res. and shout out to wheelers for everything else. They were seriously fast with shipping and packaged everything very cleanly.

    BB64CEEB-90B6-49CC-A15B-01BDE79DB7C6.jpg 9BA4877A-9D66-435E-A3EE-AB22EDDF130D.jpg
     
    Last edited: Jul 19, 2021
  2. Jul 29, 2022 at 9:29 AM
    #22
    Codolten

    Codolten [OP] Well-Known Member

    Joined:
    May 27, 2021
    Member:
    #366997
    Messages:
    238
    Gender:
    Male
    First Name:
    Colten
    Orangevale, Ca
    Vehicle:
    08 Tacoma
    An entire year since my last update!!!

    A lot has happened since then both personally, and to the truck. I am going to post a series of updates but wanted to say I'm glad to be back in business again. I moved twice, started a new job, did some serious remodeling on my new house, had my wife move two jobs, and all while trying to raise our kiddo. Now that I'm settled, its time to spend a bit more time on the truck again. So see below for new updates!
     
  3. Jul 29, 2022 at 9:37 AM
    #23
    Codolten

    Codolten [OP] Well-Known Member

    Joined:
    May 27, 2021
    Member:
    #366997
    Messages:
    238
    Gender:
    Male
    First Name:
    Colten
    Orangevale, Ca
    Vehicle:
    08 Tacoma
    So the first thing that happened was that I added a curved Auxbeam lightbar and removed my truck rack so I could move into a camper shell. So here's a shot of the added light bar before I removed the rack.IMG_4005.jpg


    Here's a shot of the rack removed.
    IMG_4015.jpg
     
  4. Jul 29, 2022 at 9:54 AM
    #24
    Codolten

    Codolten [OP] Well-Known Member

    Joined:
    May 27, 2021
    Member:
    #366997
    Messages:
    238
    Gender:
    Male
    First Name:
    Colten
    Orangevale, Ca
    Vehicle:
    08 Tacoma
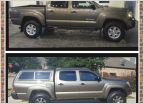
    At this point, I went and got a Leer 100 camper shell off Craigslist. I'm somewhat peeved that the color doesn't quite match right, but its damn close for a craigslist find. I think I may end up wrapping the truck at some point in the future, which would solve this problem.
    Anyways, I got the shell in mediocre condition. The window would only open on one side, the screens were trashed, and there some minor flaws in the window trim, but the structure of the shell itself isn't bad. Here's the shot of the camper when I first got it.
    IMG_4016.jpg


    As you can see in some of my earlier pictures, I do have a roof top tent I use pretty regularly, so I needed to get it mounted. This camper obviously has no rail system. So there's a problem...time to install the Thule rails! I will admit that this wasn't fun. Lining up the rails to run straight back was extremely difficult, and at some point, I had to acknowledge that there would be some imperfection whether I did it or some body guy did it. Only difference is they'd be faster lol Here's the shot of the rail finally mounted.
    IMG_4079.jpg


    As you can see, I also decided to pull the windows out and refinish them to the best of my ability. This included rescreening the window openings, repairing the slide track, and reseating the window with a bit of silicone to help prevent any leaking (FYI they don't sell any repair parts for these windows, its a whole new window assembly or nothing). Here's the rescreened window. This isn't a sexy picture, but its all part of the process.680074330.jpg
     
  5. Jul 29, 2022 at 10:51 AM
    #25
    Codolten

    Codolten [OP] Well-Known Member

    Joined:
    May 27, 2021
    Member:
    #366997
    Messages:
    238
    Gender:
    Male
    First Name:
    Colten
    Orangevale, Ca
    Vehicle:
    08 Tacoma
    The biggest part about adding a RTT to the camper shell is that the shell isn't rated to hold much more than like 150 lbs and it definitely isn't meant to hold 150 lb RTT with a 200 lb man, a 125 lb woman, a 40 lb toddler, and a handful of bedding. I scoured the forum for solutions and I was inspired by @steveo27 's unistrut frame. Ultimately, I went with square tube steel. Here's some progression shots and the final product.

    IMG_4026.jpg
    IMG_4044.jpg
    678250028.jpg
    IMG_4078.jpg
     
  6. Sep 6, 2022 at 6:08 PM
    #26
    Codolten

    Codolten [OP] Well-Known Member

    Joined:
    May 27, 2021
    Member:
    #366997
    Messages:
    238
    Gender:
    Male
    First Name:
    Colten
    Orangevale, Ca
    Vehicle:
    08 Tacoma
    I’ve taken a bit of a break but I’m that time I managed to mount the rack, mount my tent, and put new rims on the rig. Below I’ll list each change and try to include some pics.
     
  7. Sep 6, 2022 at 6:32 PM
    #27
    Codolten

    Codolten [OP] Well-Known Member

    Joined:
    May 27, 2021
    Member:
    #366997
    Messages:
    238
    Gender:
    Male
    First Name:
    Colten
    Orangevale, Ca
    Vehicle:
    08 Tacoma
    So mounting the rack and tent wasn’t too incredibly difficult. I think one of the toughest parts with the rack was ensuring everything was squared up correctly. Finding measure points on rounded body panels is very difficult lol

    For the sake of keeping track, I took apart the upTop Overland rack listed in above posts. There’s two parts: the bed truss rack (which I’ve listed for sale) and the alpha ex rack. The alpha rack is useable with Thule tracks, so I’m just reusing. I also love the upTop Overland Brand for those of you that are curious.

    I have had the Desert Armor tent for almost a year now. I absolutely love it. I have to say, it’s easy and consistent. I’ve been camping at least 20 times with it and it performs every time. Hot weather, cold weather, and in between. Its also relatively light for some of the comparable models. I have a few small complaints, but to me, the important part of that complaint list is that it hasn’t changed. Nothing is perfect, but as long as I know what to expect, I’m happy. For what it’s worth, my complaints are the following:

    1. Small pieces of fabric hang from the shell when closed
    2. I’m not overly impressed with the shell as it kinda sags in the center at the top
    3. The window on the rain fly doesn’t unzip (that’s probably intentional)

    I think it’s important to point out small flaws like this for them to improve, but let the record show: I love my tent!

    All these things being said, here’s my truck set up with the rack and tent fully mounted. 1B144D8A-6FF8-4235-8204-94F142993E64.jpg7FD0F8F0-C414-45CC-9E96-F8D514498378.jpg
     
  8. Sep 6, 2022 at 6:34 PM
    #28
    Codolten

    Codolten [OP] Well-Known Member

    Joined:
    May 27, 2021
    Member:
    #366997
    Messages:
    238
    Gender:
    Male
    First Name:
    Colten
    Orangevale, Ca
    Vehicle:
    08 Tacoma
    Now it may have been obvious in the last pic, but I surprised myself and found a used bumper at a deal and a half. I’ve always liked ARB and I scored a heavily discounted front piece. I love it.

    EDIT: I need to add a bit of commentary on the installation and note to self, more pics during process as opposed to just at the end lol

    Installation was slow and a bit difficult for me alone. I’m still beginner/intermediate with mechanical work, meaning I will get the job done and done correctly, but it’s gonna be slow and there’s a chance for needing to redo some stuff. Also, I don’t have all the tools. I’ve got some but not all. Anyways, I struggled to get the first couple bolts in alone. I did some Macgyvering with a paint bucket and some pulled back muscles. I also couldn’t really refine the fit at all. I had no movement in the direction I wanted for whatever reason. I even removed the bumper and remounted to see if that was my issue. I really wanted to reduce the gap a little bit more, but luckily the gap was at least acceptable.

    8E47AA00-FA8C-45C0-B99D-7C9A187E1E53.jpg3FD8D570-8B98-4F08-AFF5-9EDC93F926E8.jpg
     
    Last edited: Sep 6, 2022
  9. Sep 6, 2022 at 7:43 PM
    #29
    Codolten

    Codolten [OP] Well-Known Member

    Joined:
    May 27, 2021
    Member:
    #366997
    Messages:
    238
    Gender:
    Male
    First Name:
    Colten
    Orangevale, Ca
    Vehicle:
    08 Tacoma
    Now I also found a sweet deal on some Ray10’s from SCS and I couldn’t be happier with them. They look phenomenal. I thought this topic deserved its own little photo post. F9B6A119-C44B-4974-A933-23BE2478B57E.jpg153D299A-92C7-4768-A649-4CDAB5169307.jpg
     
  10. Sep 6, 2022 at 9:25 PM
    #30
    Codolten

    Codolten [OP] Well-Known Member

    Joined:
    May 27, 2021
    Member:
    #366997
    Messages:
    238
    Gender:
    Male
    First Name:
    Colten
    Orangevale, Ca
    Vehicle:
    08 Tacoma
    At the moment, I have 4 Heretic Studios pod lights. 2 are white and 2 are amber. The ambers are being worked right now to fight in the ARB bumper fog light holes. I got the metal shrouds and am just trying to figure out how to mount them. The brackets just don’t quite fit and I’m trying to be delicate with my approach so I don’t permanently ruin anything. The other two white lights are going to be mounted as either ditch lights or backup lights. I back up all the time so it kind feels like a no brainer…will post more as I progress.
     
  11. Oct 17, 2022 at 10:43 AM
    #31
    Codolten

    Codolten [OP] Well-Known Member

    Joined:
    May 27, 2021
    Member:
    #366997
    Messages:
    238
    Gender:
    Male
    First Name:
    Colten
    Orangevale, Ca
    Vehicle:
    08 Tacoma
    I went offroading on a much more rock crawling intensive trail than I have ever done before, and I fell in love immediately. I still don't know that I want to go hard core rock crawling, but I absolutely loved the challenge of the trails I hit, I loved the destination, and I think most importantly, I realized what the final goal of my build is, if only my current goal: a family vehicle that I can take off roading with the ability to hit some real obstacles.

    So the point of this post is to point out the things I realized about my truck that need to either be improved, or that needs to change, or that I need to add.

    1. My front suspension is lacking a bit. I don't think I need any long travel set ups or anything quite that significant, but Fox 2.0's aren't enough. I noticed the coilovers started performing a bit worse as the day went on and I think that can probably be attributed to the oil not having much ability to cool (that seems to be the only explanation I can come up with as I'm not a hardcore mechanic and I'm still trying to improve my education on off road suspension topics). There isn't much out there for improving the springs on the 2.0's anyways, so I think I will need to upgrade to 2.5's of some kind, likely with resi's. This will mean UCA's as well. I'll have to think about a diff drop kit, but that can be a TBD topic.

    2. I hung up my rear bumper about 4 times on my trip. I have been craving a HC bumper for the looks, but now I feel like there is some real justification for need. I was given a welder for my birthday recently, so I am going to begin fabricating one with zero prior experience lol. Wish me luck.

    3. I need to find a way to store a spare tire. I refuse to lose space under my camper shell as that is where I put all my camping gear and my dogs when they go, so that means exterior mounting is probably the approach I want. I considered getting a cab rack and just strapping it up there, but that seems like its a recipe for a dried out tire. Since I'm fabricating a bumper, I will likely figure a way to put a swing out on there.

    4. My camper shell moved around with the RTT on top during my trip. I did NOT like it, and I think I am going to take it off. I think the best thing is to get a trailer that can go offroading too. This would solve the moving canopy problem, and I think it would be a huge bonus for family camping. We hate that the tent has to be packed up for us to go anywhere when we're out camping, so I think the trailer would be a solution to that. PLUS, it will give us way more space for packing on longer trips. Two adults, two dogs, and a toddler are a tight fit in a DCSB for anything longer than about two nights.

    5. Rock sliders are a must. I found myself constantly cringing in fear of hitting the body as I cleared obstacles. I will take this on once I finish the bumper I think.

    6. I need a number of various parts, pieces, accessories, etc. These are just things that will be vital for offroading and getting myself out of sticky situations, or things that improve off road performance.
    - ARB compressor and hoses: this is necessary for being able to air down and back up again, kind of self explanatory
    - Winch and accessories: I think this one is also self explanatory
    - Hi Lift Jack and mounting brackets: again, no explanation needed
    - Secondary battery system: I hate the idea of running out of juice for any reason, plus some of the accessories above will likely need another source of power
    - Potentially looking at bigger tires: I think that moving to the 285 department will probably help finish the look of the truck, plus this will add at least a bit of true clearance
     
  12. Oct 17, 2022 at 7:27 PM
    #32
    Codolten

    Codolten [OP] Well-Known Member

    Joined:
    May 27, 2021
    Member:
    #366997
    Messages:
    238
    Gender:
    Male
    First Name:
    Colten
    Orangevale, Ca
    Vehicle:
    08 Tacoma
    So I have actually been working on a bumper for about an actual week. I took a lot of advice from a video I found online (credit to Get Lost Adventures). I will be uploading a video to youtube at some point once I have finished the bumper and I will embed it here.

    Ultimately I started with some rectangular tube steel. The main bumper section is made of 2x6 3/16" steel. I got about a 6' piece and used that. I disassembled the stock bumper into the bare pieces and left the bracket mounted since we know its level (for the most part) and its stout enough clearly to handle the stock hitch and tow. I set the 2x6 in place, cut out the slots for the pinch weld (wanted to preserve bed integrity), and tacked it in.

    IMG_4416.jpg

    At this point, I was really happy with the look. Obviously lots of progress to be made. The next step was to figure out how to run steel around the corner to the bed line. I used 2x3 angles to turn the corner. Because I knew this was my approach, I ensured the 2x6 extended past the bed line on both sides. I tacked the 2x3 on top of it and cut pieces to create the angles I wanted. I also mocked up the high clearance portion of the bumper to the bed. I used a 4x4 to bring the height up and without measuring, it just so happened to fit perfectly. I went ahead and did the scary part of cutting the bed. It honestly went perfectly, and like I said, the fitment was perfect and left me with a really nice 1/2" spacing that'll be partially filled with edge guard. Here's a few pictures outlining these steps.

    IMG_4455.jpgIMG_4456.jpg 687052803.jpg 687050944.jpg
     
  13. Oct 17, 2022 at 7:38 PM
    #33
    Codolten

    Codolten [OP] Well-Known Member

    Joined:
    May 27, 2021
    Member:
    #366997
    Messages:
    238
    Gender:
    Male
    First Name:
    Colten
    Orangevale, Ca
    Vehicle:
    08 Tacoma
    I wanted to continue to fab with the bumper on the truck. I tacked in place the side angle piece. I used 4" flat stock, again 3/16", and this was the result.

    IMG_4464.jpg IMG_4466.jpg IMG_4465.jpg IMG_4467.jpg

    At this point, I realized I was making this way tough on myself. I removed the bumper and did the other side, only to realize that it came out drastically better, so I cut off the one in the pictures above and used a new piece of flat stock to make the sides match. I am really really happy with the progress. As I ground the welds off for the finished look, I realized I need to continue to work on my welding skills. I am happy with technique but am finding that I have some setting issues and have a few worm holes. Most of them shouldn't be significant enough to cause issues as they aren't in structural joints, but I am dedicated to fixing them anyways. If you look closely, you may notice that there are some marked circles that I will weld again and re grind so that the worm holes go away. Anyways, here's where she sits as of today.

    IMG_4504.jpg IMG_4513.jpg IMG_4509.jpg IMG_4508.jpg
     

Products Discussed in

To Top