1. Welcome to Tacoma World!

    You are currently viewing as a guest! To get full-access, you need to register for a FREE account.

    As a registered member, you’ll be able to:
    • Participate in all Tacoma discussion topics
    • Communicate privately with other Tacoma owners from around the world
    • Post your own photos in our Members Gallery
    • Access all special features of the site

Is my rack and pinion shot?

Discussion in '1st Gen. Tacomas (1995-2004)' started by RoscoeTT, Oct 25, 2022.

  1. Oct 25, 2022 at 2:02 PM
    #1
    RoscoeTT

    RoscoeTT [OP] Well-Known Member

    Joined:
    Jul 12, 2021
    Member:
    #371133
    Messages:
    160
    New York
    Vehicle:
    2002 Toyota Tacoma
    Bought this truck a year ago, was in an accident. Front end had some work done in it. This wasn't broken when I bought it so it definitely failed prematurely as a result tho. Can I just swap this part or is it a whole new rack and pinion? I just did the bushings this summer so I'd rather not if I can avoid it

    E87CE1B9-98C1-465A-9696-AB92BDA8CD6E.jpg
    D40CFA6C-EE37-413F-A43D-9AA0B3E043BA.jpg
     
  2. Oct 25, 2022 at 2:04 PM
    #2
    Andy01DblCabTacoma

    Andy01DblCabTacoma Well-Known Member

    Joined:
    Mar 12, 2021
    Member:
    #359086
    Messages:
    3,998
    Gender:
    Male
    First Name:
    Andy
    San Diego, CA
    Vehicle:
    01 Double Cab v6 4x4 TRD
    F: Kings SPC, R: 5100s+J59s. Custom armor.
    That looks like just the isolator in the rag joint. You should be able to get a new rag joint.
     
    RoscoeTT[OP] likes this.
  3. Oct 25, 2022 at 2:07 PM
    #3
    RoscoeTT

    RoscoeTT [OP] Well-Known Member

    Joined:
    Jul 12, 2021
    Member:
    #371133
    Messages:
    160
    New York
    Vehicle:
    2002 Toyota Tacoma
    Do I need to drop the rack and pinion or pull the steering wheel rod forward? Or is it just a simple unbolt and bolt back in?
     
  4. Oct 25, 2022 at 2:09 PM
    #4
    Andy01DblCabTacoma

    Andy01DblCabTacoma Well-Known Member

    Joined:
    Mar 12, 2021
    Member:
    #359086
    Messages:
    3,998
    Gender:
    Male
    First Name:
    Andy
    San Diego, CA
    Vehicle:
    01 Double Cab v6 4x4 TRD
    F: Kings SPC, R: 5100s+J59s. Custom armor.
    here ya go:
    upload_2022-10-25_14-6-58.jpg

    The whole thing (45860) is part number: 45860-34020

    The bottom is (45230) 45230-35090
    The top is (45219) 45209-34040
     
  5. Oct 25, 2022 at 2:10 PM
    #5
    Andy01DblCabTacoma

    Andy01DblCabTacoma Well-Known Member

    Joined:
    Mar 12, 2021
    Member:
    #359086
    Messages:
    3,998
    Gender:
    Male
    First Name:
    Andy
    San Diego, CA
    Vehicle:
    01 Double Cab v6 4x4 TRD
    F: Kings SPC, R: 5100s+J59s. Custom armor.
    I would 100% try to do this without removing the rack. But I am not entirely certain how much pay is in there.
     
    RoscoeTT[OP] likes this.
  6. Oct 25, 2022 at 2:16 PM
    #6
    RoscoeTT

    RoscoeTT [OP] Well-Known Member

    Joined:
    Jul 12, 2021
    Member:
    #371133
    Messages:
    160
    New York
    Vehicle:
    2002 Toyota Tacoma
    Thank you! Will hopefully be able to reuse the bolts but if not is there a good rule of thumb for whatever grade I should replace them with?
     
  7. Oct 25, 2022 at 2:56 PM
    #7
    Andy01DblCabTacoma

    Andy01DblCabTacoma Well-Known Member

    Joined:
    Mar 12, 2021
    Member:
    #359086
    Messages:
    3,998
    Gender:
    Male
    First Name:
    Andy
    San Diego, CA
    Vehicle:
    01 Double Cab v6 4x4 TRD
    F: Kings SPC, R: 5100s+J59s. Custom armor.
    :notsure: at least grade 8. But the part numbers for the bolts are in the image I posted as well.. I'd just get new ones... I mean the thing is holding together your steering.
     
    MalinoisDad and RoscoeTT[OP] like this.
  8. Oct 25, 2022 at 5:45 PM
    #8
    RoscoeTT

    RoscoeTT [OP] Well-Known Member

    Joined:
    Jul 12, 2021
    Member:
    #371133
    Messages:
    160
    New York
    Vehicle:
    2002 Toyota Tacoma
    What's the worse that could happen? (I joke). I'll get those bolts, didn't see them at first glance
     
  9. Nov 3, 2022 at 12:11 PM
    #9
    RoscoeTT

    RoscoeTT [OP] Well-Known Member

    Joined:
    Jul 12, 2021
    Member:
    #371133
    Messages:
    160
    New York
    Vehicle:
    2002 Toyota Tacoma
    Any idea on how to get this to release? Its supposed to pop easily but rust says otherwise. I did PB Blaster, now using liquid wrench, but not sure how long it needs to penetrate deep enough. This clamp is barely holding on but Im limited in space to allow the claws to grab properly

    97DED0AE-01D2-4AA4-9664-35BEAD2F7BDA.jpg
     
  10. Nov 3, 2022 at 12:21 PM
    #10
    Andy01DblCabTacoma

    Andy01DblCabTacoma Well-Known Member

    Joined:
    Mar 12, 2021
    Member:
    #359086
    Messages:
    3,998
    Gender:
    Male
    First Name:
    Andy
    San Diego, CA
    Vehicle:
    01 Double Cab v6 4x4 TRD
    F: Kings SPC, R: 5100s+J59s. Custom armor.
    I haven't taken one off before. Do you have the new one on hand to compare to, and see exactly how it should separate?

    Try some tapping (not hammering) with a hammer on the part to encourage the pb blaster to do it's thing.. spray, tap-tap-tap wait, repeat. If that doesn't get it, carefully introduce some heat.
     
  11. Nov 3, 2022 at 12:24 PM
    #11
    Andy01DblCabTacoma

    Andy01DblCabTacoma Well-Known Member

    Joined:
    Mar 12, 2021
    Member:
    #359086
    Messages:
    3,998
    Gender:
    Male
    First Name:
    Andy
    San Diego, CA
    Vehicle:
    01 Double Cab v6 4x4 TRD
    F: Kings SPC, R: 5100s+J59s. Custom armor.
    also might want to pull those nuts and studs off to give the puller something better to get onto.
     
  12. Nov 3, 2022 at 12:35 PM
    #12
    RoscoeTT

    RoscoeTT [OP] Well-Known Member

    Joined:
    Jul 12, 2021
    Member:
    #371133
    Messages:
    160
    New York
    Vehicle:
    2002 Toyota Tacoma
    Heres the new part. Very simple. As for the old part, the nuts are seized and since this part can move it doesn't allow much torque to be spent. Spent a couple hours trying to break them free but theres no room for extension or mechanic removal. Plus those studs are even worse, all thread, no where to undo. Hence cutting the one. I wasn't even able to remove them from the new part. Its a very robust design...

    Unfortunately, I cant do heat with the Rack & Pinion rubber housing right there sooo looks like LOTS of penetrating oil and love taps. Might take another crack at the nuts but I might search for another tool to grab the sides instead

    image.jpg
     
  13. Nov 3, 2022 at 12:54 PM
    #13
    Andy01DblCabTacoma

    Andy01DblCabTacoma Well-Known Member

    Joined:
    Mar 12, 2021
    Member:
    #359086
    Messages:
    3,998
    Gender:
    Male
    First Name:
    Andy
    San Diego, CA
    Vehicle:
    01 Double Cab v6 4x4 TRD
    F: Kings SPC, R: 5100s+J59s. Custom armor.
    Yeah, working in that space sucks! Impact with a 90 degree adaptor? or a crazy arrangement of u joint / wobble bits?

    Thanks for the new piece picture.

    I said careful heat for a reason :D I still wouldn't rule it out. Even if you focused on just the top, you just need that thing to budge just a little bit and it'll come off.
     
    RoscoeTT[OP] likes this.
  14. Nov 3, 2022 at 3:46 PM
    #14
    RoscoeTT

    RoscoeTT [OP] Well-Known Member

    Joined:
    Jul 12, 2021
    Member:
    #371133
    Messages:
    160
    New York
    Vehicle:
    2002 Toyota Tacoma
    Okay so I wont rule out heat. I'll try an ATF/Acetone mix everyone raves about.
    Hopefully avoid damaging the rubber. If nothing, then ill need to clean it up and bust out the heat!
     
  15. Nov 3, 2022 at 3:48 PM
    #15
    Andy01DblCabTacoma

    Andy01DblCabTacoma Well-Known Member

    Joined:
    Mar 12, 2021
    Member:
    #359086
    Messages:
    3,998
    Gender:
    Male
    First Name:
    Andy
    San Diego, CA
    Vehicle:
    01 Double Cab v6 4x4 TRD
    F: Kings SPC, R: 5100s+J59s. Custom armor.
    I'd be more concerned about the acetone getting on the rubber than the heat :notsure:
     
  16. Nov 9, 2022 at 6:00 AM
    #16
    RoscoeTT

    RoscoeTT [OP] Well-Known Member

    Joined:
    Jul 12, 2021
    Member:
    #371133
    Messages:
    160
    New York
    Vehicle:
    2002 Toyota Tacoma
    Took heat to it, but I couldn’t get it to budge. Did some digging and found that the rubber housing on the bottom end where the rag joint meets the rack & pinion, that I’ve been so delicately avoiding, is a dust shield that costs a massive $5. Going to cut it off tomorrow, get a better view of the bottom of the rag joint. Might get a better grab with the pullers or worse case just cut the side walls of this rag joint. My thought is, since its a toothed fit rather than a threaded fit, a single cut shouldn’t effect the strength with the new part….right?
     
  17. Nov 9, 2022 at 6:06 AM
    #17
    RoscoeTT

    RoscoeTT [OP] Well-Known Member

    Joined:
    Jul 12, 2021
    Member:
    #371133
    Messages:
    160
    New York
    Vehicle:
    2002 Toyota Tacoma
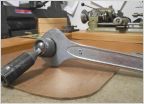
    I found this watching a video of timmy the tool man. You can see how little of teeth there is. Maybe I’ll just cut the top side and avoid the teeth, see if that’s enough to release…

    F09D7E96-128A-4954-80D4-A34EB4EA85AE.jpg
     
  18. Nov 9, 2022 at 7:56 AM
    #18
    Andy01DblCabTacoma

    Andy01DblCabTacoma Well-Known Member

    Joined:
    Mar 12, 2021
    Member:
    #359086
    Messages:
    3,998
    Gender:
    Male
    First Name:
    Andy
    San Diego, CA
    Vehicle:
    01 Double Cab v6 4x4 TRD
    F: Kings SPC, R: 5100s+J59s. Custom armor.
    If you're ok with cutting the dust shield then send it on heating that thing up. Maybe use a Nut Splitter on the two studs to remove those for better bite on the flanges?
     
  19. Nov 20, 2022 at 5:31 PM
    #19
    RoscoeTT

    RoscoeTT [OP] Well-Known Member

    Joined:
    Jul 12, 2021
    Member:
    #371133
    Messages:
    160
    New York
    Vehicle:
    2002 Toyota Tacoma
    Ended up cutting it. For anyone in the rust belt, the rust build up inside the lower rag joint collar will bind and prevent movement. If you have a dremel tool & cutting wheel. Go for it.

    Maybe MAP (not propane) or an induction heating tool would of made a difference but this worked in the end.

    Everything went in smoothly afterwards. First the dust cap, Part # 45222-35020. Then upper rag joint, slide all the way up the steering column to allow clearance for lower rag joint. Then slide on lower rag joint, drop down upper, and bolt it all together. 35 ft-lbs on the bolt/nut bringing it all together.

    1640C7D3-42A8-4994-91B1-78F11AF57AD4.jpg
     
    Andy01DblCabTacoma likes this.

Products Discussed in

To Top