

-
Welcome to Tacoma World!
You are currently viewing as a guest! To get full-access, you need to register for a FREE account.
As a registered member, you’ll be able to:- Participate in all Tacoma discussion topics
- Communicate privately with other Tacoma owners from around the world
- Post your own photos in our Members Gallery
- Access all special features of the site
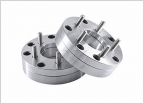 6 lug to 5 lug conversion
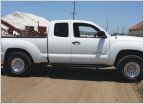 Modest taco build
 Bilstein shocks with level lift...
 After market lug nut size
 1st gen 5 lug lift question - shock suggestions
 New Cap + Tools = Build
1st Gen 2" Fabtech Shackle Lift Install
Discussion in '5 Lug' started by 5LugCowboy, May 2, 2022.


