1. Welcome to Tacoma World!

    You are currently viewing as a guest! To get full-access, you need to register for a FREE account.

    As a registered member, you’ll be able to:
    • Participate in all Tacoma discussion topics
    • Communicate privately with other Tacoma owners from around the world
    • Post your own photos in our Members Gallery
    • Access all special features of the site

Rear locker swap from non locker, how do you wire it up?

Discussion in '1st Gen. Tacomas (1995-2004)' started by 1997tacomav6, May 5, 2023.

  1. May 6, 2023 at 11:43 AM
    #21
    Kwikvette

    Kwikvette Well-Known Member Vendor

    Joined:
    Feb 27, 2019
    Member:
    #284735
    Messages:
    81,767
    Gender:
    Male
    Fresno County
    4 run, 2 don't
    Huge +1 on this.

    Can always test the actuator outside of the vehicle install.
     
    Bivouac[QUOTED] likes this.
  2. May 6, 2023 at 12:50 PM
    #22
    Dirty Pool

    Dirty Pool FLIES ON THE FRIES, KETCHUPS WATERED DOWN

    Joined:
    Mar 24, 2013
    Member:
    #100471
    Messages:
    2,325
    Gender:
    Male
    59.4 Miles, 56.67° NE Of Moab
    Vehicle:
    99 XCAB V6 MT TRD
    Dirty Pool rear bumper/air tank with integrated spare CV shaft storage, DP customized TJM front bumper, 8000 lb Ramsey/Technora rope, E-locked, Extended breathers with front diff catch can, PCV catch can, SAWs with DP heim joint seals, DP custom 6 leaf rear springs/Billies, DP custom skids, 2lo, Gray wire, Cap, Bed Rug, Black steelies, 01 Center console, Map lights, Disraeli gears
    More than you probably wanted to know.
    The limit switches in the actuator are pretty much required to get consistent full engagement of the actual locker mechanism in the diff because the actuator has an internal spring that allows it to run to it's full intended range, hit the limit switches and then shut off when the actual locker splines in the diff have not yet aligned.
    [​IMG]

    This is the simplest DIY stand alone wiring using no relay, no momentary switch and has been around for 20+ years. Pin out and wire colors vary between Tacos, Cruisers, years ect and does not work with factory switch. Use the Taco FSM "system wiring diagram" for "rear differential lock" for actual wire colors and pin out of the Taco "BO1" connector.
    The motor ground can be common with the/an indicator lamp (if used) ground for a total of 6 wires. Do not use the frame as a ground, run the ground all the way to at least a cab ground.
    [​IMG]


    If the actuator has been removed it must be installed with a specific procedure to preload the previously mentioned spring. See the last bit below about the slot, pin and rotating the actuator once in place. The FSM says to use a 1.5v battery to test run or position the actuator to be safe in the event of a short. You can use 12v if you are very very careful and remove the wire as soon as the motor stops. A 1.5v battery runs the motor very slow. Folks have been known to use 2 or 3 1.5v batteries in series to get a little bit more definitive movement.
    [​IMG]

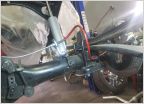
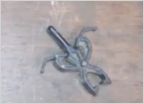
    And make sure the actuator vent hose is in place and runs to a dry spot. Looks like a small vacuum hose. The factory runs it into a hole in the frame above the axle and terminates it with a little plug to help shed water.
    Note the slits across the tip of the plug. Feel free to improvise here or combine the vent with an "extended diff breather".
    [​IMG]
    [​IMG]
     
    6 gearT444E and Bivouac like this.
  3. May 6, 2023 at 12:57 PM
    #23
    Bivouac

    Bivouac Well-Known Member

    Joined:
    Sep 5, 2021
    Member:
    #376253
    Messages:
    11,580
    Northern Lehigh Valley Pa
    Vehicle:
    2000 Tacoma 5 speed 3.4
    Remains to be seen I bought the tires and wheels the rest came along
    Thanks for posting!

    A great Write up.
     

Products Discussed in

To Top