1. Welcome to Tacoma World!

    You are currently viewing as a guest! To get full-access, you need to register for a FREE account.

    As a registered member, you’ll be able to:
    • Participate in all Tacoma discussion topics
    • Communicate privately with other Tacoma owners from around the world
    • Post your own photos in our Members Gallery
    • Access all special features of the site

ToyRyd04s - Rebuild and Limit Hydro Bumps

Discussion in 'Technical Chat' started by ToyRyd04, Feb 11, 2023.

  1. Feb 11, 2023 at 4:00 PM
    #1
    ToyRyd04

    ToyRyd04 [OP] Taco Transformer

    Joined:
    Aug 5, 2011
    Member:
    #61217
    Messages:
    1,861
    Gender:
    Male
    First Name:
    Greg
    Perryville, MD
    Vehicle:
    '04 PreRunner
    SAS'd PreRunner Diamond Axles Crawlbox
    While watching KOH '23 today for motivation, decided to work on bumpstops.

    With Hydro bumps becoming more and more popular and the price tag finally starting to decrease, I decided to invest in some TG 2.0, 4" stroke Hydro bumpstops.

    20230202_172648.jpg

    Quickly after these arriving and doing more research to figure out placement I soon realized I would need to de-stroke these. Being on leafs in the front, I only have about 4.5" of uptravel, so I decided that around 2" would be the end goal.

    TG posted on their website that these are rebuildable, so I knew that I could take these apart and modify both the length, and spring rate that I will get into later.

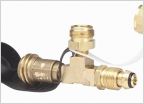
    So needed a few things before getting started. First was a Nitrogen No Loss manifold to get a pressurized before and after reading on the shocks. As TG site mentions, these were filled with 200psi of nitrogen charge. This King shock manifold threaded on the body and then the no loss valve threaded on. Two hand procedure so no picture in action.

    20230210_150612.jpg

    After confirming psi, I let out the pressure (keeping the shock up right for no oil loss).

    Then dumped the shock oil into a small bowl to keep and hopefully reuse/measure capacity and what amount was needed after the mods.

    Now with those removed, disassembly can start. Removed the Allen set screw and unthreaded the collar that also hold the shaft seal.

    20230210_171532.jpg

    Once that is unscrewed, you now have access to the sliding valve/shim assembly that is a solid machined piece. This needed to be pushed down in order to remove the C clip prevent it from completely coming out.

    20230210_171353.jpg

    20230210_171209.jpg

    And a couple views of the c clip in the shock body.

    20230210_171218.jpg

    20230210_171227.jpg

    Now I was able to pull apart the assembly and layout how it was assembled.

    20230210_160706.jpg

    Going from the Top left to right

    No loss nitrogen protective valve cap, locknut, and washer to mount the bumpcan housing onto.

    Going from the Bottom left to right

    Delrin washer that the end of the rod guide sits on, then the 6" rod body 1.25 diameter, sliding valve/shim assembly, c clip retainer, threader seal collar, o ring wiper, threaded aluminum striker body, and replaceable Delrin bumpstop striker.

    Some close up shots.

    20230210_155914.jpg

    20230210_161121.jpg

    20230210_161127.jpg

    20230210_161124.jpg


    To the right on the plastic bag is the (2) spacers needed to reduce the shock stroke. These will be added to the 6" rod body.

    Purchased from Fox Shocks:

    FOX 2.0 Air Bump Stop Shaft Spacer
    1.25" Shaft, 1.7" Length
    SKU: FOX-233-00-070-A
    Part: FOX-233-00-070-A

    Now showing a full parts diagram with the Spacer inline.

    20230210_161112.jpg

    20230210_170305.jpg

    Machined .120 DOM tube spacer, exterior OD there is room but ID of the DOM spacer needs to be machined to .1255 which Fox sells directly.

    20230210_170343.jpg

    20230210_170443.jpg

    Reassembly is the same as taking it apart.

    20230210_171013.jpg

    20230210_171031.jpg

    Thread on strike body onto the rod shaft and the replaceable bumpstop is threaded on by two button head bolts.

    20230210_163804.jpg

    20230210_171815.jpg

    20230210_163811.jpg


    That's all for now, still need to measure the amount of shock oil (5wt) that was used ***edit*** looks like 200ish CCs total for both shocks*** compared what's needed for the 2.25" stroke now, and refill. After that will start at 150psi Nitrogen recharge and tune from there.

    Also working on a set of mounts that will fit between the typical Toyota U shock hoops.

    20230211_173127.jpg


    20230211_173139.jpg


    Credit goes to Billavista article, great tips and overall instructions. After reviewing this web article about a King Shock bumpstop tear down, there's no doubt these TG bumpstops come from the same factory.
    http://www.billavista.com/tech/Articles/Air_Bump_Tech/index.html


    Updates to follow once I figure out exact mounting to measure and fully welded the mounts.
    Stay tuned...
     
    Last edited: Feb 12, 2023
  2. Feb 21, 2023 at 9:35 PM
    #2
    Buttskevin21

    Buttskevin21 Well-Known Member

    Joined:
    Dec 14, 2020
    Member:
    #349654
    Messages:
    2,490
    Gender:
    Male
    First Name:
    Kevin
    Washington
    Vehicle:
    2019 Brocoma, 37s, Lt, Dual Tcases, blah blah blah https://www.instagram.com/kevinjbutts/
    Stock-ish
    Good stuff dude!
     
    ToyRyd04[OP] likes this.
  3. Apr 25, 2023 at 8:18 AM
    #3
    ToyRyd04

    ToyRyd04 [OP] Taco Transformer

    Joined:
    Aug 5, 2011
    Member:
    #61217
    Messages:
    1,861
    Gender:
    Male
    First Name:
    Greg
    Perryville, MD
    Vehicle:
    '04 PreRunner
    SAS'd PreRunner Diamond Axles Crawlbox
    Bit more progress working on the mounts. Got them full welded (besides gluing them on the frame).

    Had to relocate the shock mounts, and brake hard lines from the initial SAS.

    20230405_093249.jpg

    20230405_115338.jpg

    20230405_132039.jpg

    20230405_132106.jpg

    20230405_203632.jpg

    20230405_203703.jpg

    20230418_162358.jpg

    20230418_162402.jpg

    20230418_162408.jpg

    20230418_162430.jpg

    20230418_162346.jpg
     
    AggiePE and slander like this.
  4. Jun 21, 2023 at 5:42 PM
    #4
    ToyRyd04

    ToyRyd04 [OP] Taco Transformer

    Joined:
    Aug 5, 2011
    Member:
    #61217
    Messages:
    1,861
    Gender:
    Male
    First Name:
    Greg
    Perryville, MD
    Vehicle:
    '04 PreRunner
    SAS'd PreRunner Diamond Axles Crawlbox
    Progress, just need to cycle and drive them to make sure and burn them in the rest of the way. :welder:

     
    Last edited: Jun 21, 2023

Products Discussed in

To Top