1. Welcome to Tacoma World!

    You are currently viewing as a guest! To get full-access, you need to register for a FREE account.

    As a registered member, you’ll be able to:
    • Participate in all Tacoma discussion topics
    • Communicate privately with other Tacoma owners from around the world
    • Post your own photos in our Members Gallery
    • Access all special features of the site

DCLB Auto to Manual RC62F, VF2B transfer case and 3rd Gen E-Brake Swap

Discussion in 'Technical Chat' started by DesertRatliff, May 7, 2023.

  1. Oct 10, 2023 at 10:11 AM
    #61
    DesertRatliff

    DesertRatliff [OP] Well-Known Member

    Joined:
    Jan 14, 2012
    Member:
    #70618
    Messages:
    2,379
    Gender:
    Male
    Mt. Hood, OR
    Vehicle:
    Mas Tacos Por Favor
    Thank you! As you'll remember, since I'm doing a tranny swap, I don't have an old flywheel and there aren't pins in the old pressure plate, so I just ordered some new ones. This was a great catch. Thanks again.

    I should have mentioned that I noticed the lock washers on the pressure plate hardware looked especially rough. My first thought was, "well that's why you use new hardware every time" but they were acting as the alignment dowels!

    Glad I tore down the tranny. This would not have turned out well.
     
  2. Oct 20, 2023 at 6:33 AM
    #62
    SR-71A

    SR-71A Define "Well-Known Member"

    Joined:
    Jun 1, 2018
    Member:
    #255145
    Messages:
    7,801
    Gender:
    Male
    First Name:
    Zack
    Southern Maine
    Vehicle:
    2012 DCSB, TX Baja Edition. Barcelona Red
    255/85/R16 Falken Wildpeak MTs, Mobtown sliders, ARB bar, SOS front skid, Icon RXT leafs, extended & adjustable Kings, JBA UCAs, OVS wedge RTT, dual AGM batteries, Gen2 xrc9.5 winch, CB, GMRS, S1 ditch lights...
    Awesome progress man! I haven't been on TW hardly at all the past 6+ weeks, but got all caught up on your thread this morning. Makes my OCD very happy to see all the paint marks on all the torqued bolts, and how clean the fab work is in general :D
     
  3. Oct 21, 2023 at 5:13 AM
    #63
    DesertRatliff

    DesertRatliff [OP] Well-Known Member

    Joined:
    Jan 14, 2012
    Member:
    #70618
    Messages:
    2,379
    Gender:
    Male
    Mt. Hood, OR
    Vehicle:
    Mas Tacos Por Favor
    I really appreciate the feedback. There've been some bumps in the road, but it's very slowly coming together nicely. Thanks for posting.
     
    SR-71A[QUOTED] likes this.
  4. Oct 21, 2023 at 5:41 AM
    #64
    DesertRatliff

    DesertRatliff [OP] Well-Known Member

    Joined:
    Jan 14, 2012
    Member:
    #70618
    Messages:
    2,379
    Gender:
    Male
    Mt. Hood, OR
    Vehicle:
    Mas Tacos Por Favor
    On that note, Gadget encouraged me to reach out to Competition Clutch who requested I send the disc and pressure plate in for inspection. We'll see what they say. With the all-clear from them, I can re-install the clutch without worry so worth it for the peace of mind. I'll keep y'all posted.
     
    BillDaCat8 likes this.
  5. Oct 22, 2023 at 12:20 PM
    #65
    DesertRatliff

    DesertRatliff [OP] Well-Known Member

    Joined:
    Jan 14, 2012
    Member:
    #70618
    Messages:
    2,379
    Gender:
    Male
    Mt. Hood, OR
    Vehicle:
    Mas Tacos Por Favor
    I'm still slowly making some progress, though.

    I needed to order some Toyota hardware, including the aforementioned flywheel locating dowells/pins so thought I would check prices on some interior parts. Turns out the new parts weren't much more expensive new than they were used on ebay so figured I ought to just save some shipping and order them with the hardware.

    Because of the manual t-case, I wouldn't need the 4x4 switch anymore. Changing out the center dash vent panel to a non-4x4 one was something I thought I'd get to someday when I upgraded the stereo but I was kinda itching to work on the truck this morning and finalize things so away I went.
    20231022_072726.jpg

    I always thought the silver dash trim looked funny, especially since it was just slightly off from the Silver Sky Metallic exterior paint so if I was replacing the panel anyway, thought I would try the matte black one. It's from a base 2WD/Prerunner and the part number is 55412-04100 if anyone is wondering. There are a bunch of different variations of it so that info might help someone down the line. I also ordered the matching matte black steering controls. Pretty silly and frivolous detail for the money but I am so stupidly deep at this point, what's another $100? Its part number is 84250-04040-C0.

    20231022_072713.jpg


    20231022_080916.jpg

    20231022_080910.jpg

    20231022_080904.jpg

    Chipping away at everything but now the gauge cluster trim rings and tweeter trim rings really stand out. Argh. Add painting those to the list.
     
    Last edited: Oct 22, 2023
    This site contains affiliate links for which the site may be compensated.
    #65
    Rezkid likes this.
  6. Oct 22, 2023 at 12:41 PM
    #66
    Rezkid

    Rezkid Not a Well Known Member

    Joined:
    Sep 16, 2019
    Member:
    #305481
    Messages:
    1,001
    Gender:
    Male
    First Name:
    TJ
    WTX
    Vehicle:
    '08 DCSB TRD RT
    Little bit of this and that
    Curious if you're going to stick with your modified auto center console or swap out for a manual one.
     
  7. Oct 22, 2023 at 1:02 PM
    #67
    DesertRatliff

    DesertRatliff [OP] Well-Known Member

    Joined:
    Jan 14, 2012
    Member:
    #70618
    Messages:
    2,379
    Gender:
    Male
    Mt. Hood, OR
    Vehicle:
    Mas Tacos Por Favor
    With all the sticks poking through, including the e-brake, I quickly ruled out modifying the auto center console. It would be a complete hack job. But I followed your advice and reached out to Will at Blue Dog Designs. He seemed receptive to the idea of building me something but I'm still waiting to hear back from him if the 19" overall dimension will fit in his printer. For now, I'll stick with my sheet metal cover plate but if all else fails, I'll likely have a similar piece waterjet cut out of 3/16" ABS and affix it with rivnuts in the center console or maybe even plastic weld some bosses so I can use the yellow factory expansion clips.

    20231017_082434.jpg

    20231017_082358.jpg

    20231001_064959.jpg
     
    Last edited: Oct 22, 2023
    Rezkid[QUOTED] likes this.
  8. Nov 4, 2023 at 6:17 AM
    #68
    DesertRatliff

    DesertRatliff [OP] Well-Known Member

    Joined:
    Jan 14, 2012
    Member:
    #70618
    Messages:
    2,379
    Gender:
    Male
    Mt. Hood, OR
    Vehicle:
    Mas Tacos Por Favor
    Lots of stuff to report with the rainy days we've had, although they've been cold ones and my shop doesn't have a good heating system yet, so have been freezing my butt off.

    I ended up sending the Stage 2 clutch back to Competition Clutch to have it inspected and make sure it wasn't damaged with my mess-up. They've been super helpful, ran it through their inspection process, said it was in perfect working order and will be getting the clutch back to me ASAP.

    With all that said, I ended up deciding to go with an OEM Toyota/Aisin clutch. I had almost 200k on my supercharged 1st gen on the original clutch so figured I just can't go wrong with Toyota parts. I'll use the Stage 2 at a later date or might try to sell it at a loss here.

    Here it is installed WITH locating pins! LOL!
    20231101_064636.jpg

    And the tranny tunnel with my touch-up paint. Lit by an LED shop light, the photo makes it look like a bad match, but in person it's much closer to factory. Hopefully I wont see it so soon again anyway.

    20231101_064707.jpg

    Now time to nail the air gap again. I modified an idea I saw here and made this out of a cheap plastic level and some all-thread drilled and tapped to fit. It worked perfectly.

    20231030_142759.jpg

    Very occasionally, Harbor Freight tools work ok and their tranny jack (with a homemade cradle) helped make this a one man job.

    20230821_141437.jpg

    You can literally dial in the level of the tranny to match the motor. Definitely worth the $200.

    20231101_065856.jpg

    Once the tranny was landed, I went about installing all of the other stuff. The factory clutch hard line didn't really fit right, so I got another one using another stock part number I saw listed and it didn't fit right either. Plus, I didn't love that I needed a 10mmx1.0 to -4AN adaptor to fit it to the Tilton. I searched for a company that could build me a custom line and finally found HEL. In a couple days from phone call to having it in my greasy hands, they built me a custom length stainless 3AN sized clutch line with a 10mm x 1.0 male fitting on one side and a -4AN fitting on the other so I wouldn't need to run an adaptor. Pretty slick, all for around the same cost as the factory hardline.

    20231101_110042.jpg

    Here it is mounted at the master cylinder.
    20231102_123012.jpg

    Clearancing the slave cover for the bleeder
    20231101_144947.jpg

    Factory fresh looking
    20231102_141830.jpg

    Another small detail is I wanted to extend the gearbox breathers a little higher. I found someone selling an ARB breather in the 3rd gen classified section here on TW. It was a good deal so I snagged it. I noticed that there aren't good factory spots to hard-mount anything to the firewall so I looked around at the next-highest point. I really wanted to use Kasbien's RA60 bracket he included in his origanl kit for something, too. It was too nice for it to just sit in a box in my shop so the hunt began for a good, higher location to mount everything. With the extra mounting hardware included in the Tilton kit, the bracket and hardware made for a perfect way to mount the Breather.

    20231102_112819.jpg

    And went on to the manifold strap at just the right angle, almost like it was made for it. Now all those gearboxes (and the ADD actuator) have a few extra inches to breathe if I ever go swimming.

    20231102_122955.jpg
     
    Last edited: Dec 8, 2023
    BillDaCat8, Kasbien and SR-71A like this.
  9. Nov 4, 2023 at 6:53 AM
    #69
    DesertRatliff

    DesertRatliff [OP] Well-Known Member

    Joined:
    Jan 14, 2012
    Member:
    #70618
    Messages:
    2,379
    Gender:
    Male
    Mt. Hood, OR
    Vehicle:
    Mas Tacos Por Favor
    I've kept going back and fourth on what to do with the ADD. Definitely have ADD when it comes to ADD. Sorry, I'll shut up.

    Initially, I thought I would remove the entire ADD system and use the FJ diff tube but it turns out, that's more involved than I originally thought and I figure, if I'm that deep, I may as well re-gear. But a re-gear is big $$$ and definitely waaaay beyond my yearly Tacoma budget right now. The FJ tube with a re-gear (and a Torsen diff put in the front from an 86/FR-S/BRZ) will be the long-term plan but for now, winter is fast approaching and it'd be nice to have 4WD. So time to research 6 Gear's diagrams and make a DPDT switch.

    add2.png

    add switch back.jpg

    add wiring dummies.png

    The DPDT switch came in from OTRATTW with a custom ADD ON/ADD OFF face plate as did the order of lots of multi-colored wiring from Corsa Technic.

    Always nice to have Bailey close by for quality control.

    20231103_075558.jpg

    She approves
    20231103_082336.jpg

    Now to figure out where I want it. This factory location would be nice but then I'd need two hands to shift and engage the ADD.

    20231103_112310.jpg

    As it turns out, the center console is the area I ended up choosing. To get the new ADD circuit to work, you need keyed 12v for the switch and I wanted illumination for it, too, that would turn on with the headlights. All of that is easy available from the automatic tranny shifter assembly connectors that are no longer in use.

    20231103_123651.jpg

    So that made the center console location the easy choice and at this point in this build, the path of least resistance is a good thing, especially if it's simple and slick.

    But I don't want the passenger to inadvertantly push the ADD button, so I still need to sort out the exact location for it. Thinking it'll go where I have it in blue. That way it's hidden from the passenger yet still accessible with my right hand for shifting with my left hand on the wheel.

    The next step will be to send my center console to Will at Blue Dog Designs for 3D print mock up to build me a shifter face plate and have him add the spot for the ADD. Ok...no more ADD jokes.

    20231103_112324.jpg

    Happy with the results. Many thanks again to TW, @6 gearT444E and @pdaddy for all of the info here. I could not have done this without your writeups.

    20231104_072729.jpg

    Also had a USB charging port from a 3rd Gen that I got when I got the e-brake. Now was a good time to get that wired with keyed 12v, too, so wired it in. I'll have to figure out where it will live, but happy that the connector for it is soldiered and heat shrunk along with everything else.

    20231104_072842.jpg

    I really like the 3RD gen TRD shifter I had on my auto shifter. I even made a shift boot for it at some point in the past.

    20190810_082901 (1).jpg

    And I'm not in love with the B&M ball shifter but found the B&M shifter's thread pitch of 9/16-18 is pretty uncommon and, because of that, there aren't a bunch of shifters available for it. So I ended up drilling out the TRD shifter, epoxying a slightly modified brass NPT air fitting in to the bottom, drilling and tapping that to 9/16-18 and Bob's your uncle, I've got a TRD shifter for my 6-speed.

    20231104_072826.jpg
     
    Last edited: Nov 4, 2023
  10. Nov 4, 2023 at 8:24 AM
    #70
    DesertRatliff

    DesertRatliff [OP] Well-Known Member

    Joined:
    Jan 14, 2012
    Member:
    #70618
    Messages:
    2,379
    Gender:
    Male
    Mt. Hood, OR
    Vehicle:
    Mas Tacos Por Favor
    I want to mention that I had one issue with bleeding the HRB in case this info helps anyone in the future.

    With the tranny at its home, I checked the inspection window and was pleased I had ~3mm of air gap, so I proceeded to put everything back together from there. The pedal stop was set from my previous install. I never really had time to set pedal freeplay during this time but for this, I didn't mess with where it was from previous.

    Tranny home and everything else installed, I set out to bleed the system with help from my wife, but she kept telling me the pedal felt soft and wouldn't return back "out". We pushed and bled a pint of DOT 4 through the system but still no avail. Having just done this a few weeks ago during my first install (the HRB bled super-easily in about 2 pumps), I thought all of this was peculiar. So, I went about checking my work and in doing so, pulled the inspection window on the tranny. Horrified, my 3mm air gap had disappeared and the bearing was sitting flush on the clutch diaphragm springs! Dang it! I thought maybe pedal freeplay was the culprit so I disengaged the MC from the pedal with no change. I opened the bleed port hoping the HRB would return to 3mm out but it did not.

    So I ended up calling Tilton support and had a super-informative conversation with Jeff there. He told me that once the air gap is set and the piston has some fluid in it and is pumped once, the piston moves to the bearing and it doesn't return to its bore.

    He also gave me some more bleeding tips and basically said not to depress the clutch all the way to the stop at first, only to where it begins to engage the diaphragm spring, and only then to open the bleed port and press the pedal all the way. My wife was going from fully open to fully depressed on the pedal and apparently, it's harder to get a good bleed, or not at all, that way.

    With pedal freeplay set a little further out, pedal stop location tweaked a bit with the different clutch and following his tips, I finally got a good bleed on the system and have a pretty normal pedal feel (although the throw from the Tilton with the FJ master cylinder is quite short).

    Hope this helps somebody in the future!
     
    Last edited: Nov 4, 2023
  11. Nov 6, 2023 at 7:20 PM
    #71
    Kasbien

    Kasbien Well-Known Member

    Joined:
    Sep 30, 2013
    Member:
    #113581
    Messages:
    426
    Gender:
    Male
    First Name:
    Kellen
    BC, Canada
    Vehicle:
    07 DCSB 6MT 4X4
    Pop rivets and JB Weld.
    Genius idea with the level. Share it with the main thread! Also it's just a bracket lol. I wouldn't care if joined the other members of your local scrap bin.
     
  12. Nov 7, 2023 at 7:29 AM
    #72
    DesertRatliff

    DesertRatliff [OP] Well-Known Member

    Joined:
    Jan 14, 2012
    Member:
    #70618
    Messages:
    2,379
    Gender:
    Male
    Mt. Hood, OR
    Vehicle:
    Mas Tacos Por Favor
    More arts and crafts. This is the final layout and final template that I thought I was going to mail to Will at Blue Dog Designs, along with both big parts of my center console that he wanted for mock-up. It was a big, rather heavy box and shipping it to him a few miles north up I-5 was going to cost about $50. Hmm...that's 500 miles of fuel money in my little DD Beater.

    20231105_134004.jpg

    I was farting around here on Tacoma World, as you do, and popped on to the Oregon Craigslist thread. That thread is awesome but must get 20 new posts a day. I've had to turn off notifications from Tacoma World because of it. It's too much. My settings are such, too, that when you don't check a thread once after getting a notification, it unsubscribes you. Long story short, I hadn't been on that thread for a few weeks and randomly popped in on a rainy Sunday afternoon. As it turns out, someone in Seattle area was giving away...not selling cheaply but actually giving away...some OME BP-51 coilovers. If I got the story right, they were terribly squeaky from Mag Chloride exposure and needed new lower ends but were not leaking and in altogether decent shape. The owner had been out of Tacomas for a while and just wanted these out of his garage. I re-read his post 20 times, shrugged my shoulders and called dibs.

    Monday was supposed to be rainy again, not good for farm work, and my winter job doesn't start til next week, so why not make a little road trip up to Seattle? I could combine trips and drop off my center console to Will in Maple Valley. If the coilover deal was in fact real, I figured I could just drop them off at ARB USA in Auburn for a rebuild, too.

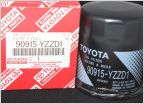
    Long story short (again), there was an actual human (a very generous and friendly one) who showed up to the arranged meeting spot in NW Seattle and gave me 4 giant boxes of Toyota stuff. BP-51's in good shape, a case of Royal Purple 5w-30, a bunch of YZZD3 filters, spark plugs and new factory front end hardware, all, in fact free. It was like Christmas morning. I still can't believe my good fortune.

    ARB USA tech support wasn't super friendly or helpful (rainy, cold Monday AM after daylight savings. Who could blame them?) and said since the gear isn't leaking, they don't need a rebuild. I asked if I could stop by and purchase new lower ends and he said their facility isn't set-up for retail but did give me the part numbers I needed. Not a complete waste of anyone's time so I won't even call that part a swing and a miss.

    Since I can't persuade my wife to get rid of her 2006 DCSB, the BP-51's will get new lower ends and hardware and all the parts will go on her truck as the start to a really nice, really cheap front end re-fresh.

    20231106_092631.jpg

    With a huge grin on my face, it was time to bomb over to Maple Valley and find Blue Dog Designs. Even though I emailed him the night before to let him know my plan, Will was a little surprised to see me on his home doorstep holding a big box filled with Tacoma interior parts.

    Hopefully he can knock out a factory looking center console bezel easily enough and have it back to me soon to finally wrap up this chapter of my build.
     
    Rezkid likes this.
  13. Nov 15, 2023 at 5:37 AM
    #73
    DesertRatliff

    DesertRatliff [OP] Well-Known Member

    Joined:
    Jan 14, 2012
    Member:
    #70618
    Messages:
    2,379
    Gender:
    Male
    Mt. Hood, OR
    Vehicle:
    Mas Tacos Por Favor
    Update and a little more info that might be helpful for the next person taking this on:

    Truck shifts awesome! I'm really, really happy about the swap but...

    A few weeks ago, I reached out to Justin at OTT to tune out the auto transmission functions on my ECM through HP Tuners. He sent me a tune that I flashed and all the check engine/VSC/trac lights disappeared with the exception of the A/T Temp light. "I'll sort that out later" I thought and took the truck for a few shakedown rides. I was stoked! The truck was so fun to drive and finally felt "right".

    The only real issues I was having, other than the A/T Temp light flashing, was a high idle speed (1300-1700RPM) even after warmup. Additionally, there was a delay or lag between shifts. When clutch was depressed/throttle released, gear selected, clutch pedal released and gas pedal re-pressed, there was a noticeable lag until the power came back on. It didn't feel like I was in full power mode, either. After the fueling delay, it felt like full power would come on for a fraction of second and then drop off again. I monitored timing via my Scan Gauge and the ECM was definitely pulling timing to go in to some limp mode. Additionally, the throttle felt notchy right at the point where you first touch the pedal. I reached back out to Justin about these issues but he told me there wasn't a way to adjust for any of this stuff through HP Tuners alone. Dang.

    Re-reading manual tranny swaps here, it appears the only way around all of this is with a manual tranny ECU/ECM. So I'm on the hunt for a cheap ECM from a 2013-2014 manual trans 4x4 Tacoma PN: 89661-04G80 or 04G81 if anyone reading has a lead. Thanks!

    [​IMG]

    Last of all, Cruise Control isn't working. While I was reading and re-reading through some posts trying to figure out the fueling issue, I stumbled on SparkyIX's post here about the Cruise Control:


    "Well final update on this swap, I officially got the cruise control working.
    Ign power to pin 1 of the upper clutch switch, and pin 2 ran down to the PCM Connector E9 Pin 27.
    After a brief test drive, all is working as it should be."


    Looks like I just need to jump a few more wires when I find and plug in a new ECM. I'll keep my fingers crossed nothing changed from 2009 to 2014 in regards to the Cruise Control and give it a shot. Thanks Sparky!
     
    Last edited: Dec 8, 2023
  14. Nov 15, 2023 at 7:16 PM
    #74
    waffleiron

    waffleiron Well-Known Member

    Joined:
    May 29, 2020
    Member:
    #329757
    Messages:
    316
    Washington
    Stoked you're enjoying your swap though, definitely and inspiration for me to talk to my gf about doin this, arguably the hardest part of the whole thing.

    be curious if the ecm swap would get rid of the lights you were getting.

    Good to know about cruise control, something I briefly looked at the electrical for on my truck, hopefully it being adaptive won't change a whole lot.

    Also since I have a display that shows P,R,N,D....the one thing I can't seem to figure out is if will always be displayed in "P"
     
    DesertRatliff[OP] likes this.
  15. Nov 15, 2023 at 7:39 PM
    #75
    DesertRatliff

    DesertRatliff [OP] Well-Known Member

    Joined:
    Jan 14, 2012
    Member:
    #70618
    Messages:
    2,379
    Gender:
    Male
    Mt. Hood, OR
    Vehicle:
    Mas Tacos Por Favor
    The only light I still have on is the A/T Temp light flashing. The rest were turned off in HP Tuners so it'll be interesting if it's all off with the new ECM without HP Tuners (although I will have to reassign the VIN and do the handshake immobilizer with HP Tuners anyway).

    I havent gotten a manual trans display so PRND is still visible but only R lights up. I'm not sure how that works for 3rd gens.

    Good luck with the gf. If I had known before I started how quickly this swap would add up and admitted that info to my wife, I would still be driving the old transmission, I'm sure of it!
     
  16. Nov 16, 2023 at 1:41 PM
    #76
    waffleiron

    waffleiron Well-Known Member

    Joined:
    May 29, 2020
    Member:
    #329757
    Messages:
    316
    Washington
    What was your solution for the drive shafts? Didnt see that mentioned.
     
  17. Nov 16, 2023 at 5:47 PM
    #77
    DesertRatliff

    DesertRatliff [OP] Well-Known Member

    Joined:
    Jan 14, 2012
    Member:
    #70618
    Messages:
    2,379
    Gender:
    Male
    Mt. Hood, OR
    Vehicle:
    Mas Tacos Por Favor
    The RC62f and A750f are the same length, so that was a gimme. It's the 2nd gen's RA60f that's an inch shorter. I'm not sure how this works out for 3rd gens, though, but I'd take a wild shot from the hip and say its plausible that, with Toyota trying actively to reduce part variation in their engineering, that the auto and manual trannies are the same length. Wild, wild shot and based on zero actual info though so...
     
  18. Nov 24, 2023 at 7:46 PM
    #78
    anthony250f

    anthony250f Well-Known Member

    Joined:
    Feb 18, 2012
    Member:
    #73066
    Messages:
    16,666
    Gender:
    Male
    First Name:
    Anthony
    San Diego, CA
    Vehicle:
    2008 dcsb trd offroad 4wd
    Did you find the ECU? I got mine for like 70 bucks or so on eBay and had Justin put my VIN in it.
     
    This site contains affiliate links for which the site may be compensated.
    #78
  19. Nov 25, 2023 at 5:57 AM
    #79
    DesertRatliff

    DesertRatliff [OP] Well-Known Member

    Joined:
    Jan 14, 2012
    Member:
    #70618
    Messages:
    2,379
    Gender:
    Male
    Mt. Hood, OR
    Vehicle:
    Mas Tacos Por Favor
    $70!?!? Wow. That's awesome.

    I looked on ebay but settled on one from a wrecker on car-part.com for $200 shipped. The guy that helped me was super helpful and sent me all the pics I requested but didn't see that the connector stops on two of the connectors were pulled out. They said no returns on electrical stuff but I convinced them to let me send it back for a refund.
    20231121_074744.jpg

    So found another one on car-part from LKQ and am going to pick it up in person to inspect it when it arrives from Texas. Then Justin will do his magic and I'll be down the road!
     
    This site contains affiliate links for which the site may be compensated.
    #79
  20. Nov 25, 2023 at 8:41 AM
    #80
    anthony250f

    anthony250f Well-Known Member

    Joined:
    Feb 18, 2012
    Member:
    #73066
    Messages:
    16,666
    Gender:
    Male
    First Name:
    Anthony
    San Diego, CA
    Vehicle:
    2008 dcsb trd offroad 4wd
    Oh wow, yeah they must be way cheaper for a 2008.

    I just ordered the rest of my oem parts to do the swap.

    can’t start the swap until my wife stops driving the truck lmao
     
    DesertRatliff[OP] likes this.

Products Discussed in

To Top