

-
Welcome to Tacoma World!
You are currently viewing as a guest! To get full-access, you need to register for a FREE account.
As a registered member, you’ll be able to:- Participate in all Tacoma discussion topics
- Communicate privately with other Tacoma owners from around the world
- Post your own photos in our Members Gallery
- Access all special features of the site
 Lower ball joint p/n confusion
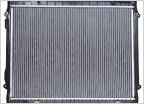 Cheap Radiator until Champion is fixed
 [Looking for] 1st Gen Tacoma - Rear BUmper Tire Carrier
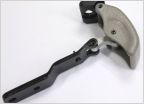 Notorious rear quarter window latch failures
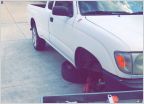 5 lug 2WD wheel/tires help
 Valve cover gasket replacement. Engine won’t stay on.
1st gen sludge in the valve cover 130k miles
Discussion in '1st Gen. Tacomas (1995-2004)' started by Dutchtaco1gen, Feb 8, 2021.
Page 2 of 2
Page 2 of 2


