1. Welcome to Tacoma World!

    You are currently viewing as a guest! To get full-access, you need to register for a FREE account.

    As a registered member, you’ll be able to:
    • Participate in all Tacoma discussion topics
    • Communicate privately with other Tacoma owners from around the world
    • Post your own photos in our Members Gallery
    • Access all special features of the site

Front End Work

Discussion in '1st Gen. Tacomas (1995-2004)' started by ChinoXL, May 20, 2024.

  1. May 20, 2024 at 6:55 PM
    #1
    ChinoXL

    ChinoXL [OP] Well-Known Member

    Joined:
    Apr 21, 2024
    Member:
    #448344
    Messages:
    76
    Vehicle:
    95 Tacoma V6 MT 4x4 Xtracab
    I’ve been working on my truck’s front end since the driver side came “apart” almost a month ago. I’ve done the driver’s side: upper and lower ball joint, tie rod end, CV Axle; and passenger side: lower ball joint and tie rod end.

    I’m going to tackle the passenger upper ball joint and steering rack this weekend. Once this is done I will feel comfortable getting an alignment, although I plan on replacing the passenger CV axle with a NAPA extended CV axle in the near future.

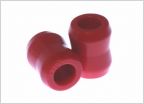
    Will the new CV axle affect my alignment? Also does anyone have any advice, tips or tricks for doing the rack and pinion? I believe I have all the tools and parts needed (got an Energy Suspension bushing kit so I can replace any bushings the new rack didn’t come with). Will the 19mm center bolt on the rack be reachable with normal tools? The one that points down to the ground and is only accessible from above.

    How much ATF will I lose/need to replace?

    Thanks Taco World.
     
  2. May 21, 2024 at 4:53 AM
    #2
    Black97v6MT

    Black97v6MT 366k on the 0D0 ... 5VZFE R150F 4WD

    Joined:
    May 9, 2024
    Member:
    #449422
    Messages:
    1,276
    First Name:
    iMA0
    tacoLand USA
    28 years of livin' Gen1 TacoLife...
    have you watched timmy toolman video on the rack replacement?
     
    ChinoXL[OP] likes this.
  3. May 21, 2024 at 5:15 AM
    #3
    ChinoXL

    ChinoXL [OP] Well-Known Member

    Joined:
    Apr 21, 2024
    Member:
    #448344
    Messages:
    76
    Vehicle:
    95 Tacoma V6 MT 4x4 Xtracab
    I didn’t realize he had one! That guy is very helpful. Thank you.
     
    Black97v6MT likes this.
  4. May 21, 2024 at 5:30 AM
    #4
    Black97v6MT

    Black97v6MT 366k on the 0D0 ... 5VZFE R150F 4WD

    Joined:
    May 9, 2024
    Member:
    #449422
    Messages:
    1,276
    First Name:
    iMA0
    tacoLand USA
    28 years of livin' Gen1 TacoLife...
    he does a good job on explaining that rear down bolt you mention
    it is tricky if you do NOT have the proper leverage onit
     
  5. May 21, 2024 at 5:53 AM
    #5
    ChinoXL

    ChinoXL [OP] Well-Known Member

    Joined:
    Apr 21, 2024
    Member:
    #448344
    Messages:
    76
    Vehicle:
    95 Tacoma V6 MT 4x4 Xtracab
    I have a very long 3/4 drive breaker bar with a 1/2 drive adapter that I suppose I can make work with the right extension and a deep 19mm socket. I’m trying to get it all sorted out in my head so everything goes smoothly this weekend.
     
    Black97v6MT likes this.
  6. May 21, 2024 at 5:59 AM
    #6
    Black97v6MT

    Black97v6MT 366k on the 0D0 ... 5VZFE R150F 4WD

    Joined:
    May 9, 2024
    Member:
    #449422
    Messages:
    1,276
    First Name:
    iMA0
    tacoLand USA
    28 years of livin' Gen1 TacoLife...
    are you able to stand directly underneath your truck at the rack
    that probably makes getting that bolt loose (if it is very tight) a much easier task without having to worry about ground clearance on that very long breaker bar
     
  7. May 21, 2024 at 6:05 AM
    #7
    ChinoXL

    ChinoXL [OP] Well-Known Member

    Joined:
    Apr 21, 2024
    Member:
    #448344
    Messages:
    76
    Vehicle:
    95 Tacoma V6 MT 4x4 Xtracab
    If you mean getting the truck up on a lift, unfortunately no I won’t be able to do that. I could always use my shorter handle 1/2 inch ratchet with a boxed end wrench on the end for leverage.

    Thanks for brainstorming with me.
     
    Black97v6MT likes this.
  8. May 21, 2024 at 7:32 AM
    #8
    Red_03Taco

    Red_03Taco Well-Known Member

    Joined:
    Nov 2, 2021
    Member:
    #381170
    Messages:
    1,814
    Gender:
    Male
    First Name:
    Jerad
    Vehicle:
    2003 Tacoma Xtra Cab 4WD
    A ratcheting box end wrench will be your friend for that bolt you're worried about. There's not much vertical space for fitting a ratchet wrench + socket in there. And an additional box end wrench can be wedged into the open end for added leverage.
     
    Sklar likes this.
  9. May 21, 2024 at 10:32 AM
    #9
    rocknbil

    rocknbil Well-Known Member

    Joined:
    Jan 5, 2023
    Member:
    #414860
    Messages:
    1,119
    Gender:
    Male
    First Name:
    Bill
    Vehicle:
    2003 Taco Ext Cab DLX TRD 4WD MT 3.4L
    It should not.

    Did this last year. Timmy's video is great, a few things aside I learned . . .


    Have it on good jackstands - do not skimp on this one, your front wheels will be off and you don't want it to fall over.

    Yes, and contrary to what I've read you can get a breaker bar and torque wrench in there.

    Before starting anything lock your steering column. Don't use the key lock, it's rarely center. You want to lock the steering wheel dead center. I used ratchet straps fastened to the seat mounts on both sides. This is really important so you can center up the new rack.

    An OEM rack, right? You'll regret it later if it fails earlier than expected.

    The process is fairly simple - disconnect TRE's, remove swaybar to get room to move the rack rearward, you'll need the room to cuss at the PS lines and rag joint. Slide rack back, disconnect PS lines and steering column rag joint. The bolt that comes in from the front will not completely come out without removing an A-arm, but don't do that. It will slide forward enough to get the rack out and do the work.

    Get a set of good flare nut wrenches for removing the PS lines - do not use open end wrenches. Even with flare nut wrenches I bunged up one of the fittings on the lines, and no way was it going back on a new rack, so plan for that possibility. The return line is a short stub you can replace, the input high pressure line you'd have to replace the whole thing. Jury is out on creating a new flare union with it in the truck, I wouldn't do it.

    An impact wrench is helpful for removal of the bottom three bolts. a breaker bar and torque wrench with at least 150 ft/lbs capability are essential.

    Have new swaybar bushings on hand, they're cheap and you'll wish you had. Note the swaybar orientation when removing, it's easy to try and install it backwards. Don't ask how I know.

    When removing swaybar links you'll see there's not much room behind the link to stop the bolt from turning (and on reassembly.) You will definitely need a set of these to get that under control.
    [​IMG]

    The absolute worst part for me was getting the TRE's to drop out once the castle nut was off. I broke my favorite puller tool, sprayed PB Blaster until I was blue, and almost gave up. You'll need PB Blaster, a puller that fits the TRE's, and a BAH.

    Leave the nut flush with the top of the TRE so you can hammer it, but most of the hammering will be on the side of the spindle where the TRE goes in. TRE's are pretty cheap, just get a new set for your new rack.

    The rag joint can be a real beotch. Advised is to mark the two halves before separating, this is one place where locking the wheel is helpful so on reassembly your wheel is not at 30 degrees to go straight.

    There's not a lot of room to work in there, you'll see this in Timmy's video. You're supposed to be able to loosen and remove the upper pinch bolt, remove the two rag joint bolts holding the upper half, and the top half of the rag joint will slide up the shaft. In practice, this is not often the case, mine was rusted up and required a lot of convincing (tapping) to get it to slide up. I wound up having to Dremel one of the bolts off. Replaced all the rag joint bolts, but miraculously didn't damage the joint or anything upstream from the joint. Use caution when trying to drive the joint up the shaft, there's a U-joint above you don't want to damage.

    On re-assembly, note the new output shaft on the rack has "witness marks" to align it with the body and center up the rack. This is the other reason you really want your steering wheel locked dead center. In Timmy's video he had it off a tooth or so, and it's one bolt and a few more expletives to slide the shaft up and twist it a spline or two to center it up. If you pay close attention to centering everything up, marking parts for removal, you can hit it right on the first try. If you're off a little, an alignment can center it out, but now you'll have more TRE threads on one side or the other.

    As did I . . . the OEM rack only comes with the ones in the rack body, they're pretty easy to remove and replace with the ES bushings. It does not come with the large one held in place by the U clamp. Did you also get the ES grease? You don't need much, three of the little squeeze tubes will do. Poly is notorious for squeaking and the ES grease is super sticky, grease them up before assembly. If you didn't, do not use petroleum based grease, it accelerates rubber deterioration. Use a good silicon based grease.

    [​IMG]

    All of it . . should only be a couple quarts, while you're at it, pull the PS reservoir and clean the screen really well. You don't want boulders floating in and destroying your new rack.

    On startup, don't freak out (like I did) when it screams like a wild banshee. It took quite a while for me to get it fully bled and quiet down. Leave it on the stands and crank the wheel full right, hold, full left, hold, shut off, check fluid. Repeat process until the reservoir stays more or less at cold full. Take it off the stands, repeat until it quiets down and you can take the first test drive, which will be to a trusted mechanic/tire shop for an alignment.
     
    Last edited: May 21, 2024
    ChinoXL[QUOTED][OP] likes this.
  10. May 21, 2024 at 11:15 AM
    #10
    ChinoXL

    ChinoXL [OP] Well-Known Member

    Joined:
    Apr 21, 2024
    Member:
    #448344
    Messages:
    76
    Vehicle:
    95 Tacoma V6 MT 4x4 Xtracab
    Hmm, are you referring to the 19mm bolt that threads in from the top? From the videos it doesn’t look like a ratcheting boxed end wrench would be able to reach down on the other side of the rack.

    rocknbil: I got an OEM rack from the dealership. I saw a video on centering the rack with vice grips by turning it all the way to one side, counting the turns back the other way, and then turning back halfway. Does this sound right? The boot spins freely around the input (output) shaft on the rack, and I don’t trust the witness marks.

    My steering wheel is NOT currently centered when driving straight and the toe is out on both front wheels. When I had the lower and upper ball joint, and cv axle failure last month and replaced it all along with the OTRE, the steering wheel ended up pointing slightly to the left. Is this something I should correct when installing the new rack? Would this be corrected at the rag joint or with the tie rod ends?

    Both tie rod ends are new so I shouldn’t have any issues with those and I will be replacing the jam nuts. I do have silicone grease for the bushings. I will also be sure to clean out the reservoir on the pump, thanks for that tip. My sway bar attempted to delete itself a few years back so I finished the job and no longer have to deal with it.

    I am now mainly concerned about getting the steering wheel back on “straight”. When the LBJ failed and the tire was drug underneath the truck by the tie rod end, would this have caused the steering wheel to be cocked to the left? Therefore making the problem correctable at the OTRE? So I assume I shouldn’t make any adjustments at the rag joint: just mark it as is and reassemble it the same, then let the shop do the alignment and get the steering wheel straight.
     
    Last edited: May 21, 2024
  11. May 21, 2024 at 11:51 AM
    #11
    rocknbil

    rocknbil Well-Known Member

    Joined:
    Jan 5, 2023
    Member:
    #414860
    Messages:
    1,119
    Gender:
    Male
    First Name:
    Bill
    Vehicle:
    2003 Taco Ext Cab DLX TRD 4WD MT 3.4L
    Goodonya, it will outlast any aftermarket rack.

    This doesn't sound right and I would question it at the dealer. The boot is not supposed to spin free, it's supposed to spin as the output shaft spins. Another AdventureTaco pic . . .

    [​IMG]

    Your approach will probably work but still, these things aren't cheap and the marks on a new or even remanufactured one should be right.

    Well, the idea is to center everything down to the rack, then have it realigned to correct toe issues. The idea is you should have an equal number of threads on both sides on the TRE's, whether it's toed in or out. There's a lot of unknowns here (something bent/damaged when the ball joints failed?) Eliminate as many as possible. If you know the steering wheel is centered and know the rack is centered, adjustments can be made at the alignment shop at the TRE's.

    Correct, the rag joint doesn't adjust, the only thing that can go wrong there is it would be 90 degrees off if you turned it on reassembly. :-D Even that shouldn't be possible, as I recall there are two bolts going up, two bolts going down (sorry, I may be mis-remembering.)

    If you do adjust, you'd do it by removing the steering shaft at the rack output shaft and move it left/right a spline or two. At this point, tie the steering wheel to center, center the output shaft of the rack before assembly, and get the TRE's as close as possible; let the alignment shop adjust it from there.

    I really can't say, but it's entirely possible that much force pulled something hard enough to throw the whole mess out of whack. I could see the rack being pulled out of position or the rack bolts getting bent - not saying that's what happened but something like that may be possible. At this point the best you can do is due diligence to center up the components and get a proper alignment on it, see what happens.
     
  12. May 21, 2024 at 12:13 PM
    #12
    Dirty Pool

    Dirty Pool FLIES ON THE FRIES, KETCHUPS WATERED DOWN

    Joined:
    Mar 24, 2013
    Member:
    #100471
    Messages:
    2,325
    Gender:
    Male
    59.4 Miles, 56.67° NE Of Moab
    Vehicle:
    99 XCAB V6 MT TRD
    Dirty Pool rear bumper/air tank with integrated spare CV shaft storage, DP customized TJM front bumper, 8000 lb Ramsey/Technora rope, E-locked, Extended breathers with front diff catch can, PCV catch can, SAWs with DP heim joint seals, DP custom 6 leaf rear springs/Billies, DP custom skids, 2lo, Gray wire, Cap, Bed Rug, Black steelies, 01 Center console, Map lights, Disraeli gears
    The boot can be rotated around the shaft with little effort. It is not "keyed" to the shaft in any way. It just fits in a groove with a little friction.
    Handling during shipping/install could easily move it. Always best to physically center the rack.
    [​IMG]
    [​IMG]
     
  13. May 21, 2024 at 12:37 PM
    #13
    Red_03Taco

    Red_03Taco Well-Known Member

    Joined:
    Nov 2, 2021
    Member:
    #381170
    Messages:
    1,814
    Gender:
    Male
    First Name:
    Jerad
    Vehicle:
    2003 Tacoma Xtra Cab 4WD
    I'm referring to the 19mm bolt that is oriented vertically in the middle portion of the rack. I recall my torque wrench not being able to fit with a short socket onto the head of that bolt, because of things above the rack interfering. I could be mistaken on this part, as it's been a couple years. A ratcheting box end wrench would solve that issue (and is a great tool in general for tighter spaces like that one).
     
    ChinoXL[QUOTED][OP] likes this.
  14. May 21, 2024 at 12:43 PM
    #14
    Burro

    Burro Well-Known Member

    Joined:
    Jun 11, 2018
    Member:
    #256064
    Messages:
    197
    SoCal
    Vehicle:
    98 v6 4x4 xtracab
    My rack wasn't correctly centered and that rubber boot moved during shipping. I had Firestone align it as it was, they set the toe camber and caster and then I was able to center the wheel as close as I could after. It was 30 degrees off in both directions so I picked one side and now I have more threads on one tie rod than the other after another alignment. Is this okay, or is there something bent on my truck? I assume that wasn't intended to be that way from the factory?
     
    ChinoXL[OP] and Black97v6MT like this.
  15. May 21, 2024 at 12:45 PM
    #15
    Black97v6MT

    Black97v6MT 366k on the 0D0 ... 5VZFE R150F 4WD

    Joined:
    May 9, 2024
    Member:
    #449422
    Messages:
    1,276
    First Name:
    iMA0
    tacoLand USA
    28 years of livin' Gen1 TacoLife...
    ...Wondering if that will put abnormal wear on the rack ends aka inner tie rod ends?
    With the uneven # of threads on the otre
     
  16. May 21, 2024 at 1:02 PM
    #16
    Burro

    Burro Well-Known Member

    Joined:
    Jun 11, 2018
    Member:
    #256064
    Messages:
    197
    SoCal
    Vehicle:
    98 v6 4x4 xtracab
    My only other thought to get more adjustment would be to unstake the steering wheel from the shaft and correct it that way? That way I believe the clock spring would still be happy, but I'm not sure if those splines have any more granularity than the ones on the rag joint
     
  17. May 21, 2024 at 1:17 PM
    #17
    ChinoXL

    ChinoXL [OP] Well-Known Member

    Joined:
    Apr 21, 2024
    Member:
    #448344
    Messages:
    76
    Vehicle:
    95 Tacoma V6 MT 4x4 Xtracab
    Okay. So before I go disconnecting tie rods, I will get the actual tires pointing as straight ahead as I can with the steering wheel (which will leave steering wheel canted left). I will then mark the OTREs with paint so I can hopefully return as close as possible to my current (bad but not terrible) alignment and remove the OTREs. When disconnecting the rag joint, I will turn the steering wheel to access the second bolt easier, ultimately returning the steering wheel to center. I will then center the steering rack as best as I can and proceed to install it. Before I reinstall the rag joint, I will ensure the steering wheel is centered. I will then connect the rag joint to the steering rack. After everything is back together and the wheels are on, I suppose I will then follow a guide to get the toe alignment close enough to take it to a shop. Thanks everyone for your input so far, hopefully everything goes swimmingly and I won’t be back with more questions.
     
    Burro likes this.
  18. May 26, 2024 at 8:56 PM
    #18
    ChinoXL

    ChinoXL [OP] Well-Known Member

    Joined:
    Apr 21, 2024
    Member:
    #448344
    Messages:
    76
    Vehicle:
    95 Tacoma V6 MT 4x4 Xtracab
    Hopefully this can help someone else out. My truck has 272k miles on it and this all should have been done a while ago.

    Yesterday I replaced the upper ball joint and today I replaced the steering rack. Both OEM parts. We will see how the NAPA tie rod ends hold up. Reman O’Reilly power steering pump has developed a slight whine (noticed before replacing steering rack).

    Having my dad as a second set of hands made things much easier.

    The upper ball joint was fairly simple to remove using a pickle fork and BFH to separate from UCA and an OMT ball joint press set to press out of the knuckle. A flat, thick piece of metal on the bottom of the unit was *essential* for pressing it back into the knuckle. The C clip is easily removed by driving a small flathead screwdriver underneath one end and prying up, grabbing it with a set of lineman’s pliers and pulling outward and up. Overall, this was not the easiest job but so worth not paying a shop to do it.

    The steering rack went about as best as it could have, granted the rag joint was a pain. My truck is fairly rust-free having (seemingly) lived in dry climates the majority of its 29 year lifespan. This being the case, I was very surprised with how difficult the upper half of the rag joint was to push upwards on the steering shaft splines. This was eventually accomplished by putting a pry bar below the upper pinch bolt and repeatedly whacking it until it moved up enough to get some clearance. Later on, I whacked it downwards by inserting the pry bar through the wheel well. I then put anti seize on the splines of the steering shaft as well as all other splines and pushed and pulled from below the truck until the rag joint broke free and slid smoooothly.

    The inside power steering line to the rack (the one with the larger nut) began twisting the steel line when removing. I grabbed the line as lightly as I could with vice grips to keep it from turning and this worked like a charm.

    Bleed the system with the truck off first.
    Edit to elaborate: bleed the system with the truck off and jacked up. I didn’t have my tires mounted at this point.

    To center the rack, lightly grab the top of the output shaft ABOVE THE SPLINES with a shop towel/rags for cushion and vice grips. Turn to lock one way. Count number of turns to other lock, divide by two and turn that number to center. Optional: paint one spline to use as reference. I chose one at 12 o clock at full driver side lock.

    Tie rod end removal is a breeze with the OTC 6295 front end set, I don’t like the idea of beating on the LBJ to separate.

    3/10 on the fun scale but 12/10 on the peace of mind scale. Would recommend any and all first gen owners get their trucks up in the air and check those lower ball joints, inner/outer tie rod ends and steering rack bushings.
     
    Last edited: May 27, 2024
    rocknbil, Black97v6MT and Burro like this.
  19. May 27, 2024 at 3:47 AM
    #19
    Black97v6MT

    Black97v6MT 366k on the 0D0 ... 5VZFE R150F 4WD

    Joined:
    May 9, 2024
    Member:
    #449422
    Messages:
    1,276
    First Name:
    iMA0
    tacoLand USA
    28 years of livin' Gen1 TacoLife...
    have you done anything with the front wheel bearings on your rig?

     
  20. May 27, 2024 at 7:35 AM
    #20
    ChinoXL

    ChinoXL [OP] Well-Known Member

    Joined:
    Apr 21, 2024
    Member:
    #448344
    Messages:
    76
    Vehicle:
    95 Tacoma V6 MT 4x4 Xtracab
    I have not…yet.
     
    Black97v6MT[QUOTED] likes this.

Products Discussed in

To Top