

-
Welcome to Tacoma World!
You are currently viewing as a guest! To get full-access, you need to register for a FREE account.
As a registered member, you’ll be able to:- Participate in all Tacoma discussion topics
- Communicate privately with other Tacoma owners from around the world
- Post your own photos in our Members Gallery
- Access all special features of the site
 Completely Flushing a 240k mi Automatic Transmission
 What performance rotors and pads to you run with stock calipers?
 4WD conversion - Request for 4WD computer Part Number
 PO131.....2004 year. Just for ideas from Tacoma owners
 Fender flair clips really hard to find
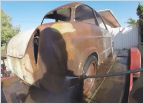 Rust question
1997 Extra Cab Frame Swap Project/ Restoration Build
Discussion in '1st Gen. Tacomas (1995-2004)' started by Dan496, Jul 2, 2024.
Page 1 of 3
Page 1 of 3


