

-
Welcome to Tacoma World!
You are currently viewing as a guest! To get full-access, you need to register for a FREE account.
As a registered member, you’ll be able to:- Participate in all Tacoma discussion topics
- Communicate privately with other Tacoma owners from around the world
- Post your own photos in our Members Gallery
- Access all special features of the site
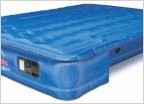 Air matress that will fit 6 foot bed?
 Difference in VVT-I/Camshaft gears
 Help with EGR vent visor on amazon
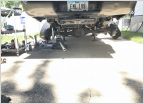 6112s in the front. Whats the best option for rear shocks with 1" spacer block?
Rusty Frame Questions (Gen 2 Tacoma)
Discussion in '2nd Gen. Tacomas (2005-2015)' started by CB_2AOR, Jul 28, 2024.


