

-
Welcome to Tacoma World!
You are currently viewing as a guest! To get full-access, you need to register for a FREE account.
As a registered member, you’ll be able to:- Participate in all Tacoma discussion topics
- Communicate privately with other Tacoma owners from around the world
- Post your own photos in our Members Gallery
- Access all special features of the site
 Coolant Replacement Kit
 Mirror stock headunit to smartphone wirelessly $60 amazon thoughts?
 Planning a big 30,000 mile service.
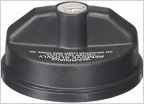 LOCKING FUEL CAP/ OTHER THAN STANT 10504.
 OEM front camera install
 Fob
FobTwin Stick Transfer Case Spoofer + Timing Transfer Case Actuator
Discussion in '3rd Gen. Tacomas (2016-2023)' started by Sep1911, Aug 6, 2024.


