

-
Welcome to Tacoma World!
You are currently viewing as a guest! To get full-access, you need to register for a FREE account.
As a registered member, you’ll be able to:- Participate in all Tacoma discussion topics
- Communicate privately with other Tacoma owners from around the world
- Post your own photos in our Members Gallery
- Access all special features of the site
 All Cleaned up!
 Fj t case swaps
 Good range handheld radios?
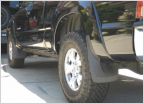 Mud Flaps
 Sky Silver SR5 make over part numbers guide. 285s and color match
 Turning off the seat belt reminder on a 2015
Drum brake issues after brake job
Discussion in '2nd Gen. Tacomas (2005-2015)' started by chickenwarrior, Sep 2, 2024.


