

-
Welcome to Tacoma World!
You are currently viewing as a guest! To get full-access, you need to register for a FREE account.
As a registered member, you’ll be able to:- Participate in all Tacoma discussion topics
- Communicate privately with other Tacoma owners from around the world
- Post your own photos in our Members Gallery
- Access all special features of the site
 Gears and Lockers??
 Vantrue N3 Touch Screen Dual Dash Cam Group Buy
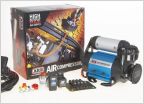 **CLOSED**ARB compressors 5.0 - Group Buy**
 FS: Trek Deck Stove Mount for Decked
 **CLOSED**ARB Snorkels 2.0 - Group Buy**
CLOSED: GROUP BUY: 3RD GEN CENTER CONSOLE MOLLE 25% OFF, ROUND #1
Discussion in 'Automotive Group Buys' started by GDESMOND1976, Sep 14, 2020.
Page 8 of 8
Page 8 of 8

