1. Welcome to Tacoma World!

    You are currently viewing as a guest! To get full-access, you need to register for a FREE account.

    As a registered member, you’ll be able to:
    • Participate in all Tacoma discussion topics
    • Communicate privately with other Tacoma owners from around the world
    • Post your own photos in our Members Gallery
    • Access all special features of the site

Home Improvement Today?

Discussion in 'Garage / Workshop' started by Hotdog, Jul 28, 2008.

  1. Oct 2, 2024 at 7:04 PM
    FortuneFavorstheBruin

    FortuneFavorstheBruin Well-Known Member

    Joined:
    Mar 11, 2018
    Member:
    #247018
    Messages:
    1,143
    Gender:
    Male
    First Name:
    Zack
    Austin, Texas
    Vehicle:
    2018 Tacoma Off-Road
    well if it can't be fixed with a hammer it must be an electrical issue is what i always say
     
    Kremtok[QUOTED] likes this.
  2. Oct 2, 2024 at 7:08 PM
    Kremtok

    Kremtok Well-Known Member

    Joined:
    Jan 15, 2017
    Member:
    #207630
    Messages:
    1,754
    Gender:
    Male
    First Name:
    Gary
    Houston, TX
    Vehicle:
    2021 Tesla Model 3 Long Range AWD
    2018 Triumph Street Triple RS
    Yup I concur. Sounds like an electrical problem.
     
  3. Oct 2, 2024 at 7:12 PM
    Panchovilla6192002

    Panchovilla6192002 Well-Known Member

    Joined:
    Dec 2, 2018
    Member:
    #274502
    Messages:
    964
    Gender:
    Male
    Arizona
    Vehicle:
    2019 Cavalry Blue TRD SPORT 4X4 DCSB MT 2003 Red ExtraCab MT 5 lug
    Just run wire from the fan box to your first light fixture and then from that fixture to the next. That is assuming you have the fan and the light on separate switches already
     
  4. Oct 2, 2024 at 8:04 PM
    Aaron O.

    Aaron O. Well-Known Member

    Joined:
    Dec 16, 2022
    Member:
    #413411
    Messages:
    284
    Gender:
    Male
    First Name:
    Aaron
    Denver, CO
    Vehicle:
    2023 Tacoma Off Road DCLB
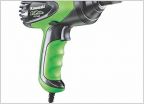
    Quick question to those of you who have hung your own kitchen cabinet uppers. Did you pre drill the holes where the screws were going to go through the back of the cabinets into the studs or did you just use cabinet screws and an impact driver? Have some cabinets coming at the end of the month and none of the DIY vids mention pre drilling holes but I really don’t want to screw up the new cabinets the day I go to install them!
     
  5. Oct 2, 2024 at 8:17 PM
    TwistedTLM4

    TwistedTLM4 Unknown Member

    Joined:
    Jul 6, 2011
    Member:
    #59396
    Messages:
    3,124
    Gender:
    Male
    Philadelphia, PA
    Vehicle:
    '05 DCSB TRD Sport
    WeatherTech Floor Mats, WeatherTech Bug Shield and Vent Visors, Audio Upgrade, RaamAudio RaamMat & Ensolite, Mr. Marv's Custom 10" Sub Enclosure, Pop N Lock Electronic Tailgate Lock, mattgecko's Bedlights, Demello Offroad Single Hoop Bumper, Marathon Seat Covers, Leer Topper, OME885s on 5100s, @Blackout14 HD Leaf Pack
    Cabinet screws and impact driver.
    IMG_20241002_231734.jpg
     
    Last edited: Oct 3, 2024
    la0d0g, KojiKP, shakerhood and 4 others like this.
  6. Oct 3, 2024 at 3:07 AM
    Sig45

    Sig45 Well-Known Member

    Joined:
    Jun 21, 2012
    Member:
    #81045
    Messages:
    23,609
    Gender:
    Male
    First Name:
    Mark
    Maine
    Vehicle:
    2011 Tacoma TRD OR DC 4x4 & 2021 Tundra SR5 DC 4x4
    I pre-drill and use cabinet screws with an impact driver. With screw tip technology these days, pre-drilling probably isn't needed. If the backs are not plywood, I'd definitely pre-drill regardless of screw type.
     
  7. Oct 3, 2024 at 8:19 AM
    RxYoda

    RxYoda Well-Known Member

    Joined:
    Mar 19, 2024
    Member:
    #446157
    Messages:
    247
    Gender:
    Male
    First Name:
    Mark
    Florence, SC
    Vehicle:
    2023 Sport Premium 4x4 DCSB
    What is the back of your cabinets made of? I have a couple of approaches I have used for years (as a cabinet maker/builder). My priorities

    1. Make sure you are attaching to wall studs. Pre mark wall and back of cabinet.
    2. Make sure your screws are completely supported for entire length of the screw.
    3. Use large head screws 5/8” or larger.
    FASTCAP PHZ8.3-inch-50PC PowerHead 3-Inch Cabinet Installation Screws, 50-Pack, Zinc

    4. I usually built a jig (scrap 2x4 box at correct height) for cabinet to rest on while I mounted them.
     
    Last edited: Oct 3, 2024
  8. Oct 3, 2024 at 12:50 PM
    SR-71A

    SR-71A Define "Well-Known Member"

    Joined:
    Jun 1, 2018
    Member:
    #255145
    Messages:
    7,797
    Gender:
    Male
    First Name:
    Zack
    Southern Maine
    Vehicle:
    2012 DCSB, TX Baja Edition. Barcelona Red
    255/85/R16 Falken Wildpeak MTs, Mobtown sliders, ARB bar, SOS front skid, Icon RXT leafs, extended & adjustable Kings, JBA UCAs, OVS wedge RTT, dual AGM batteries, Gen2 xrc9.5 winch, CB, GMRS, S1 ditch lights...
    Hey folks, looking for advice or opinions on the "best" way to insulate the floor above a crawl space area. I thought I had a decent plan, but it's one of those things the more I read the less I know. Ill outline some specifics related to my project and my original plan below. Criticisms or first hand experience welcome.

    Im located in central / southern Maine FYI. Majority of the basement is a full basement. Block walls and a poured floor, nothing special there. Then there is an addition on the side that is more of a crawl space area. Block walls with a dirt floor. With a block wall separating the two parts of the basement. The furnace (forced hot air) and all plumbing is in the main section of the basement so that space is "heated" to some extent.

    When I moved in there was nasty moldy pink fiberglass, plastic sheeting, and foam board all up under the floor in that unheated section (foam, then plastic, the fiberglass if you were looking up). A lot of that had fallen down over time. The parts still in tact had obviously pooling of moisture on top of the plastic. This summer I ripped all of that nasty shit out (including about a dozen mouse nests). After that was cleaned up I put down heavy 6 mil polyethylene to cover the dirt floor. That made a big difference in the humidity in the basement.

    Getting to the question - whats the best way to insulate that and prevent the floor above from being cold all winter long? I had planned to use Rockwool Comfortbatt and no vapor barrier. But thats where I start to read lots of conflicting info.
     
  9. Oct 3, 2024 at 1:01 PM
    FortuneFavorstheBruin

    FortuneFavorstheBruin Well-Known Member

    Joined:
    Mar 11, 2018
    Member:
    #247018
    Messages:
    1,143
    Gender:
    Male
    First Name:
    Zack
    Austin, Texas
    Vehicle:
    2018 Tacoma Off-Road
    I do, they are separate switches on the wall plate. Is there a guide to tapping into the power source for them?
     
  10. Oct 3, 2024 at 1:06 PM
    Denk

    Denk Well-Known Member

    Joined:
    Oct 11, 2012
    Member:
    #88739
    Messages:
    1,173
    Gender:
    Male
    PNW
    Vehicle:
    '13 Spruce TRD Sport DCSB
    Is caulk tape just smoke, or a legit product?

    upload_2024-10-3_13-6-48.png
     
  11. Oct 3, 2024 at 1:09 PM
    Andy01DblCabTacoma

    Andy01DblCabTacoma Well-Known Member

    Joined:
    Mar 12, 2021
    Member:
    #359086
    Messages:
    3,896
    Gender:
    Male
    First Name:
    Andy
    San Diego, CA
    Vehicle:
    01 Double Cab v6 4x4 TRD
    F: Kings SPC, R: 5100s+J59s. Custom armor.
    I think you should call an electrician.
     
  12. Oct 3, 2024 at 2:28 PM
    FortuneFavorstheBruin

    FortuneFavorstheBruin Well-Known Member

    Joined:
    Mar 11, 2018
    Member:
    #247018
    Messages:
    1,143
    Gender:
    Male
    First Name:
    Zack
    Austin, Texas
    Vehicle:
    2018 Tacoma Off-Road

    I agree but they all want $2000 for 2 hours of work.
     
    KRAMERICA and MGMDesertTaco like this.
  13. Oct 3, 2024 at 2:57 PM
    TRDaddio

    TRDaddio Well-Known Member

    Joined:
    Sep 30, 2024
    Member:
    #457959
    Messages:
    76
    Gender:
    Male
    Vehicle:
    2024 TRD Sport
    None

    My house in NE wears built in 1836 as a hunting cabin and is now 2300sq. Made of wood with wood siding. Next to a river! When am I not working on it Hahah! We just purchased 2 years ago. Did a major framing repair to one corner. Took out a door and window on the back of garage so I can hang my tool cabinate system. I graded the whole yard replanted grass and put up a 6foot fence all buy my self. Picket by picket. None of those premade panels. Redid the downstairs bathroom top to bottom. Wired the house with 10gb Ethernet and wireless access points. Put up lights and fixtures. Painted almost every room a new color. And so much more. Guess who has a garage full of new tools though! That’s right! This guy lol
     
  14. Oct 3, 2024 at 4:06 PM
    Danner488

    Danner488 Well-Known Member

    Joined:
    Oct 13, 2021
    Member:
    #379560
    Messages:
    151
    Gender:
    Male
    Vehicle:
    2016 TRD Sport
    We had a company do spray foam underneath our cabin. The Breathable Home | Improving Home Energy Efficiency | Central Maine
    Also used them for an energy audit and Efficiency Maine rebate program for upgrades to the insulation in our house. Spray foam on the basement walls and additional blown in for the attic.
     
    OZ-T, wilcam47 and Toyko Joe like this.
  15. Oct 3, 2024 at 4:21 PM
    Andy01DblCabTacoma

    Andy01DblCabTacoma Well-Known Member

    Joined:
    Mar 12, 2021
    Member:
    #359086
    Messages:
    3,896
    Gender:
    Male
    First Name:
    Andy
    San Diego, CA
    Vehicle:
    01 Double Cab v6 4x4 TRD
    F: Kings SPC, R: 5100s+J59s. Custom armor.
    It's just scary to give someone electrical advice over the internet.

    Get yourself a non contact voltage tester.

    Then do some digging - pull the switches, test with the non-contact tester, turn off the breaker, and then test again. Once you're certain there isn't juice to the box, start mapping things out.

    You may have a common power source into the switches, and two runs of 14-2 (14 gauge, 2 conductor, black, white, bare copper) out to the fan if you're lucky.

    If that's the case, you just need to route the run controlling the light functionality of the fan to your first retrofit light, and then daisy chain them from there.

    If there is only one run from that switch box to the fan (14-3, black, white, red, bare copper) you have a different problem, where the red would be the load for the light, and black the load for the fan. In that case you'd need to run another length of 14-2 romex to the box and attach that to your first light.

    There could be a ton of different ways your house is wired up... But yeah.. non contact tester, turn the breaker off...
     
  16. Oct 3, 2024 at 4:33 PM
    Sig45

    Sig45 Well-Known Member

    Joined:
    Jun 21, 2012
    Member:
    #81045
    Messages:
    23,609
    Gender:
    Male
    First Name:
    Mark
    Maine
    Vehicle:
    2011 Tacoma TRD OR DC 4x4 & 2021 Tundra SR5 DC 4x4
    No expert, but that heavy mil poly on the dirt floor should control the moisture problems. I'd make sure it's sealed nicely along the block/perimeter. Is there any venting in that crawl space? Could also put some rigid foam along the block wall. For the floor, fiberglass should be good if the moisture is under control. Gravity sucks, so maybe some strapping attached to the bottom of the floor joists to keep it in place. I've seen that reinforced nylon tape strung along & stapled on floor joists to keep the insulation in place too.
     
    OZ-T and SR-71A[QUOTED] like this.
  17. Oct 3, 2024 at 4:44 PM
    MGMDesertTaco

    MGMDesertTaco Come on, live a little...

    Joined:
    Jan 30, 2021
    Member:
    #354573
    Messages:
    9,725
    Gender:
    Male
    I've never had a use/need for it and I certainly wouldn't try and stop any toilet leaks with it as shown in that picture. What project did you have in mind for it?
     
    308savage and Sig45 like this.
  18. Oct 3, 2024 at 4:47 PM
    Sig45

    Sig45 Well-Known Member

    Joined:
    Jun 21, 2012
    Member:
    #81045
    Messages:
    23,609
    Gender:
    Male
    First Name:
    Mark
    Maine
    Vehicle:
    2011 Tacoma TRD OR DC 4x4 & 2021 Tundra SR5 DC 4x4
    Never heard of it.
    Never seen any professional (or anyone) use it.
     
    308savage and wilcam47 like this.
  19. Oct 3, 2024 at 7:28 PM
    Pointeman

    Pointeman Well-Known Member

    Joined:
    Aug 11, 2017
    Member:
    #226590
    Messages:
    1,720
    Gender:
    Male
    First Name:
    Mark
    Vehicle:
    2013 Pyrite Mica Tacoma DCLB
    6" Fabtech Amp Research hydraulic steps Front Runner Cab Rack Leer 100xr topper w/rails 17” Black Rhino Warlords Dark Tint 295/70R17 Nitto Ridge Grapplers
    Previous owner used it at base of tub. I’m sure it worked for a while but shortly after moving in the glue failed and trapped ever spec of dirt floating around on the bathroom floor. It was a pain to clean and more of a pain to remove and replace
     
    Sig45, MGMDesertTaco and wilcam47 like this.
  20. Oct 4, 2024 at 5:49 AM
    FortuneFavorstheBruin

    FortuneFavorstheBruin Well-Known Member

    Joined:
    Mar 11, 2018
    Member:
    #247018
    Messages:
    1,143
    Gender:
    Male
    First Name:
    Zack
    Austin, Texas
    Vehicle:
    2018 Tacoma Off-Road
    Sounds good, I understand 99% of what you're saying so I don't think that i'm that far off from where i need to be. I've wired and re-wired 2 different fans into the hole (I'm picky and didn't like the ones I bought) so I shouldn't be in too much danger. Cutting and mounting the cans is the easy part, it's the splicing and connecting that leaves me puzzled.
     

Products Discussed in

To Top