

-
Welcome to Tacoma World!
You are currently viewing as a guest! To get full-access, you need to register for a FREE account.
As a registered member, you’ll be able to:- Participate in all Tacoma discussion topics
- Communicate privately with other Tacoma owners from around the world
- Post your own photos in our Members Gallery
- Access all special features of the site
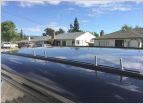 Roof Basket on Camper Shell Easy Install
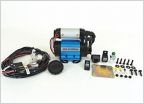 Wiring for Dummies!!! Help us solve some basic/common electrical issues
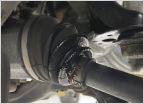 CV Axle Boot Repair
Reflections on 2TRFE Timing Cover Leak Repair (On a rebuild to boot)
Discussion in 'Technical Chat' started by Johnnyjtaco, Mar 20, 2022.
