1. Welcome to Tacoma World!

    You are currently viewing as a guest! To get full-access, you need to register for a FREE account.

    As a registered member, you’ll be able to:
    • Participate in all Tacoma discussion topics
    • Communicate privately with other Tacoma owners from around the world
    • Post your own photos in our Members Gallery
    • Access all special features of the site

Boomtacoma's 86/96 build

Discussion in '1st Gen. Builds (1995-2004)' started by Boomtacoma01, Dec 16, 2024.

  1. Dec 16, 2024 at 2:22 PM
    #1
    Boomtacoma01

    Boomtacoma01 [OP] Well-Known Member

    Joined:
    Dec 7, 2009
    Member:
    #27162
    Messages:
    1,377
    Gender:
    Male
    First Name:
    Chris
    Houston
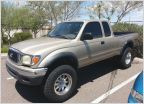
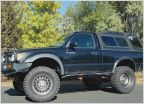
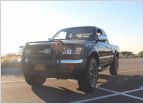
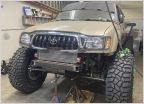
    Apparently I'm a glutton for punishment. I wanted to get a run around truck to help keep some mileage off of the tow rig. I found a pristine 86 XtraCab body a while back and a deal on a 96 Tacoma 3RZ 4x4. It has a slight CO lift, AALs in the rear, a set of new 31s, new radiator, plugs, wires and runs like a top. I'm going to use the Taco drivetrain and transplant the interior, gauges, steering column, dash and electronics into the 86 cab. Planning on running a set of Skinny 35" Interco SX2s on some Tacoma wheels that I had left over from my 02 Tacoma. Ill be picking up the 35/10/16 SX2s on the way back from the project I'm currently on. Should be a fairly straightforward swap (to an extent). I will more than likely freshen up the motor a bit while I have access to it easily. The Tacoma has working AC and Heat which is a plus. I may end up replicating the boost setup I'm currently building for the 2Rz for the Red Truck. We'll see..

    I found some frame dimension drawings for the 2nd gen truck and 1st gen regular cab. The front 4 mounts line up just about perfectly. The width between the frame may need to be adjusted outward a tad. I will have to figure out the frame extensions at the end after the body swap is done. It's only approximately 8-10 inches of frame extension in round numbers. Or, I will just build a custom bed depending on where the rear axle CL ends up. It may be a bit too close to the rear of the cab.

    On to the pics...

    [​IMG]

    [​IMG]

    [​IMG]

    [​IMG]

    [​IMG]

    [​IMG]
     
  2. Dec 16, 2024 at 2:26 PM
    #2
    Boomtacoma01

    Boomtacoma01 [OP] Well-Known Member

    Joined:
    Dec 7, 2009
    Member:
    #27162
    Messages:
    1,377
    Gender:
    Male
    First Name:
    Chris
    Houston
    Started chopping up the 86 and disassembling the Tacoma. No turning back now. I have way too many tires in my garage lol...

    [​IMG]

    [​IMG]

    [​IMG]

    [​IMG]

    Upon further disassembly, the whole front end is being rebuilt. Always fun opening up Pandora’s box. New parts galore. Rotors, pads, CVs, lower ball joints. Lower control arms, upper ball joints, coilovers, and upper ball joints. I’m having to relearn all this ifs stuff. New parts are budget minded to get it going again: Mevotec, Detroit axle and Moog..

    Back to roller status. Got the 35s mounted on the refinished wheels. Replaced a ton of parts. Almost ready to pull the bed and cab.

    [​IMG]

    [​IMG]

    [​IMG]

    [​IMG]

    [​IMG]
     
  3. Dec 16, 2024 at 2:28 PM
    #3
    Boomtacoma01

    Boomtacoma01 [OP] Well-Known Member

    Joined:
    Dec 7, 2009
    Member:
    #27162
    Messages:
    1,377
    Gender:
    Male
    First Name:
    Chris
    Houston
    Got a few steps closer over the weekend.
    Pulled the bed, knocked out another 10 lbs of dried mud, repaired and re-loomed the rear wiring harness and clearanced the cab on the 86 for the gas tank.

    [​IMG]

    [​IMG]

    [​IMG]

    I've been cleaning up the engine bay and deleting shit that's not necessary. Pulled the old brown top injectors/installed a new set of Pink tops, deleted the EGR and made some block off plates, deleted the coolant lines to the throttle body and replaced the worn out body mounts.

    Donor cab is rigged with my engine hoist to stab onto the Tacoma chassis and drive train...
    Gonna try to stab it on tomorrow an see how the body mounts line up.
     
  4. Dec 16, 2024 at 2:30 PM
    #4
    Boomtacoma01

    Boomtacoma01 [OP] Well-Known Member

    Joined:
    Dec 7, 2009
    Member:
    #27162
    Messages:
    1,377
    Gender:
    Male
    First Name:
    Chris
    Houston
    [​IMG]

    [​IMG]

    [​IMG]

    [​IMG]

    [​IMG]


    Cut off the old body mounts, modified them and tacked them in to their new home. Went fairly smoothly. I have a new steering rack on the way which should be here Monday. Going to pull the old one and stab the new one in before I drop the cab on the newly positioned body mounts.

    [​IMG]

    [​IMG]

    [​IMG]
     
  5. Dec 16, 2024 at 2:32 PM
    #5
    Boomtacoma01

    Boomtacoma01 [OP] Well-Known Member

    Joined:
    Dec 7, 2009
    Member:
    #27162
    Messages:
    1,377
    Gender:
    Male
    First Name:
    Chris
    Houston
    The cross bars should line up with the braces on the Weatherguard packrat tool box I picked up. All the square tubing is 1.5” .25wt. I trimmed the frame rails back to align with the base of the tube bed. I’ll tie them together with some .25” plate. The risers are some 3x3 square tubing 2.5” line that I ripped down the center.

    [​IMG]

    [​IMG]

    [​IMG]
     
    Yetimetchkangmi likes this.
  6. Dec 16, 2024 at 2:37 PM
    #6
    Boomtacoma01

    Boomtacoma01 [OP] Well-Known Member

    Joined:
    Dec 7, 2009
    Member:
    #27162
    Messages:
    1,377
    Gender:
    Male
    First Name:
    Chris
    Houston
    Steering rack and pinion is finally replaced what a bitch. Drained the 2 year old gas from the tank, dumped it in the back yard, got the Fire Dept called on me by my neighbors, normal shit there LOL. Engine harness has been fed through the firewall and plugged in. Had to clearance the floor of the cab behind the river seat for the horse collar since it was hitting. I had to enlarge the hole for the Gas tank. I'm about 90 percent done with the sheet metal cover for that. I ordered a radiator and some other misc. parts to get this about 90% of the way there for start up. Body mounts had to be tweaked slightly and are in their final locations just need to burn them in.. Its hell having more than one project to work on. Gotta get this thing moveable since I ordered a Chassis to to build and I need room in the garage...

    Instead of relocating the battery to the Driver side, I decided to mount ion the pass side like it was on the 2nd Gen originally. Extended the cables and modified the batt hold down bracket last night. Added an Ebay Hot air intake and got it plumbed.

    To Do:

    -hook up heater core hoses
    -install TC shifter bushing
    -weld front clip to the body

    -finish installing dash
    -seats
    -install doors and hood
    -swap rear diff
    -mount radiator and overflow
    -nut and bolt check front suspension
    -check all the grounds
    -check all fluids and oil
    -add fresh gas
    -leak check
    -attempt to start and not burn down the garage


    Been trying to get this shit knocked out. I'm also widening my car hauler 8" along with doing some maintenance on the Crawler.

    Dash is 75% in. I need to attach the shifter linkage to the transmission. The center vent is proving to be a bitch. I need to get some coolant and fresh gas and see if it starts up.

    [​IMG]

    [​IMG]

    [​IMG]

    [​IMG]

    [​IMG]

    New OEM grille and headlight buckets from a buddy.

    Doors on and wiped down. Not to bad for some almost 40 year old paint!!

    [​IMG]

    [​IMG]
     
    This site contains affiliate links for which the site may be compensated.
    #6
    ToyRyd04 likes this.
  7. Dec 16, 2024 at 2:38 PM
    #7
    Boomtacoma01

    Boomtacoma01 [OP] Well-Known Member

    Joined:
    Dec 7, 2009
    Member:
    #27162
    Messages:
    1,377
    Gender:
    Male
    First Name:
    Chris
    Houston
    Well this 3rz purrs like a kitten. Need to get the trailer out of the way, throw a seat in and take it for a spin around the block and see I don't run over any kids.

    Still hammering away at the interior and other ancillary items.
     
    Yetimetchkangmi likes this.
  8. Jan 14, 2025 at 5:01 AM
    #8
    Boomtacoma01

    Boomtacoma01 [OP] Well-Known Member

    Joined:
    Dec 7, 2009
    Member:
    #27162
    Messages:
    1,377
    Gender:
    Male
    First Name:
    Chris
    Houston
    Got a little more accomplished. Found a set of Mastercraft seats on FB marketplace which I was sure that was a scam. I was pleasantly surprised. I didn’t get shanked and got them for 300 for the pair. Got a set of inner door panels from Flintstone Fab. Getting real close now. Not everything matches but oh well….


    [​IMG]


    [​IMG]

    [​IMG]
     
    Speedytech7, ToyRyd04 and nl_tacoma like this.
  9. Jan 15, 2025 at 6:40 PM
    #9
    Agent004

    Agent004 Member

    Joined:
    Jan 7, 2025
    Member:
    #463725
    Messages:
    24
    Gender:
    Male
    Vehicle:
    Custom 2004 4door long bed trd
    Simple lift, custom long bed, rack ,and winch with lights
    Is this going to be a flatbed?
     
  10. Jan 23, 2025 at 5:13 PM
    #10
    TRoss1

    TRoss1 Member

    Joined:
    Sep 1, 2023
    Member:
    #432588
    Messages:
    13
    Gender:
    Male
    Chris! Cool build! Did I see the ol' 85 in the background? When I first saw this thread thought you were re-body-ing it...
     
  11. Jan 27, 2025 at 4:05 PM
    #11
    Boomtacoma01

    Boomtacoma01 [OP] Well-Known Member

    Joined:
    Dec 7, 2009
    Member:
    #27162
    Messages:
    1,377
    Gender:
    Male
    First Name:
    Chris
    Houston
    It is going to have a Weatherguard pack rat tool box/Flatbed..
     
    Agent004[QUOTED] likes this.
  12. Jan 27, 2025 at 4:06 PM
    #12
    Boomtacoma01

    Boomtacoma01 [OP] Well-Known Member

    Joined:
    Dec 7, 2009
    Member:
    #27162
    Messages:
    1,377
    Gender:
    Male
    First Name:
    Chris
    Houston
    What's up Ted!!

    Yeah I still have it for now. I just bought a new chassis to build a rear steer buggy so the ol 85 will be for sale soon.
     
    Last edited: Feb 21, 2025
  13. Jan 28, 2025 at 6:37 PM
    #13
    TRoss1

    TRoss1 Member

    Joined:
    Sep 1, 2023
    Member:
    #432588
    Messages:
    13
    Gender:
    Male
    Awesome! ..well, not for the '85. I should have kept BR oh well.

    Are you doing a build thread on the buggy? Forum?
     
  14. Feb 14, 2025 at 8:23 AM
    #14
    Boomtacoma01

    Boomtacoma01 [OP] Well-Known Member

    Joined:
    Dec 7, 2009
    Member:
    #27162
    Messages:
    1,377
    Gender:
    Male
    First Name:
    Chris
    Houston
    yeah I started one on IRATE4x4 in the General section, same username. I just got it picked up last weekend and slowly working on it now.
     
  15. Apr 2, 2025 at 12:49 PM
    #15
    Boomtacoma01

    Boomtacoma01 [OP] Well-Known Member

    Joined:
    Dec 7, 2009
    Member:
    #27162
    Messages:
    1,377
    Gender:
    Male
    First Name:
    Chris
    Houston
    Gonna spend some more time working on some finishing touches while I'm waiting on my Atlas II to come in for the buggy.

    To Do:

    -hook up heater core hoses - done
    -install TC shifter bushing
    -weld front clip to the body - done
    -finish installing dash
    -trim fenders
    -finish weld body mounts
    -seats -in progress
    -install doors and hood - done
    -swap rear diff
    -mount radiator and overflow - done
    -nut and bolt check front suspension
    -check all the grounds
    -check all fluids and oil
    -mount PackRat tool box
    -patch up cab body work
     

Products Discussed in

To Top