

-
Welcome to Tacoma World!
You are currently viewing as a guest! To get full-access, you need to register for a FREE account.
As a registered member, you’ll be able to:- Participate in all Tacoma discussion topics
- Communicate privately with other Tacoma owners from around the world
- Post your own photos in our Members Gallery
- Access all special features of the site
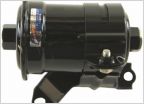 Part Number for Fuel filter
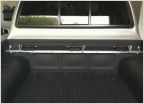 Truck bed bike mount
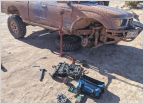 Changing cvs with manual hubs
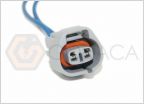 Corner Light Pigtail?
 Sound deadening insulation stages and how many sq ft double cab taco
What would be your next step for dealing with this brake booster/master cylinder issue?
Discussion in '1st Gen. Tacomas (1995-2004)' started by soccersmitty55, Dec 21, 2024.
Page 1 of 2
Page 1 of 2

