

-
Welcome to Tacoma World!
You are currently viewing as a guest! To get full-access, you need to register for a FREE account.
As a registered member, you’ll be able to:- Participate in all Tacoma discussion topics
- Communicate privately with other Tacoma owners from around the world
- Post your own photos in our Members Gallery
- Access all special features of the site
 Apple CarPlay
 Need Some help deciding on the First two mods to my Tacoma OR
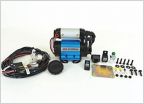 Bed Inverter Wiring for ARB Compressor (CKMA12)
 Products for plastic trim
 Best Dash Cam For Off Roading? Need Advice!
 Fumoto valve install with RCI skid
Borked it and need help
Discussion in '3rd Gen. Tacomas (2016-2023)' started by Dravnx, Mar 23, 2025.


