

-
Welcome to Tacoma World!
You are currently viewing as a guest! To get full-access, you need to register for a FREE account.
As a registered member, you’ll be able to:- Participate in all Tacoma discussion topics
- Communicate privately with other Tacoma owners from around the world
- Post your own photos in our Members Gallery
- Access all special features of the site
Quick Links: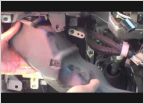 Steering wheel feels too "free" at highway speed
 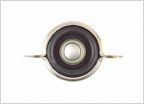 Drive shaft support bearing
  What would be your next step for dealing with this brake booster/master cylinder issue?
 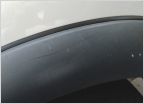 Repair Cuts in Wheel Well Trim
 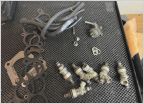 FYI: New fuel injectors solved problems
  Possible to run a 4 prong harness with a shell’s 3rd brake light?
Who has done a complete suspension replacement?
Discussion in '1st Gen. Tacomas (1995-2004)' started by shankyjones, Feb 19, 2025.


