-
Welcome to Tacoma World!
You are currently viewing as a guest! To get full-access, you need to register for a FREE account.
As a registered member, you’ll be able to:- Participate in all Tacoma discussion topics
- Communicate privately with other Tacoma owners from around the world
- Post your own photos in our Members Gallery
- Access all special features of the site
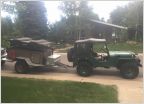 3378jakesr5 expedition trailer build
 PcBuilder's 2016 Yamaha FZ-07 Build
 The BS Daycare but no build thread
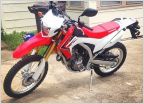 PcBuilder's 2014 Honda CRF250L Build
 Jlemmonds 06' GX470 "The Adventure Wagon" build, bs and trip report thread.
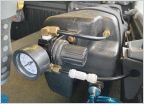 Always Pressurized Waterport
T-Bucket build? Or rat style jalopy.
Discussion in 'Other Builds' started by Deathbysnusnu, May 19, 2025.
Page 2 of 3
Page 2 of 3