

-
Welcome to Tacoma World!
You are currently viewing as a guest! To get full-access, you need to register for a FREE account.
As a registered member, you’ll be able to:- Participate in all Tacoma discussion topics
- Communicate privately with other Tacoma owners from around the world
- Post your own photos in our Members Gallery
- Access all special features of the site
 Rear seat covers for dogs.
 Use 4th Gen Cameras for recording
 2024 4th Gen grab handles?
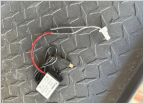 Installed dash cam using factory pigtail.
 Locking hitch pin not long enough
DCDC charger install for camper
Discussion in '4th Gen. Tacomas (2024+)' started by Thegreatgretz, Jul 27, 2025.


