

-
Welcome to Tacoma World!
You are currently viewing as a guest! To get full-access, you need to register for a FREE account.
As a registered member, you’ll be able to:- Participate in all Tacoma discussion topics
- Communicate privately with other Tacoma owners from around the world
- Post your own photos in our Members Gallery
- Access all special features of the site
 Another stupid headlight bulb question
 SR5 Grill Mod
 SL or load range e?
 Waze?
Waze?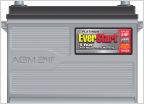 Battery replacement
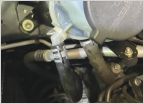 Power steering return line leaking at reservoir
Just finished gutting my Taco to install under-carpet sound deadening. Decibel difference & pics.
Discussion in '3rd Gen. Tacomas (2016-2023)' started by jerbee, Jul 28, 2025 at 2:29 PM.


