

-
Welcome to Tacoma World!
You are currently viewing as a guest! To get full-access, you need to register for a FREE account.
As a registered member, you’ll be able to:- Participate in all Tacoma discussion topics
- Communicate privately with other Tacoma owners from around the world
- Post your own photos in our Members Gallery
- Access all special features of the site
 Truck is rattling, especially at 45mph - 55mph, and having a hard time accelerating up hill.
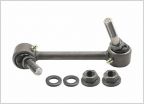 Heavy Duty / Greasable Sway Bar End Links?
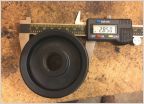 URD 2.85 stealth supercharger pulley install
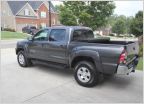 Pop and Lock pl8540 install truck will not lock
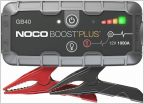 Jumpstarter?
 Adhesive Removal From Headlight?
Building a Topper
Discussion in '2nd Gen. Tacomas (2005-2015)' started by Michigan333, Jul 23, 2025.


