-
Welcome to Tacoma World!
You are currently viewing as a guest! To get full-access, you need to register for a FREE account.
As a registered member, you’ll be able to:- Participate in all Tacoma discussion topics
- Communicate privately with other Tacoma owners from around the world
- Post your own photos in our Members Gallery
- Access all special features of the site
 Hella H4 100/55w Halogen
 Euro vs pencil vs cornering beams
 Best 7x6 headlight housing for Taco 97"?
 Where to mount HID ballasts?
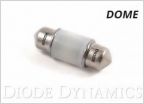 2019 Map Light, Dome Light and Vanity Light Stock Types/Sizes?
 Parking Lights and Turn Signals as DRLs
Morimoto Mini Stage III Kit (H1) bulb mounting?
Discussion in 'Lighting' started by sfcadams, Mar 24, 2012.