1. Welcome to Tacoma World!

    You are currently viewing as a guest! To get full-access, you need to register for a FREE account.

    As a registered member, you’ll be able to:
    • Participate in all Tacoma discussion topics
    • Communicate privately with other Tacoma owners from around the world
    • Post your own photos in our Members Gallery
    • Access all special features of the site

Door Mounted Tweeter Install Write-up

Discussion in 'Audio & Video' started by thewhiteknight, Oct 25, 2012.

  1. Oct 25, 2012 at 10:18 AM
    #1
    thewhiteknight

    thewhiteknight [OP] Well-Known Member

    Joined:
    Jun 5, 2011
    Member:
    #57803
    Messages:
    90
    Gender:
    Male
    First Name:
    Colby
    SW Alabama
    Vehicle:
    06 PreRunner TRD SR5 Dbl Cab
    foglight anytime, HIDs, lift, bilstein 5100s, AAL, LED interior, LEDs, BHLM, extended rear diff vent mod, upgraded audio system,
    This is one of my first write-ups so bare with me.

    This is for 05 and up Tacomas. This one is an 06.

    I looked around and haven't seen anyone else with tweeters here, and i thought, why not?

    So i figured i would try it.

    Time: about a hour and a half if you take your time.

    Tools: drill, hole saw, wire cutters, screw driver

    Supplies: tweeters, zip-ties, glue, electrical tape, (beer?)
    And i was tired of my tweeters looking like this:
    [​IMG]

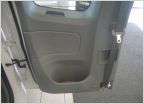
    I started out and removed this:
    [​IMG]

    I then got a 1 and 3/4" hole saw and cut a hole in it:
    [​IMG]

    I cut the center of the hole here:
    [​IMG]

    Since I already had a wire ran up to the top of the windshield, where the tweeters were, i used the same wire to pull through the door up to the tweeter. i removed the kick panels and door panels (the directions to remove the door panel are on here somewhere) I ran the wire through this rubber hose with the factory wires to the mirrors, window switches, etc. :
    [​IMG]

    I then cut a slit in the thin plastic on the door and pulled the wire through it:
    [​IMG]

    Then I secured the wire to the power mirror wires with zip ties:
    [​IMG]

    Then I hooked up the tweeter and test fit it:
    [​IMG]

    I did have to trim the back of the tweeter mount for clearance:
    [​IMG]

    Another test fit and it was perfect.

    Be sure when putting the panels back in place to not pinch any wires.

    Then I replaced all the panels popped everything back in place. and I was done. Much better i think.
    [​IMG]

    The other side is pretty similar so i only did the write-up on the driver's side..

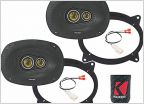
    A picture of the things i used:
    [​IMG]

    *All pics were taken with iPhone.
    **Not responsible for any damage caused to vehicle.
     
  2. Oct 25, 2012 at 3:24 PM
    #2
    ThreeMan

    ThreeMan Opinions Vary...

    Joined:
    Feb 22, 2008
    Member:
    #4880
    Messages:
    760
    Gender:
    Male
    Oswego, NY
    Vehicle:
    08 4x4 V6 TRD DCLB
    King Remote Resi Suspension - Total Chaos UCAs - Full Katzkin Leather - Leer Camper Shell - Custom Projector Halo Headlights - HID Fogs - Eagle Eye LED tail lights - Rigid Industries LED Light Bar Mounted in Bumper - Wade In-channel Vent Visors - K&N Filter - 20% on the fronts - Dakar Progressive Leafs - Fuel Beast Wheels wrapped in Hankook Dynapro ATMs - 4 Tie Down Mod - Pop N Lock - Billet Grille - Weathertech Mats - LED Map and Dome Lights - Optima Yellow Top - Redline Elite Hood Struts - Tunes: Eclipse 7100 HU - Eclipse IPC-106 Interface - Audison LRX 5.1K - Hertz Mille MLK2 Components - JL 13TW5 - JL cables and wires - Fully Deadened with SDS products - Metra dash kit - Custom Sub Box and Amp Rack - Still Under Construction.
    Nice work.
     

Products Discussed in

To Top