1. Welcome to Tacoma World!

    You are currently viewing as a guest! To get full-access, you need to register for a FREE account.

    As a registered member, you’ll be able to:
    • Participate in all Tacoma discussion topics
    • Communicate privately with other Tacoma owners from around the world
    • Post your own photos in our Members Gallery
    • Access all special features of the site
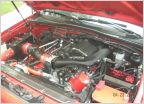
DIY Rear brake replacement?

Discussion in '2nd Gen. Tacomas (2005-2015)' started by JasonJump, Sep 23, 2010.

  1. Sep 23, 2010 at 10:23 AM
    #1
    JasonJump

    JasonJump [OP] Well-Known Member

    Joined:
    Apr 7, 2010
    Member:
    #34799
    Messages:
    801
    Gender:
    Male
    First Name:
    Jason
    Yukon Oklahoma
    Vehicle:
    '05 Tacoma TRD Sport 4X4 D Cab Debadged
    Billy 5100's set at 2.5, iPhone innerface, TRD Sport wheels powdercoated Anthracite grey wrapped in 265/70/17 Duratracs, Custom Sliders
    Ive searched all over and can't find a DIY rear brake drum replacement, I have had my fronts replaced and roters turned, and am still getting squeaking... read on here guys having the same issue and said it was the rear. So please if someone can post the link that would be great!
     
  2. May 20, 2013 at 7:37 AM
    #2
    parfleet

    parfleet Well-Known Member

    Joined:
    May 16, 2007
    Member:
    #1594
    Messages:
    70
    Gender:
    Male
    First Name:
    Rex
    Pensacola, FL.
    Vehicle:
    05 PreRunner, SR5 Package, 4.0 Engin
    Front Bush Guard with 100 Watt Driving Lights, Color Match Tonel Cover. Cold Air Intake By True Flow,added an additional 26 HP.
    I have changed brake pads numerous times during my life and have replaced the front pads and rotors on my 05 Tacoma PreRunner. A friend and I attempted to change the rear brake shoes on my Tacoma just yesterday. Here's what I now know, there are an awful lot of pins, springs, c-clips, etc. on the brake drum systems of these 2nd Generation Tacoma's. Even after my friend and I follow the instructions of "All Data", I wounded-up taking my Tacoma to the dealer this morning as my breaks are spongy, and the parking brake no longer functions. We must have done an incorrect install. So here's my advice, unless you are well versed on removing and installing drum brake systems, take it to the Dealer or at least to a shop that has ASE Technicians and absolutely insist as ASE Certified Tech do the break job. Brake pads on-the-other-hand are quite simple.
     
  3. May 20, 2013 at 12:40 PM
    #3
    92LandCruiser

    92LandCruiser Well-Known Member

    Joined:
    Feb 20, 2010
    Member:
    #31761
    Messages:
    8,324
    Gender:
    Male
    Nevada
    Vehicle:
    80 series Land Cruiser
    Cummins, tons, 40s
    Personally I don't think it's that difficult, there are a couple of springs that will piss you off if you don't have the right tools but overall as long as you do one side at a time it's not too bad. Just saying... sorry about your troubles and best of luck getting it all fixed up. :)
     
  4. May 20, 2013 at 12:58 PM
    #4
    sprocketgti3

    sprocketgti3 Well-Known Member

    Joined:
    Apr 11, 2009
    Member:
    #15836
    Messages:
    49
    Gender:
    Male
    First Name:
    Todd
    Sacramento CA
    Vehicle:
    Prerunner TRD
    TRD Air box TRD Exhaust Rear Swaybar Undercover Bed Cover Additional D-Ring rails installed, refab of oem rails. Steel Side bed lock box. 1" lift kit. Stainless Brake Lines Frt D-ring tie downs 12 VDC power port in rear bed Reinforced tailgate structure DRL cutout switch.
    Do one side at a time after you have both drums removed. That way you have a reference to look at when putting back together all the hardware. As for the adjusting, run out the adjuster just until the the shoes bar[SIZE=4]el[SIZE=4]y ru[SIZE=4]b. If you are [SIZE=4]not[SIZE=4] comfort[SIZE=4]able wit[SIZE=4]h you skills. [SIZE=4]Then pay a prof[SIZE=4]ession[SIZE=4]al[SIZE=4] for the job. BRAKES are a SAF[SIZE=4]ET[SIZE=4]Y ITEM. [SIZE=4]It's all about your L[SIZE=4]IABILIT[SIZE=4]Y If you [SIZE=4]get into a accident due to [SIZE=4]brake failure[/SIZE]!

    [SIZE=4]Goo[SIZE=4]d Luck![/SIZE][/SIZE]
    [/SIZE][/SIZE][/SIZE][/SIZE][/SIZE][/SIZE][/SIZE][/SIZE][/SIZE][/SIZE][/SIZE][/SIZE][/SIZE][/SIZE][/SIZE][/SIZE][/SIZE]
     
  5. May 20, 2013 at 7:22 PM
    #5
    Fury

    Fury Well-Known Member

    Joined:
    Feb 5, 2012
    Member:
    #72221
    Messages:
    160
    Gender:
    Male
    Hi all.

    Here is the procedure to facilitate the removal of the drum from the 2012 RM. Of course you may have to also use a hammer and/or the bolt method if they are rusted on.

    (a) Release the parking brake, and remove the rear brake
    drum.
    If the rear brake drum cannot be removed easily,
    perform the following procedures.
    (b) Remove the hole plug and insert a screwdriver through
    the hole into the backing plate, and hold the automatic
    adjusting lever away from the adjuster.
    (c) Using another screwdriver, contract the brake shoe by

    turning the adjusting bolt.

    Here is the procedure to adjust the shoes from the 2012 RM.

    (b) Remove the hole plug, and turn the adjuster to expand
    the shoe until the drum locks.

    (c) Using a screwdriver, release the adjuster 15 notches.

    Cheers
    Ray.
     

Products Discussed in

To Top