1. Welcome to Tacoma World!

    You are currently viewing as a guest! To get full-access, you need to register for a FREE account.

    As a registered member, you’ll be able to:
    • Participate in all Tacoma discussion topics
    • Communicate privately with other Tacoma owners from around the world
    • Post your own photos in our Members Gallery
    • Access all special features of the site

Ultra Gauge Mount 2nd Gen Tacoma

Discussion in '2nd Gen. Tacomas (2005-2015)' started by KC Sean, Jul 7, 2013.

  1. Jul 7, 2013 at 6:29 PM
    #1
    KC Sean

    KC Sean [OP] New Member

    Joined:
    Jul 7, 2013
    Member:
    #107806
    Messages:
    4
    Gender:
    Male
    First Name:
    Sean
    Kansas City
    Vehicle:
    2013 Black DCSB 4x4
    Grillcraft, Ultra Gauge, WeatherTechs, Moto-xtender, LEDs
    Hello,
    I've followed Tacoma World since I purchased my first Tacoma back in February of this year (2013). I've gotten so many good tips and ideas I figured it was time that I contributed something back to the community.

    I wanted to post some pics of my Ultra Gauge mount. With just a few inexpensive items from the local hardware store (less than $10.00 in parts) I was able to throw together a pretty nice little mount for my Ultra Gauge. I thought I'd post some pics here in case anyone else may be attempting the same install.
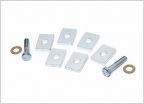
    1. Here are the basic parts. #1 conduit hanger, 1/4" short machine screws and nuts, L-bracket, washers and lock washers.securedownload.jpg
    2. Here are the parts assembled into the bracket and coated with some black plasti-dip. (one quick note: the machine screw behind the Ultra Gauge mount was a bit too tall...so I needed to file it down just a bit to clear).securedownload-2.jpgsecuredownload-3.jpg
    3. Here are some pics of the completed mount with the Ultra Gauge installed.securedownload-4.jpgsecuredownload-5.jpg
     
    Last edited: Jul 7, 2013
    BRONSON and TacoTacoma97 like this.
  2. Jul 7, 2013 at 7:36 PM
    #2
    5.56

    5.56 Well-Known Member

    Joined:
    May 19, 2013
    Member:
    #104446
    Messages:
    51
    Gender:
    Male
    OKC
    Vehicle:
    2013 DCSB Off Road
    Looks great! How'd you run the wire?
     
  3. Jul 7, 2013 at 7:46 PM
    #3
    KC Sean

    KC Sean [OP] New Member

    Joined:
    Jul 7, 2013
    Member:
    #107806
    Messages:
    4
    Gender:
    Male
    First Name:
    Sean
    Kansas City
    Vehicle:
    2013 Black DCSB 4x4
    Grillcraft, Ultra Gauge, WeatherTechs, Moto-xtender, LEDs
    Thanks!
    I removed the plastic cover on the driver's side A pillar (2 bolts that hold the "oh-$hit" handle in place) and ran the cable up that passageway. Then, I just used a small screwdriver to tuck the wire under the front edge of the headliner all the way across to the rear view mirror.
     

Products Discussed in

To Top