1. Welcome to Tacoma World!

    You are currently viewing as a guest! To get full-access, you need to register for a FREE account.

    As a registered member, you’ll be able to:
    • Participate in all Tacoma discussion topics
    • Communicate privately with other Tacoma owners from around the world
    • Post your own photos in our Members Gallery
    • Access all special features of the site

BAMF bolt-on slider Install

Discussion in '1st Gen. Tacomas (1995-2004)' started by TIPICOTACO, Oct 9, 2013.

  1. Oct 9, 2013 at 3:47 PM
    #1
    TIPICOTACO

    TIPICOTACO [OP] Well-Known Member

    Joined:
    Nov 22, 2010
    Member:
    #46556
    Messages:
    2,234
    Gender:
    Male
    First Name:
    Tyler
    nw nj
    Vehicle:
    '01 DC 4X4 TRD "RAD BARON"
    Some lift, some armor, some scratches..
    So today I did all the prep work for installing my new BAMF bolt-on kickout sliders! I received the sliders on Monday after a pretty long wait from when I ordered them in a GB a few months back; but after seeing the quality of the work and handling these beastly things it was well worth the wait!!

    I figured since I plan on actually using them as sliders it would be best to paint them myself so that it would be easier to touch them up once they get banged around.

    Here's the products I picked up at Wally world/Lowes - ~$50 total
    [​IMG]


    Because it was pouring rain on Monday when I received them; they had already started to develop some minor surface rust.


    First step was to take a wire wheel to them to remove the rust as well as scuff up the metal to promote better adhesion of the paint. I also rubbed them down with steel wool and a scotch brite pad (heavy duty green one, couldn't find the red one @ Lowe's)


    After they were sufficiently 'sanded' I wiped them down thoroughly w/ paint thinner and a white cloth. Then wiped them down again w/ a clean rag
    [​IMG]


    I applied the Rustoleum Clean Metal Primer in two stages; first a light coat then went back over them with a heavier coat making sure I covered every inch. I made sure that I liberally applied the primer at all the welds. (which looked great btw)
    [​IMG]


    Next, I went over the dry, primered sliders with a 320 grit sand paper really lightly and wiped away the dust w/ a slightly damp rag. After allowing them to fully dry I began spraying on the Rustoleum Fine Textured Paint (Black) again in two stages, light at first then a heavier thorough layer w/ a focus on the welds.
    [​IMG]


    I used up all three cans of black and allowed it to dry as I ran back to Walmart for another can (luckily only 5 min away) I used the final can for touch-ups and set them aside to dry. It's supposed to rain for the next couple days here so I'm gonna let them sit in my dad's garage until the weekend when I hope to get the mounted.


    I am really pleased w/ the finished look of the Rustoleum Textured Black paint and hope that my prep work pays off and the paint holds up well over time and abuse,
    [​IMG]
     
    Last edited: Oct 9, 2013
  2. Oct 9, 2013 at 3:47 PM
    #2
    TIPICOTACO

    TIPICOTACO [OP] Well-Known Member

    Joined:
    Nov 22, 2010
    Member:
    #46556
    Messages:
    2,234
    Gender:
    Male
    First Name:
    Tyler
    nw nj
    Vehicle:
    '01 DC 4X4 TRD "RAD BARON"
    Some lift, some armor, some scratches..
    I let the paint dry for 3 days and installed on Saturday after work. Everything was pretty straight forward but with a few details that complicated things. Took about 3 hours total including a few breaks to watch Penn State upset Michigan, Booyah!!

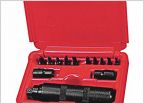
    Here are the tools that I used
    [​IMG]

    Corded drill 3/8" drive
    HSS drill bits in 3/16", 1/4", 3/8", and 1/2"
    3/4" combo wrench
    3/4" socket and 12mm socket
    3/8" allan key
    flat head screw driver
    BFH
    needle nose vise grips (not pictured)
    head lamp
    and of course safety glasses

    Lifting the sliders into place was much easier with a little help from Dad, but it could have been done solo w/ the use of jack stands. Jerrys attention to detail really showed here with how well the "U" channels fit over the frame. His measurements and alignment were right on :thumbsup: One thing making it a little harder for me is that my frame had been coated by Toyota about two years ago and the added thickness of the coating made it a pretty tight squeeze; but with a bit of force and a BFH we got the channels seated nicely, tight to the frame.

    note: on the PS, the clip holding the wire for the rear o2 sensor needs to be relocated to the hole above it, easy peezy w/ a flat head screwdriver.
    [​IMG]

    Jerrys design utilizes factory holes on my '01 DC to bolt on the rear and second from front legs. They aligned very well on both the DS and PS. After mocking the sliders into place I marked where the holes for both sides of the remaining legs needed to be drill and removed the sliders. If I had a 90* drill I might have been able to drill the holes w/ the sliders in place, but alas I was forced to do it the hard way.

    Drilling/ Bolting:

    PS - the cat/exhaust is in the way on the inside of the frame so I had to drill from the outside all the way through the other side. I used HSS bits in stages 3/16", 1/4", 3/8", and 1/2". They did a pretty nice job, but it was a little difficult to get the holes lined up perfectly level and the bolts were a tiny bit crooked. I sprayed the newly drilled hole w/ a quick shot of Rustoleum black and positioned the sliders into place. Using the 3/8" Allan on the outside and the 3/4" wrenches on the inside I tightly secured the legs to the frame.

    Bolted PS slider w/ relocated o2 wire
    [​IMG]


    DS - I actually found the DS to be a little more difficult. First I would recommend removing the bracket (12mm) that holds the ebrake to the frame to give you a little play in the cable. (replace when done)

    [​IMG]

    I mocked up the sliders same as the PS, marked my holes, and removed them. The front hole has to be drilled from the outside like the PS but the other can be drilled from either side. I positioned the slider into place and bolted them down. Tight squeeze w/ some hard lines too but it clears.

    [​IMG]

    The rear bolt is a real PITA because of how close the gas tank comes to the inside of the frame. It is right where the rear leg bolt hole is. The ebrake cable also hampers your ability to get the nut in place. I pushed the ebrake cable out of the way w/ a screw driver and used needle nose vise grips to hold the nut in place as I turned the bolt to get it to grab. After some finagling I got it threaded and left the vise grips on there until it was good-n-tight. I bailed on the supplied washer for that one cause it was just that tight a squeeze.

    [​IMG]


    BOOM!! they're installed :) I touched up some paint where the BFH had scratched them and painted all the bolts and nuts too. Very glad I didn't go for the powdercoat.

    They fit perfectly between the wheels and the clearance to the body is comfortable and consistent all the way around. The angle upward is ideal IMO and they don't stick too far out either (something I was afraid of) but still can easily serve as a step.

    Jerry makes a really GREAT PRODUCT!!!!

    [​IMG]

    [​IMG]

    added a little touch of "Rad" too
    [​IMG]
     
    Last edited: Oct 15, 2013
  3. Oct 9, 2013 at 3:48 PM
    #3
    TIPICOTACO

    TIPICOTACO [OP] Well-Known Member

    Joined:
    Nov 22, 2010
    Member:
    #46556
    Messages:
    2,234
    Gender:
    Male
    First Name:
    Tyler
    nw nj
    Vehicle:
    '01 DC 4X4 TRD "RAD BARON"
    Some lift, some armor, some scratches..
    Didn't get a chance to give them any kinda test today as me and the wife had some festive plans, but she likes em!!


    [​IMG]


    [​IMG]
     
    Last edited: Oct 13, 2013
  4. Oct 9, 2013 at 3:55 PM
    #4
    JLee

    JLee The Man! Vendor

    Joined:
    Jul 20, 2010
    Member:
    #40461
    Messages:
    19,561
    Gender:
    Male
    First Name:
    Jerry
    Benicia, CA
    Vehicle:
    02 Extra cab SAS Linked front and rear
    I lost track thousands of dollars ago.
    Looking good Tyler :cool:
     
  5. Oct 9, 2013 at 5:58 PM
    #5
    TejasYOTA

    TejasYOTA Countinuous improvement

    Joined:
    Oct 4, 2009
    Member:
    #23789
    Messages:
    344
    Gender:
    Male
    First Name:
    Nathan
    Country of TEXAS!
    Vehicle:
    "WOOKIE" 01 Tacoma DC TRD Limited 4WD
    Check the TTORA Garage Section....
  6. Oct 9, 2013 at 6:00 PM
    #6
    RJ MacReady

    RJ MacReady professional trousersnake charmer

    Joined:
    Nov 19, 2012
    Member:
    #91424
    Messages:
    963
    Gender:
    Male
    First Name:
    RJ/Mike Hauncho/HeavyHands
    US OUTPOST North 31-Mayday Mayday! We've found som
    Vehicle:
    00 4Runner 4WD LTD - Cheatin' Bitch Build 2
    Cheatin' bitch build 2: All stock for now... 99' Tacoma 4wd TRD Cheatin' bitch build 1: BG44K additive, motul 5w40(always), deckplate mod, K&N washable air filter, 2.5" flow master(cut thanks to Airdog), king fronts 2.5", all pro standard leaf pk, stainless steel rear ext brakeline, 5125's 10" travel rears, 4-jasper offroad 6" pod LED spot lights, secret compartment for small bottle of wild turkey, cobra CB, Hi-lift jack w/locking bed mount, hi lift curved bumper lift & road base plate, smittybuilt X20 winch, wab fab F&R bumpers w/ hitch receivers, smittybuilt 4in1 recov tool, 10gal mini flamethrower, 11 lbs dynamite sticks, 13 4-hr snowflares, .50Cal full auto mounted machine gun w/ RPG unit & a shitoad of death metal to fuckstart your brain...everything you need for first contact with a shape-shifting alien entity frozen for over 100,000 years reanimated & immitating all life it engulfs.
    very nice sliders & easy prepping.
     
  7. Oct 9, 2013 at 6:58 PM
    #7
    Madjik_Man

    Madjik_Man The Rembrandt of Rattle Can

    Joined:
    Dec 2, 2009
    Member:
    #26893
    Messages:
    19,194
    Gender:
    Male
    Colorado Front Range
    Vehicle:
    1998 Ext Cab 3.4 4x4 TRD 5MT, 2004 DC 3.4 4x4 TRD
    Those look great and I like the texture look and practicality (if they provide enough traction on wet sliders).

    But they won't hold up with abuse. Your first hit on a rock or dragging them across a rock and it'll go right down to bare metal.

    It's like scars... chicks dig them.
     
  8. Oct 9, 2013 at 7:04 PM
    #8
    TIPICOTACO

    TIPICOTACO [OP] Well-Known Member

    Joined:
    Nov 22, 2010
    Member:
    #46556
    Messages:
    2,234
    Gender:
    Male
    First Name:
    Tyler
    nw nj
    Vehicle:
    '01 DC 4X4 TRD "RAD BARON"
    Some lift, some armor, some scratches..
    if they're still slippery when wet I'm gonna add some 3M traction tape on top by the doors, My wife will be using my truck quite a bit more these days and she'll end up using it as her step...

    and I know the paint's gonna lose against the rock, that's why I figured its best to rattle can it. I just hope then when a scratch happens that the surrounding paint stays put and doesn't flake off much
     
  9. Oct 9, 2013 at 7:05 PM
    #9
    babytruck

    babytruck Babytruck, babytruck...I've got a babytruck :)

    Joined:
    May 17, 2011
    Member:
    #56797
    Messages:
    8,974
    Gender:
    Female
    NorCal
    Vehicle:
    2010 Barcelona AC 4x4 4.0 6spd
    That come out nice!
     
  10. Oct 9, 2013 at 7:08 PM
    #10
    TIPICOTACO

    TIPICOTACO [OP] Well-Known Member

    Joined:
    Nov 22, 2010
    Member:
    #46556
    Messages:
    2,234
    Gender:
    Male
    First Name:
    Tyler
    nw nj
    Vehicle:
    '01 DC 4X4 TRD "RAD BARON"
    Some lift, some armor, some scratches..
    Thanks for such an awesome product!! very well made, I am impressed with the quality!
     
  11. Oct 9, 2013 at 7:11 PM
    #11
    RockyMtnTRD

    RockyMtnTRD Wanderlust.

    Joined:
    May 4, 2011
    Member:
    #56088
    Messages:
    6,557
    Gender:
    Male
    First Name:
    Noah
    Colorado
    Vehicle:
    '11 TRD OR
    hack job
    I have banged my BAMF sliders on countless rocks, they never cease to amaze me. You will have to repaint them if you offroad though. I have to paint mine every time I come back from wheeling.
     
  12. Oct 9, 2013 at 7:12 PM
    #12
    RockyMtnTRD

    RockyMtnTRD Wanderlust.

    Joined:
    May 4, 2011
    Member:
    #56088
    Messages:
    6,557
    Gender:
    Male
    First Name:
    Noah
    Colorado
    Vehicle:
    '11 TRD OR
    hack job
    e8asurub_1deecfb5ae1f63168443a9981b87a87b6b9b7cc2.jpg

    Needless to say, you will be painting them again haha
     
  13. Oct 9, 2013 at 7:19 PM
    #13
    fouillard13

    fouillard13 Well-Known Member

    Joined:
    Jan 15, 2009
    Member:
    #12619
    Messages:
    1,170
    Gender:
    Male
    First Name:
    Riley
    Canadia
    Vehicle:
    1998 tacoma 4x4
    what did the sliders cost you shipped?
     
  14. Oct 9, 2013 at 7:29 PM
    #14
    TIPICOTACO

    TIPICOTACO [OP] Well-Known Member

    Joined:
    Nov 22, 2010
    Member:
    #46556
    Messages:
    2,234
    Gender:
    Male
    First Name:
    Tyler
    nw nj
    Vehicle:
    '01 DC 4X4 TRD "RAD BARON"
    Some lift, some armor, some scratches..
    niice, rattle can FTW... there's not a ton of rocks out here though but its inevitable

    pm'd
     
  15. Oct 9, 2013 at 7:44 PM
    #15
    Madjik_Man

    Madjik_Man The Rembrandt of Rattle Can

    Joined:
    Dec 2, 2009
    Member:
    #26893
    Messages:
    19,194
    Gender:
    Male
    Colorado Front Range
    Vehicle:
    1998 Ext Cab 3.4 4x4 TRD 5MT, 2004 DC 3.4 4x4 TRD
    I used cheap rattle can Rustoleum enamel and took some carnage to the sliders the last wheeling trip. I still haven't gotten around to touching them up and they've held up fine. Just some surface rust on the bare metal.

    I definitely need to touch them up before too long though.
     
  16. Oct 9, 2013 at 7:51 PM
    #16
    iJDub

    iJDub Well-Known Member

    Joined:
    Dec 26, 2010
    Member:
    #48225
    Messages:
    1,118
    Gender:
    Male
    Even if it was powder coated, sliding on rocks will still take off the powder coat. At least with spray, its 1) cheaper 2) easier to touch up.
     
  17. Oct 13, 2013 at 7:10 PM
    #17
    TIPICOTACO

    TIPICOTACO [OP] Well-Known Member

    Joined:
    Nov 22, 2010
    Member:
    #46556
    Messages:
    2,234
    Gender:
    Male
    First Name:
    Tyler
    nw nj
    Vehicle:
    '01 DC 4X4 TRD "RAD BARON"
    Some lift, some armor, some scratches..
    UPDATED!! :woot:
     
  18. Oct 15, 2013 at 8:16 AM
    #18
    SteveFaust

    SteveFaust Well-Known Member

    Joined:
    Jan 2, 2013
    Member:
    #94247
    Messages:
    86
    Gender:
    Male
    First Name:
    Steve
    Chandler, AZ
    Vehicle:
    1995 XtraCab XL 2.7 4x4 Auto
    Bilstein 5100 Shocks 4Runner Rearview w/ Cabin & Map Lights Apline Head unit with Bluetooth 16" TRD OEM Wheels w/ BFGs
    Thanks for the write up and nice work!
     
  19. Oct 15, 2013 at 2:26 PM
    #19
    TIPICOTACO

    TIPICOTACO [OP] Well-Known Member

    Joined:
    Nov 22, 2010
    Member:
    #46556
    Messages:
    2,234
    Gender:
    Male
    First Name:
    Tyler
    nw nj
    Vehicle:
    '01 DC 4X4 TRD "RAD BARON"
    Some lift, some armor, some scratches..
    you're welcome and Thanks!! I need to find some time to beat on them now!
     
  20. Oct 15, 2013 at 9:47 PM
    #20
    SCSPerformance

    SCSPerformance Stealth Custom Series™ Vendor

    Joined:
    May 25, 2011
    Member:
    #57195
    Messages:
    5,757
    Gender:
    Male
    First Name:
    Vin
    Bay Area, CA
    Vehicle:
    2005 Tacoma
    Camburg LT kit DMZ SUA kit SCS wheels Destroyer Gray
    Great work and it looks damn good. I used the same paint on my sliders. I noticed that it does fade a little after a few months of being exposed to the sun.
     

Products Discussed in

To Top