1. Welcome to Tacoma World!

    You are currently viewing as a guest! To get full-access, you need to register for a FREE account.

    As a registered member, you’ll be able to:
    • Participate in all Tacoma discussion topics
    • Communicate privately with other Tacoma owners from around the world
    • Post your own photos in our Members Gallery
    • Access all special features of the site

nvwiggins 2007 SR5 DCLB build.

Discussion in '2nd Gen. Builds (2005-2015)' started by nvwiggins, Nov 5, 2013.

  1. Nov 5, 2013 at 10:03 PM
    #1
    nvwiggins

    nvwiggins [OP] Well-Known Member

    Joined:
    Apr 1, 2013
    Member:
    #101079
    Messages:
    591
    Gender:
    Male
    First Name:
    David
    Elko
    Vehicle:
    96 Tacoma, 85 T4R
    Tepui Kuenam Sky RTT.
    Well I've been on the forum for nearly a year now and had my Tacoma since December of 2012 so I figured its about time to throw together a build thread.

    Currently
    DSC_0063_zps8919e0df_82022ffca6fbefa0d36a1ffe43006f9031b6f0a6.jpg

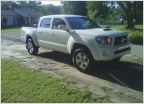
    I bought my truck about as stock as they come aside from the A.R.E. shell.

    IMG_4225_zps8b253130_304de966fa1185717eb7907b7f2532a07880c9b7.jpg

    Then about a week later I ordered Method double standards, 285/75-16 BFG A/Ts, and an Icon stage 3 kit.

    IMG_0020_zpse694ceb3_af6901602c32391660fc0aa3934e353741d472d0.jpg

    IMG_0050_zpscc8104c2_dc390be32fce247ce2089338f0d08736b6c64b41.jpg

    And it stayed like that until last month when I got in a little fender bender and needed to replace my front bumper, so I decided it was a perfect time to get a DIY Relentless front bumper and high clearance rear bumper, and finally install the sliders I built before summer.

    So for now my set up is as follows:

    Armor:
    Relentless Fabrications DIY front bumper

    IMG_2701_zps8ccd48b1_e4b7fa3af6e612f5350c40fcf7e9a1f14743c1fe.jpg

    IMG_2706_zps3c64c102_f03ff3257539809ba8171612317ca794e5eba6d7.jpg

    IMG_2758_zps23de1b9c_ea452a7722d1d28719650be66c3568915f5cff12.jpg

    Relentless DIY high clearance rear bumper

    IMG_2711_zpse99f19a4_b486f76e1611ad3135f236378347651cac6037af.jpg

    IMG_2722_zps9aff5987_db6869e3e64f27c41c399d88728dd9f876ae5914.jpg

    IMG_2761_zpsce010e85_f4a89b3f51aaf45511d55ec34dc9b6a1bafb0be7.jpg

    Full length sliders I built and used Relentless bolt on plates to mount

    IMG_1241_zps293b80ed_2eac3b32fb71dc39e474cee9dfce580c4766ab85.jpg

    IMG_2819_zpsd42591a1_d994a00258e1260295166675a075f65a530115f9.jpg

    Electrical:
    20" LED combo beam light bar
    2 3" 6 LED spots

    IMG_2749_zpsb352d1c0_9407ce22811dfea162ac9661b1870930ae7f0d5b.jpg

    Blue Sea 12 spot fuse block
    Sky High Car Audio 4 gauge wire to relocate the winch solenoid under the hood

    IMG_2836_zpsaece8a13_cdaeddcf57ec420226e81411f682ae7320aaccd7.jpg

    OTRATTW illuminated rocker switches

    Wheels/Tires:
    Method Race Wheels 16x8
    285/75-16 BFG All Terrains

    Suspension:
    Icon Vehicle Dynamics stage 3 kit.

    Winch:
    Smittybilt XRC-8

    Camper Shell:
    A.R.E. MX series with Gray Carpet Interior, sliding and opening win-doors, and sliding fold down rear window.

    I have many more plans for my truck, as I'm sure most everyone on this forum does, and will keep this thread up to date as I go. Feel free to comment, ask questions, or lend advice/ideas as I go.
     
    Last edited: Jun 1, 2014
  2. Nov 6, 2013 at 6:36 AM
    #2
    Oowen

    Oowen Goes through trucks faster then underwear

    Joined:
    Nov 2, 2011
    Member:
    #66326
    Messages:
    1,356
    Gender:
    Male
    First Name:
    Owen
    Elko, NV
    Vehicle:
    15 DCSB
    Garage Queen
    Looking good
     
  3. Nov 6, 2013 at 3:46 PM
    #3
    Brock19

    Brock19 Well-Known Member

    Joined:
    Jul 10, 2013
    Member:
    #107992
    Messages:
    99
    Gender:
    Male
    First Name:
    brock
    southern utah
    Trail gear bolt-on sliders. BLHM, AUX relayed fuse block, Plastiderp, Diff breather mod, Paracord handles, Trex eyelids, Spacer lift (for now), Magnaflow offroad series cat-back exhaust. sound system, limo tint on all windows excluding windshield. all pro rear bumper with side plates
    really like your design for the sliders! i was wondering if you could post some pictures of your truck flexing with the icon set up sometime, because im thinking about getting them.
     
  4. Nov 6, 2013 at 3:48 PM
    #4
    nvwiggins

    nvwiggins [OP] Well-Known Member

    Joined:
    Apr 1, 2013
    Member:
    #101079
    Messages:
    591
    Gender:
    Male
    First Name:
    David
    Elko
    Vehicle:
    96 Tacoma, 85 T4R
    Tepui Kuenam Sky RTT.
    For sure, my sway is still connected but maybe this week I'll get some pics up for you.
     
  5. Feb 16, 2014 at 11:12 PM
    #5
    nvwiggins

    nvwiggins [OP] Well-Known Member

    Joined:
    Apr 1, 2013
    Member:
    #101079
    Messages:
    591
    Gender:
    Male
    First Name:
    David
    Elko
    Vehicle:
    96 Tacoma, 85 T4R
    Tepui Kuenam Sky RTT.
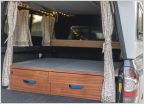
    A little update for my build, on Friday I got rid of the stock springs+Icon 3 leaf pack and swathed them out for Old Man Emu Dakars with the extra 3rd leaf. Install went smooth did it by myself in about 4 hours. The total lift in the rear is about 3 inches from where it was sitting with the Icon leafs. After installing theme my girlfriend and I decided to take a little road trip to Bridgeport, Ca at about 9:00 Friday night and camp in the back. The new springs are a huge improvement over what I was running. Now I'm just waiting on my rear Icon 2.0s to be rebuilt and the rear will be done again for a while. Didn't take any pictures during the install but here are a few from the weekend and the new springs.

    IMG_3358_zps368e81db_bd1d286daaa791e1d21cef13d2d35974a5b64c2f.jpg

    IMG_3361_zpsd559fcc7_f05ca7a62e678c4022a01406950d55203983789c.jpg

    IMG_3371_zps6fef99fe_ace59ab7fe60b600827f567fc1642a7cac97b396.jpg

    IMG_3364_zps145fea53_c0e353ffdaa1e6709f04d3a4a9bead2ffe05d1b7.jpg
     
    Pirhett and tacorgidor like this.
  6. Feb 17, 2014 at 6:23 AM
    #6
    zscott

    zscott Well-Known Member Vendor

    Joined:
    Jul 16, 2013
    Member:
    #108365
    Messages:
    3,742
    Gender:
    Male
    First Name:
    Zach
    Utah
    Vehicle:
    13 DCSB Off-Road 4x4
    I love it. How did you like the DIY kit? Did the assembly go pretty well?
     
  7. Feb 17, 2014 at 10:03 AM
    #7
    nvwiggins

    nvwiggins [OP] Well-Known Member

    Joined:
    Apr 1, 2013
    Member:
    #101079
    Messages:
    591
    Gender:
    Male
    First Name:
    David
    Elko
    Vehicle:
    96 Tacoma, 85 T4R
    Tepui Kuenam Sky RTT.

    Front assembly went very well, rear was a lot harder due to the fact that there are so many pieces that go into the high clearance rear, but I go by Eric's shop quite ofter so I had some decent pics of the unpainted bumpers to go off of. I don't think he typically likes to sell the high clearance as a DIY and I understand why after putting one together.
     
  8. Feb 17, 2014 at 6:46 PM
    #8
    1sttaco11

    1sttaco11 Well-Known Member

    Joined:
    Nov 23, 2010
    Member:
    #46628
    Messages:
    55
    Gender:
    Male
    Coleville, California
    Vehicle:
    TRD sport 4x4
    Fox 2.0 coil overs, ToyTec add-a-leaf, debadged, Marathon seatcovers, antennax stubby, Ted Nugent spear chucker sticker, American Outlaw wheels, 265/75/16 Goodyear Wrangler MTR's, Relentless bed bars, cargo basket, painted grille emblem, painted engine cover, flowmaster original 40 dumped at the axle.
    good looking truck! nice view from the travertine hot springs?
     
  9. Feb 17, 2014 at 6:48 PM
    #9
    nvwiggins

    nvwiggins [OP] Well-Known Member

    Joined:
    Apr 1, 2013
    Member:
    #101079
    Messages:
    591
    Gender:
    Male
    First Name:
    David
    Elko
    Vehicle:
    96 Tacoma, 85 T4R
    Tepui Kuenam Sky RTT.

    Yep travertine is pretty awesome!
     
  10. Feb 18, 2014 at 6:58 PM
    #10
    nvwiggins

    nvwiggins [OP] Well-Known Member

    Joined:
    Apr 1, 2013
    Member:
    #101079
    Messages:
    591
    Gender:
    Male
    First Name:
    David
    Elko
    Vehicle:
    96 Tacoma, 85 T4R
    Tepui Kuenam Sky RTT.
    A few more pictures of recent updates, Carhartt seat covers, Midland 75-822 CB and Wilson Lil Wil antenna, Ram seat base iPad mount, Relentless U-Bolt flip and the stance of the truck with the OME Dakars.

    DSCN0020_zps1ba1a5b8_89ba225a8c454008951db2656ef021a005420f9c.jpg

    DSCN0021_zpsd36505a3_e31a7f6ff7525b4e9ae365b7f15b91abccd40363.jpg

    DSCN0023_zps26d88720_a219f95d8a646c3055e6a3cf4b891be38eb73f96.jpg
    I wanted the CB/Antenna to be completely removable and not hardwired in and this seemed like a good setup and fairly cheap.

    DSCN0027_zps0dde90d1_1ecbfb558b91e7062860af8f4a992d4a381dc8bc.jpg

    DSCN0017_zpsf9381139_5ccae32e48caa36e8865209f5ea2249ce9aeecd2.jpg

    Temporary home for the CB until I figure out a better spot/mounting method.

    DSCN0039_zps33a76719_207be9e606f9316d2c07e754679698395f187542.jpg

    The single rod alone transfers quite a bit of vibration so I made up a little brace to prevent most of the vibration.

    DSCN0032_zps39b35898_360b72a7a5a37716fb2a16ee8fbfa7da63f8a822.jpg

    DSCN0031_zps0097eb2d_5c55418e9d2eab4d41230a534b20125c74f6041a.jpg
     
    Pirhett likes this.
  11. Feb 18, 2014 at 7:08 PM
    #11
    slaphappy

    slaphappy Mama didn't raise no fool

    Joined:
    Jul 16, 2013
    Member:
    #108393
    Messages:
    618
    Gender:
    Male
    First Name:
    Travis
    River Valley
    Vehicle:
    Silver Fresco 2010 FJ Cruiser 4WD
    Nice truck! What do you think about those Carhartt seat covers? I've been looking at those myself..
     
  12. Feb 18, 2014 at 7:10 PM
    #12
    nvwiggins

    nvwiggins [OP] Well-Known Member

    Joined:
    Apr 1, 2013
    Member:
    #101079
    Messages:
    591
    Gender:
    Male
    First Name:
    David
    Elko
    Vehicle:
    96 Tacoma, 85 T4R
    Tepui Kuenam Sky RTT.
    I like them a lot, they are durable, can was them after I get them dirty and are daily simple to remove/install. Plus its just cool to have the Carhartt logo and rivets :cool:
     
  13. Feb 18, 2014 at 7:14 PM
    #13
    ivoryaddict

    ivoryaddict Well-Known Member

    Joined:
    Jan 12, 2013
    Member:
    #94998
    Messages:
    340
    Gender:
    Male
    First Name:
    Andy
    Northern California
    Vehicle:
    09 TRD offroad MGM DCSB
    Custom Headache Rack, BAMF Kick-out sliders with fill plate Level Kit, ARB bumper, Warn Winch Ruff Tuff Digital Camo Seat Covers Fuel 16" Boost Wheels Duratrac 285/75/16 X-tra D-Rings in Bed
    That's a sick truck.
     
  14. Feb 18, 2014 at 7:17 PM
    #14
    nvwiggins

    nvwiggins [OP] Well-Known Member

    Joined:
    Apr 1, 2013
    Member:
    #101079
    Messages:
    591
    Gender:
    Male
    First Name:
    David
    Elko
    Vehicle:
    96 Tacoma, 85 T4R
    Tepui Kuenam Sky RTT.
    Thanks man, it's coming along, still a long list of wants!
     
  15. Mar 6, 2014 at 8:14 PM
    #15
    nvwiggins

    nvwiggins [OP] Well-Known Member

    Joined:
    Apr 1, 2013
    Member:
    #101079
    Messages:
    591
    Gender:
    Male
    First Name:
    David
    Elko
    Vehicle:
    96 Tacoma, 85 T4R
    Tepui Kuenam Sky RTT.
    Well I've been gathering parts for the past couple weeks to do onboard air. I picked up a Viair 444c pump and 5 gallon aluminum tank from a friend of mine who was reworking his airbag setup on his Audi. My dad had a pressure gauge from an overload airbag setup he had a few years back and the rest of the hose/fittings/wire I either had laying around or picked up from a local commercial truck shop. My plan was to mount the tank under the truck and the pump in one of the rear cubbies. That plan changed a bit when the pump was larger than the cubby and I didn't really feel like cutting into the storage compartment to make it fit, so then I decided to mount it behind the rear seats on the passenger side. I still mounted the tank under the truck where my spare tire once was. Under the truck is a sweet spot for the tank since its basically unused space but I wanted the tank protected and mounted level too or above the bottom of my high clearance rear bumper. The solution to protecting the tank and mounting it that high was to build a skid plate/mount for the tank. Lucky for me we were having a mod day here in Reno at the Relentless Fabrication shop. Eric was cool enough to take my rough idea, draw it up in CAD and cut it out with his CNC Plasma. We then used his press break and some big hammers to create the bends needed to mount the skid to the factory rear bumper mounts. All in all I'm very happy with how the compressor, tank, and the skid turned out to complete my OBA setup. Thanks again Eric! Here are some pics of it all complete and where I routed the air chucks too.

    DSC_0189_zps1d5b2cf3_0b9e80d929638b18321c873c030377aac27d4ef8.jpg
    Front of the tank, with the pressure switch/relay unit facing forward.

    DSC_0184_zpsd9e253dd_8c1921cea5f89bf4f6f3a29acbef770ef75734c0.jpg
    Compressor mounted behind the seat in the storage compartment.

    DSC_0180_zps1f70c6eb_62393726601454d5e93b9b03fd1b66c8f379817f.jpg

    DSC_0181_zps2dc5a945_5f2fdd783b818026288ff80b771bb37d30fb3ac1.jpg
    Front air quick connect with protective cap.

    DSC_0177_zpsfe7a5ed6_2b348eca6b5fcc0f0d6ec6451559cc47a0e77392.jpg
    Pressure gauge and compressor on/off switch.....just haven't gotten the correct switch cover yet. Pay no attention to the coffee dribbles.

    DSC_0176_zpsbd350f1a_9eb3784d2205dbc6cb24acb4b3238add690cfc42.jpg
    Rear quick connect with cap. Mounted it to the tank mount as well since its fairly accessible.

    DSC_0174_zps29db7a74_c0c465b88e8a9df0cb9e0e4410b95395f79ab71c.jpg
    Side view from the rear of the truck.

    DSC_0170_zps16038213_f24458ed5eb519f558b94869692cb98153fc3a9a.jpg
    All tucked up and out of the way. Ready to go camping!
     
    Pirhett likes this.
  16. Mar 6, 2014 at 8:53 PM
    #16
    happy

    happy Well-Known Member

    Joined:
    Nov 2, 2013
    Member:
    #115725
    Messages:
    234
    Gender:
    Male
    Eagle, CO
    Vehicle:
    '14 DCSB SR5 4x4 Silver Sky
    CBI Moab 2.0, 2.5" Radflo Coilovers, Light Racing UCA, Dakar Leaf Pack, 265/75 16 Kelly Safari TSR, Leer XR100
    Awesome build. :thumbsup:
     
  17. Mar 7, 2014 at 8:02 AM
    #17
    InTheRough

    InTheRough Well-Known Member

    Joined:
    Jan 29, 2013
    Member:
    #96438
    Messages:
    3,001
    Gender:
    Male
    First Name:
    Kolt
    Gig Harbor, WA
    Vehicle:
    '20 Tundra Platinum
    Rock Warrior wheels
    Nice looking truck you got. I can't wait to get a high clearance bumper. I bet it's nice living right down the street from Relentless Fab.
     
  18. Mar 7, 2014 at 8:04 AM
    #18
    Traction120

    Traction120 "Not all those who wander are lost"

    Joined:
    Jan 4, 2013
    Member:
    #94452
    Messages:
    1,656
    Gender:
    Male
    First Name:
    Nathan
    Reno, NV
    Vehicle:
    2013 DCSB BLK
    SEE BUILD.
    DAVES NOT HERE MAAAN.

    Sub'd :cool:
     
  19. Mar 9, 2014 at 9:46 PM
    #19
    nvwiggins

    nvwiggins [OP] Well-Known Member

    Joined:
    Apr 1, 2013
    Member:
    #101079
    Messages:
    591
    Gender:
    Male
    First Name:
    David
    Elko
    Vehicle:
    96 Tacoma, 85 T4R
    Tepui Kuenam Sky RTT.
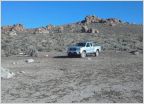
    Went for a camping/mellow wheeling trip with the girlfriend the pup and some friends this weekend. Crossed a river a couple times, nothing crazy just high enough to clean the mud off the sliders, we took a few pictures of the area, campsite, and hot spring so I figured I'd post them up.
    DSC_0211_zpsd38ce83b_978507d06a62d55814b16c5adccbee6763c1b7ab.jpg

    DSC_0254_zps994790cc_2802cf710737bb279c0ea2c767930271ddb7d313.jpg

    DSC_0259_zps52c2d8fa_7c5e98c03445b14e71b4beffff93f9c3a1b55b02.jpg

    DSC_0263_zpsd5865f0b_4942172de8c7d73826794fab4ba733984069164e.jpg

    DSC_0285_zps6a8e173c_1551622fa383f5e4eda8c172e09bba8bd2875277.jpg

    DSC_0290_zpse46bdf03_4a064305f899adbf27377677f8240e96501c1561.jpg

    DSC_0302_zps196f7fb3_086edb0f1e6d46d64adc82bebe8712a671f89995.jpg

    DSC_0304_zps020d4b3c_425c6091dc2f781d536f0c656261db1be9178c39.jpg

    DSC_0307_zpsa0bee49b_e8fd50adc92b11defadb5d791dcbb643b6830b82.jpg

    DSC_0329_zps816ca927_13f0c6aa5414b6d900eadad38cdd3ff26e7ac596.jpg

    eaaacff8-e591-46cb-8a99-dde746718ae9_zps_316b2b3c04a0e6e9f8451d64829e12c064245083.jpg

    DSC_0348_zpsdf66c715_bf13fbbad869c404f3a40fdf03380fa736c260cd.jpg
     
  20. Mar 9, 2014 at 10:03 PM
    #20
    RelentlessFab

    RelentlessFab Eric @Relentless Fab Vendor

    Joined:
    Feb 17, 2008
    Member:
    #4772
    Messages:
    15,719
    Gender:
    Male
    First Name:
    Eric
    Sparks, NV
    Vehicle:
    07 AC 6mt>03 SR5 >08 Sport and 17 6MT TRD OR
    Relentless Armored! Too many others to list.
    Truck is coming together nice Dave! I'm a little jealous of all the exploring you get to do! I'm too damn busy! :goingcrazy:

    Wrong! Dave is here! :p
     

Products Discussed in

To Top