1. Welcome to Tacoma World!

    You are currently viewing as a guest! To get full-access, you need to register for a FREE account.

    As a registered member, you’ll be able to:
    • Participate in all Tacoma discussion topics
    • Communicate privately with other Tacoma owners from around the world
    • Post your own photos in our Members Gallery
    • Access all special features of the site

Tacoma Hood Strut Installed

Discussion in '2nd Gen. Tacomas (2005-2015)' started by Kevinztaco, Nov 16, 2013.

  1. Nov 16, 2013 at 4:08 PM
    #1
    Kevinztaco

    Kevinztaco [OP] Well-Known Member

    Joined:
    Dec 3, 2012
    Member:
    #92405
    Messages:
    548
    Gender:
    Male
    none yet
    I followed Quicklift Installation guide installing my Tacoma's hood strut but I must be very poor at following instruction or the instruction provided did not match 2013 Tacoma. Any suggestions on what I should use to cover those holes to prevent them from rusting? I used clear Loctite to cover them up at the moment but I need a more permanent solution. Thanks.
     
    Last edited: Nov 16, 2013
  2. Nov 16, 2013 at 4:13 PM
    #2
    Joe D

    Joe D .

    Joined:
    Nov 13, 2011
    Member:
    #66942
    Messages:
    7,202
    Is the strut fully compressed with the hood open in one of the pics?

    Otherwise very cool!

    Maybe some primer and touch up paint?
     
  3. Nov 16, 2013 at 4:20 PM
    #3
    BulletToothTony

    BulletToothTony You’ll have that on these big jobs.

    Joined:
    Feb 20, 2008
    Member:
    #4833
    Messages:
    16,293
    First Name:
    You can call me Susan if it makes you happy.
    Silicon or some rtv should do.
     
  4. Nov 16, 2013 at 4:23 PM
    #4
    snowgod06

    snowgod06 UG legend wannabe

    Joined:
    Apr 26, 2009
    Member:
    #16454
    Messages:
    5,571
    Gender:
    Male
    First Name:
    Rob
    A farm field, OREGON
    Vehicle:
    06 Access Cab
    crap bolted and welded together....
    ^^ this.


    also, i see where your mistake happened. You measured from the wrong fender bolt. You measured 8.25 from the BACK bolt. You were supposed to measure 8.25 from the FRONT fender bolt. But either way you got em on and look good. :D
     
  5. Nov 16, 2013 at 4:39 PM
    #5
    J0HN_R1

    J0HN_R1 Well-Known Member

    Joined:
    Jun 15, 2010
    Member:
    #39007
    Messages:
    554
    Gender:
    Male
    Calgary, Alberta
    Vehicle:
    2014 Tacoma TRD Sport DCSB
    Bilstein 5100's @ 2.75" FR, Deaver 1.5" TSB leafs RR, SpiderTrax 1" spacers, custom LED interior & bed lights, 2005 4Runner Sport 17" wheels powder coated satin black
    I think you measured the 8.25" from the wrong spot...

    Shoulda been from the fender-bolt behind that rubber bumper, measuring towards the cab.

    QUICKLIFThoodliftinstallpic_zps1209a276_3152860b834e08263e7ac59da48513042da618dd.jpg
     
  6. Nov 16, 2013 at 4:47 PM
    #6
    J0HN_R1

    J0HN_R1 Well-Known Member

    Joined:
    Jun 15, 2010
    Member:
    #39007
    Messages:
    554
    Gender:
    Male
    Calgary, Alberta
    Vehicle:
    2014 Tacoma TRD Sport DCSB
    Bilstein 5100's @ 2.75" FR, Deaver 1.5" TSB leafs RR, SpiderTrax 1" spacers, custom LED interior & bed lights, 2005 4Runner Sport 17" wheels powder coated satin black
    These rubber bumpers. Bolt you measure from is just behind them, towards the cab... (in pic #1 above)

    KEVINZ hood.jpg
     
    Last edited: Nov 16, 2013
  7. Nov 16, 2013 at 5:04 PM
    #7
    rockhopjohn

    rockhopjohn Well-Known Member

    Joined:
    Aug 29, 2013
    Member:
    #111412
    Messages:
    316
    Gender:
    Male
    ID, MT, ND, I'm a transient
    Vehicle:
    2013 Tacoma T|X Baja
    Just did the install, you measure from the wrong bolt as other's have mentioned. You may have to trim up some of the seam sealer if you have the bracket in the right place.
     
  8. Nov 16, 2013 at 5:07 PM
    #8
    ajw1986

    ajw1986 Well-Known Member

    Joined:
    Aug 2, 2013
    Member:
    #109619
    Messages:
    513
    Gender:
    Male
    First Name:
    Andrew
    Pitt Meadows, B.C.
    Vehicle:
    06 Money Pit
    How much did the kit cost?
     
  9. Nov 16, 2013 at 5:11 PM
    #9
    rockhopjohn

    rockhopjohn Well-Known Member

    Joined:
    Aug 29, 2013
    Member:
    #111412
    Messages:
    316
    Gender:
    Male
    ID, MT, ND, I'm a transient
    Vehicle:
    2013 Tacoma T|X Baja
    $70-$120 depending on options.

    http://www.redlinetuning.com/products_quicklift.html

    You also may need some specialized tools like a rivet gun and nail set, but these can be had for less than $15 at your local big box store.
     
    Last edited: Nov 16, 2013
  10. Nov 17, 2013 at 9:07 AM
    #10
    Kevinztaco

    Kevinztaco [OP] Well-Known Member

    Joined:
    Dec 3, 2012
    Member:
    #92405
    Messages:
    548
    Gender:
    Male
    none yet
    oh shucks!!
     
  11. Nov 17, 2013 at 1:24 PM
    #11
    Kevinztaco

    Kevinztaco [OP] Well-Known Member

    Joined:
    Dec 3, 2012
    Member:
    #92405
    Messages:
    548
    Gender:
    Male
    none yet
    I think I have it pretty close to what it should be now. It works like magic now so that's what counts in my book. Perfect alignment on both sides and the struts are not over compressed nor over extended.
     
  12. Nov 17, 2013 at 1:38 PM
    #12
    Kevinztaco

    Kevinztaco [OP] Well-Known Member

    Joined:
    Dec 3, 2012
    Member:
    #92405
    Messages:
    548
    Gender:
    Male
    none yet
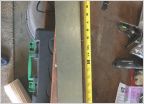
    The highlighted part of your comment would've been a better instruction for dummies like myself. Plus, the pictures are hard to see and to use as guide. Wish the owner have those pictures taken on a taco with different color with an overview shot of the area to be measured.
     

Products Discussed in

To Top