1. Welcome to Tacoma World!

    You are currently viewing as a guest! To get full-access, you need to register for a FREE account.

    As a registered member, you’ll be able to:
    • Participate in all Tacoma discussion topics
    • Communicate privately with other Tacoma owners from around the world
    • Post your own photos in our Members Gallery
    • Access all special features of the site

OKLEDLIGHTBARS 3W Round 3/4" LED Light and More

Discussion in 'Lighting' started by Drunknsloth, Mar 16, 2014.

  1. Mar 16, 2014 at 6:54 PM
    #1
    Drunknsloth

    Drunknsloth [OP] Indffrnce will be the fall of manknd but who cares

    Joined:
    Jun 17, 2010
    Member:
    #39105
    Messages:
    3,126
    Gender:
    Male
    First Name:
    Retribution
    South West
    Vehicle:
    08 SR5 Access V6 6-Speed
    Blacked-Out Badges; Retribution Decals (Sockmonkey); Tailgate Mod; Red LED Rear Blinkers; Yellow Foglights; Yellow Front Blinkers; Superwhite Xenon Corner Bulb; Leer Bedcap; Bedrug Bedmat; Black Cupholders; Black Plastic Piece Around Window Controls; Plasti-Dip Front Bumper Valence; Plasti-Dip Grill Surround; Blackout Chrome Back Bumper; Metal Miller Skid-Plate; Aero Turbine 2525 Muffler; TSB Rear Leaf Springs and Shocks; Satoshi Grill Pending; Off-Roading Torn off Mirror (Replaced); Blue-Sea Fuse Box; Tinted Tail Lights; URD Short Shifter; Interior Mood Lighting; Hood Lights; BedLights Pending
    First off, I would like to start out saying that Chris, the owner of OKLEDLIGHTBARS.com (zilla68 on TacomaWorld) has top quality customer service. He replies quickly to any questions and is always extremely helpful. Shipping is also extremely fast. I've already participated in two of his groupbuys (ran by Taco Man in HD) and you can bet that I will be in more down the road.

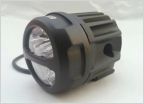
    I recently acquired 6 of the 3 watt round 3/4" led lights from Chris.
    Link: http://www.okledlightbars.com/apps/webstore/products/show/4424713

    For anyone who is purchasing these lights:
    Install the lights before wiring them. Since the wire runs through the bolt of the light it is easiest this way.

    [​IMG]
    (Picture from OKLEDLIGHTBARS.com)

    [​IMG]
    (Picture from OKLEDLIGHTBARS.com)

    I took a few pictures of the light output, the first picture is on a blue mat, the lights I got are white, not blue. In the second picture the light appears to turn blue after a certain distance but I can assure you that it does not look like that in person these lights are pure white (although the yellow hue around the white is really there looking at it in person).
    DSC_9943_zpsd00de545_da6a66db40e8ac05fb9e604f70ca9ba10b45ed0b.jpg
    DSC_9945_zps5c42841c_c3fa63bc255233429ec8c6f12d2a0f88e96c60ab.jpg

    I took some measurements and in order to fit these lights you need at least 7/16" of clearance (1/2" to be safe) in front of the surface you are mounting these too (the direction the light is shining). At first I wanted to use these as puddle lights mounted under the door speakers so when the doors opened these would light up the ground below it, but I quickly found out that they would not fit while the door was closed.

    You also need around 7/8" of clearance behind the mounting surface so there is enough room for the bolt side of the light (less if the mounting surface is thicker).

    The light comes with about 30" of cable.

    The mounting hole must be at least 10mm (.394") in diameter and no more than 17mm (0.702") in diameter. Although you might be able to get away with a bigger mounting hole if you sandwich the mounting location between two washers or fender washers.

    The bolt on the lights are threaded to M10-1.50
    They come with what looks like a zinc coated nut (I'm not 100% sure, I'm not a metal expert). I live in Utah where the roads are caked in salt every winter and rust is a big problem. This makes the zinc coating on nuts and bolts disappear very quickly and the actual metal starts to rust. I went to my local Lowe's and picked up a few M10-1.50 stainless steel nuts to prevent this from happening. I wanted to get stainless steel nylon locking nuts but they were out of the right size ones. The reason I wanted nylon locking nuts is because when tightening the nut, there is no real way to hold on to the light and keep it from spinning except using your fingers. My fingers aren't that strong so I wanted to have something that would keep it from loosening while the truck is bouncing around off-road. If you can find the nylon locking nuts in this size I would definitely recommend it. If you can't, a stainless steel locking M10 washer and a stainless steel regular M10 washer should work just fine (which is what I'm using right now).

    DSC_9948_zpse9eaa22b_64cbbb3e287a2226c33ea6a55d946a3c2ef295bc.jpg

    Since I already have rocklights under my cab and in the back I decided to install two of these up front first (I will probably add one in each wheel-well when I have more time). There are holes on both sides of the vehicle in the front that are not used (at least on the 2008 SR5) and fit these lights perfectly. One is right in front of the battery:
    DSC_9946_zps456399c4_64b9f276147f9233bf1cafafbb12f202d108ee60.jpg
    DSC_9951_zps09a2b787_4a289b3ef1de2edc3d7d74d9d1e307b24295c116.jpg

    And the other is on the mirror side of it in front of the window washer fluid:
    DSC_9947_zps832178d3_3c6d3e3952383d574b0003d2c2ef73798123a93c.jpg
    DSC_9950_zpsc11b4d9b_f5c97501002cba42765de81e6fd02b7200b7b7b4.jpg

    These locations will only work if you have an aftermarket bumper and you trim off the plastic fender liner in each of the front wheel-wells up to the first plastic clips that hold fender liner to the actual engine bay and not the stock bumper. I recently installed the DTF Type B Front Bumper so these holes were perfect.

    In order to install in these locations you will also need a 17mm wrench with a tilt-able head.

    DSC_9949_zpsb8a48d5d_23e2f1b415d1497aa505e8fca47f9345388542e9.jpg

    Here is the result. It doesn't look like they are in the pictures, but trust me, looking at them directly is blinding.
    DSC_9954_zps353db69d_324188a590b558f37f32d183afd960eca03743e1.jpg
    DSC_9955_zps3ecd548b_edc784b7c199717e782ffbae0fbde7623724b436.jpg

    DSC_9953_zps233031f8_6fb68ccce3f84a8758a1cae699019e7fcc1bde65.jpg
    DSC_9956_zpsf0176eea_53957a677ea0f34c48b4db21d0a221f6842928a1.jpg

    I also purchased two more 6 LED 3x3 CREE Lights from Chris in a group buy. I already have two of these that are mounted on my hood and the two I just purchased were installed on the new DTF Bumper. I got the 3x3 Colored Replacement Lenses in amber to use on the lights on the bumper. When you get the replacement lenses they come protected on both sides by a stuck on piece of paper.
    DSC_9939_zpsf99ab8e4_ed93245c4e3c8563e4ec8c7a287db3d5bc124b45.jpg
    You can also see that the replacement lens is noticeably thicker then the original lens.

    To disassemble the 6 LED 3x3 CREE Lights you need a 2.5mm allen wrench. You must use a 2.5mm or you will strip the bolts! Just unscrew the six bolts on the bezel of the light and the bezel will come off. Below will be the lens and a rubber gasket.
    DSC_9936_zps154d0d31_edfffffa8ed1464654b921099552417f091be50a.jpg

    When assembling the light, be sure to put the right side of the rubber gasket faced down (you can tell which side is which because one side has a line cut around it to fit onto the light and the other side will fit the lens). When you are screwing the bezel back onto the light you might be worried that the bezel won't seal properly since the new lens is thicker. I can assure you that it will fit just fine. Just tighten the bolts slowly in a criss-cross manner using a 2.5mm allen wrench. This is where the right size allen wrench really matters or you will strip the head of the bolt!

    This is the end result and the next picture is the closest I can get to what the output looks like in person.
    DSC_9932_zps67b8290f_13c9bc96d4c42989930b4bd03f7001dca01c161f.jpg
    DSC_9942_zpsc36ed53e_6a057fcee6c2a6481d0ee2bf2323d8f83f73cf70.jpg

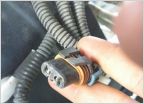
    I also recommend getting the connectors from Chris. If you are not very good at wiring, you can buy the wiring harness from his store and the Deutsch DT Series 2 Pin Connector Kit Option for these lights. The ones listed on his website are the male side, but he also has the female side if you email him. These are very simple to assemble. Just follow the directions on his website and make sure you put the positive and negative wires on the correct sides. The only problem I had with the male side was that the green wedge that goes in through the front didn't want to go in all the way so I had to shave down the back edge of the ramp with a flat head screwdriver so it would slide in easier.
    Here is the disassembled male side:
    [​IMG]
    (Picture from OKLEDLIGHTBARS.com)

    Here is the disassembled female side (the assembly is basically the same except there is an extra red gasket that goes on in the front before you insert the green piece.
    [​IMG]
    (Picture from Google)

    Here is the end result. The lights on the hood are the 6 LED 3x3 CREE Lights with the original lens. The amber lights on the bumper are the 6 LED 3x3 CREE Lights with the Amber replacement lens. The lights in the grill are 3000K 55Watt HIDs in Hella 700ff lights. The rock lights in front of the front wheels are the 3W Round 3/4" LED Lights. The rock lights underneath the body and behind the rear wheels are LED strips I got from a while ago.

    This picture was take at ISO-200 f/3.5 and 1/10 sec. Exposure time.
    DSC_9967_zps35814bd6_6a01cea8832981656d60bb60e0069acc5de2aeab.jpg

    Here is a picture with the same camera settings with no lights on:
    DSC_9968_zps743ca576_6ed73762df047933b97f184c850864e891c5d074.jpg
     
  2. Mar 17, 2014 at 8:43 AM
    #2
    zilla68

    zilla68 www.okledlightbars.com

    Joined:
    Oct 19, 2012
    Member:
    #89308
    Messages:
    244
    Gender:
    Male
    First Name:
    Chris
    Moore,Oklahoma
    looks really good and a great write up!!
    We have had a huge success with these as a rock light set up in the fender wells, inside cab lights, under hood lights, just about anywhere you can think of putting them, people are sticking them, lol.

    Nice rig, great job
     
  3. Mar 17, 2014 at 9:16 AM
    #3
    Pope953

    Pope953 That's a fact Jack!

    Joined:
    Feb 25, 2010
    Member:
    #32117
    Messages:
    11,454
    Gender:
    Male
    First Name:
    Wesley
    Asheville, NC
    Vehicle:
    SR5 Pickup
    35% up front, 20% in the back window tint, 15" Mickey Thompson bullet hole wheels, with 31x10.5 Firestone Destination A/T tires. Glass Pack, High Flow Cat, S&B CAI, Custom Light Bar with 4 fog lights. 2 10" Rockford Fosgate P2 subs with 1000 watt Rockford Fosgate Amp, CB.
    Just got a camper cover for camping, so I went and got it tinted at 5%. I can see out during the daytime, and at nighttime if someone is behind me. Backing up is a different story though. So, I have been looking at some LEDs trying to decide what to get. And after seeing these little things, and the price, I'm very interested. I see the pictures, and see they are pretty bright for their size.

    My question is though, would these be bright enough to illuminate 10-15 feet or so behind my truck? Or should I continue to look at something like the flush mount pods?

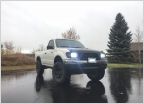
    Here's a picture of the truck for my reference. If I had the flush mounts I would cut my bumper and install them within it.

    [​IMG]
     
  4. Mar 18, 2014 at 6:09 AM
    #4
    zilla68

    zilla68 www.okledlightbars.com

    Joined:
    Oct 19, 2012
    Member:
    #89308
    Messages:
    244
    Gender:
    Male
    First Name:
    Chris
    Moore,Oklahoma
    with 5% tint I'd say pods are your only option. These do put out a lot of light, but with almost black windows I don't think you'd get much with them rear facing. They really light up in fender wells etc. where the light is bouncing off stuff, but in the rear with nothing to reflect off of, I don't think they would do much for you.
    I do have a local guy who used them as back ups and he likes them, but he's not 5% tinted and is using them with his backup camera.
     
  5. Mar 20, 2014 at 5:41 AM
    #5
    Drunknsloth

    Drunknsloth [OP] Indffrnce will be the fall of manknd but who cares

    Joined:
    Jun 17, 2010
    Member:
    #39105
    Messages:
    3,126
    Gender:
    Male
    First Name:
    Retribution
    South West
    Vehicle:
    08 SR5 Access V6 6-Speed
    Blacked-Out Badges; Retribution Decals (Sockmonkey); Tailgate Mod; Red LED Rear Blinkers; Yellow Foglights; Yellow Front Blinkers; Superwhite Xenon Corner Bulb; Leer Bedcap; Bedrug Bedmat; Black Cupholders; Black Plastic Piece Around Window Controls; Plasti-Dip Front Bumper Valence; Plasti-Dip Grill Surround; Blackout Chrome Back Bumper; Metal Miller Skid-Plate; Aero Turbine 2525 Muffler; TSB Rear Leaf Springs and Shocks; Satoshi Grill Pending; Off-Roading Torn off Mirror (Replaced); Blue-Sea Fuse Box; Tinted Tail Lights; URD Short Shifter; Interior Mood Lighting; Hood Lights; BedLights Pending

Products Discussed in

To Top