1. Welcome to Tacoma World!

    You are currently viewing as a guest! To get full-access, you need to register for a FREE account.

    As a registered member, you’ll be able to:
    • Participate in all Tacoma discussion topics
    • Communicate privately with other Tacoma owners from around the world
    • Post your own photos in our Members Gallery
    • Access all special features of the site

JDawg562's Long Travel Tacoma

Discussion in '2nd Gen. Builds (2005-2015)' started by JDawg562, May 6, 2014.

  1. May 6, 2014 at 2:39 PM
    #1
    JDawg562

    JDawg562 [OP] Derp.

    Joined:
    Jan 26, 2014
    Member:
    #121588
    Messages:
    967
    Gender:
    Male
    First Name:
    Justin
    Long Beach, CA
    Vehicle:
    2007,TRD Off-Road, Access Cab
    Hello,

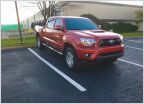
    Here's my 2007 Toyota Tacoma, TRD Off-Road, Access Cab, Prerunner.

    Currently Sits.
    2-16-18

    [​IMG]

    How she looked like the day I bought her.
    1_zpsxaos2udo_12aac818382ceac845d980fb2accc3ec3cca757b.jpg
    I couldn't stop smiling. I was so stoked!

    My 2nd weekend I got my truck I took my pup to Crystal Cove Campground, CA
    10257092_1395198247431976_79455006179312_b89d56c7a30f099240a33fc525d706f859166161.jpg
    I got an Access Cab for my dog... lol

    The 240sx
    69090_10151123111238568_1394102879_n_zps_0426dac016974eeac0635dea4f56ed4a5b72336b.jpg
    Yeah, I know huge size difference. Sad thing is my car's front & rear tires are wider than my Tacoma's tires...

    5/6/14 Plasti Dipped
    1_zps9o2vr1jc_b1d88677d36098669f869e38af6b849f6c75b0f5.jpg
    5/8/14 Blacked Out Headlight Mod
    1958170_1397907810494353_681084651426152_8a3a959fdac9a891bfee5406af4435ddd18104e2.jpg
    5/10/14 Backup Camera and Running Boards installed
    10357119_1400402460244888_22766086961759_a221852855e3a944ed1265880ee2725497801e9f.jpg
    5/28/14 1st Trip to Gorman, CA
    10274177_1411338635817937_70327286528276_86f58dcebcc7d186f75a52f30403026897cad663.jpg
    6/11/14 Glassworks Unlimited Fiberglass Fenders
    10409634_1421523724799428_21788622487486_388c87067c8c35ac01f2b2e997897e9833131f3e.jpg
    6/12/14 Total Chaos 3" Long Travel kit
    10247207_1422089348076199_71929539364187_f699f3666d966b5eebf9dc8bd70e267d7d18b057.jpg
    6/14/14 Finished Welding Bumper and Gorman, CA trip
    10378087_1423259411292526_40381394216533_ecc6e1caab19510d2a33095b906db35db028a782.jpg
    6/25/14 Made a Satoshi Grill
    10511325_1430111840607283_46138776282181_ce9fc85abbc73100528db11f07ece250c034a31d.jpg
    7/17/14 1st set of used BFG A/T 285/75/16s
    10524573_1441722766112857_13784064129967_8f338877ea64cde9dc613e0f8349a72ad7908ca0.jpg
    8/17/14 Big Bear, CA
    10603702_1455813894703744_12239095985108_5194410e7502d5643ad121ca31e52cc2578b4afe.jpg
    8/26/14 Method NV wheels and General Grabber Red Letters 285/75R16s
    10646811_1459069497711517_18857232812975_a95c2482defd3a625f4ffaf7abd99fd6a9d65753.jpg
    8/31/14 Plasti Dipped my Method NV two tone.
    10653352_1466022617016205_89434788683630_b5eec1ed6a002eb3c524f709b9a1ffd04b0c72e2.jpg
    10/12/14 Big Bear, CA
    10519640_1491356597816140_47966184914354_617be6b6a13efa5ba9af0cb62fbbcf1e21cf4e29.jpg
    10/22/14 Fiberglass Bedsides
    10407837_1508490856102714_26932729747525_0917ede4dc59970d5d0eb94dfd34d0ee399b7aee.jpg
    4/3/15 New Tires 315/75/16 Toyo Open Country M/T
    10382262_1575601646058301_42071920152061_f51312442f6f9c4f5e104116f4a32dc5f767d34a.jpg
    5/17/15 50" Curved LED Lightbar.
    IMG_1718_zpsuy3c3u3d_e38d5589267561878ca24dec62a1a4099db72f61.jpg
    1/17/16 Barstow shooting/off road trip for my birthday.
    FullSizeRender%206_zpsbkwlcopq_dd825507b9808ff27037ae75990b81b6b35bfa50.jpg
    3/19/16 Barstow, CA. Built a new bumper & testing valving on 2.5x16 smoothies in the rear.
    FullSizeRender%2013_zpsdjx9gmeo_467ccd62a4af262aeb12e5f838f704f33b913de8.jpg
    2/7/17 New Method 17" wheels and Toyo Open Country R/T 35x12.5r17 tires!
    IMG_1200_zpskdunjuwv_cffba470730b58d17de1d4262f1f5cf9f0936b7c.jpg
    4/14/17 TRD Sport hood, color match and two part clear painting.
    IMG_3204_zpsde06nmgz_f2aa3e1988dee2008461103f0c4ea94d27d577fd.jpg
    1/3/18 DMZ Long Travel installed
    [​IMG]
    2/16/18 Testing DMZ kit
    [​IMG]

    Installed/Mods Click the links to see the post!
    -WeatherTech Floor Liner bought from a TacomaWorld Member. Group Buy.
    -Spidertrax 1.25" Spacers Installed on Front & Rear bought used from a TacomaWorld Member.
    -Plasti Dipped Emblems, Rims, Grill & Rear Bumper.
    -Blacked out Headlight Mod.
    -Pop & Lock and Back Up Camera
    -Under the Hood & Bed LEDs Made and installed by me!
    -Glassworks Unlimited Fenders with 4″ Flare and 3″ Rise.
    -Total Chaos 3.5" Long Travel kit(Used) Installed Thread here.
    -Home made Fabericated bumper.
    -Key Fob Reprogrammed. 30$ for 2x remotes and programmed
    -Satoshi Grill Mod. Made by me. Took 2 days to complete from scratch.
    -My Welding Helmet.
    -Tires 285/75r16
    -Method Race Wheels NV 305 16" Matte Black Machined Face 6x5.5
    -General Grabber Red Letters 285/75r16.
    -Plasti Dipped my Method NV two tone.
    -Glassworks Fiberglass Bedsides.
    -Toyo Open Country M/T 315/75r16
    -50" Curved LED Lightbar
    -Cab Mount Chop
    -
    Sliders
    -2.5x16 Smoothies
    -Bedcage!
    -Remade my front bumper
    -30" LED light bar for bumper
    -3rd member 4.56 gears install
    -LED Gauge lights
    -LED Radio Dash lights
    -New Method 17s and new Toyo Open Country R/T 35x12.5r17
    -TRD Sport hood time lapse painting it
    -DMZ Spring under kit day 1
    -Hydro bump stops & spindle gussets

    Ordered and/or not installed.


    Thing's I'd like to buy used if you have them.


    Future Plans
    ?????

    Trips/Camping
    -Gorman, CA 5-25-14
    -Gorman, CA 6-14-14
    -Big Bear, CA 8-17-14
    -Big Bear, CA 10-12-14
    -Hungry Valley shock testing with DMZ kit 2-16-18

    I'll edit this post, organize and post pictures.
     
    Last edited: Feb 17, 2018
  2. May 6, 2014 at 2:49 PM
    #2
    JDawg562

    JDawg562 [OP] Derp.

    Joined:
    Jan 26, 2014
    Member:
    #121588
    Messages:
    967
    Gender:
    Male
    First Name:
    Justin
    Long Beach, CA
    Vehicle:
    2007,TRD Off-Road, Access Cab
    Last edited: May 22, 2015
  3. May 6, 2014 at 2:55 PM
    #3
    JDawg562

    JDawg562 [OP] Derp.

    Joined:
    Jan 26, 2014
    Member:
    #121588
    Messages:
    967
    Gender:
    Male
    First Name:
    Justin
    Long Beach, CA
    Vehicle:
    2007,TRD Off-Road, Access Cab
    Last edited: Nov 26, 2014
  4. May 6, 2014 at 3:06 PM
    #4
    JDawg562

    JDawg562 [OP] Derp.

    Joined:
    Jan 26, 2014
    Member:
    #121588
    Messages:
    967
    Gender:
    Male
    First Name:
    Justin
    Long Beach, CA
    Vehicle:
    2007,TRD Off-Road, Access Cab
    Plasti Dip Rampage!!!!!

    I knew about this stuff and watched my friends use it, but never tried it myself. Till NOW!

    I used newspaper/magazine pages the next time I did it...
    1908014_1395230357428765_260794571414441_d4ebff194f4cb960cf95445ab141d50e2ec38463.jpg
    10308161_1395230350762099_89484132734090_9f12c27f6e02b8857b017f869658a365575b2bca.jpg
    1_zps9o2vr1jc_b1d88677d36098669f869e38af6b849f6c75b0f5.jpg

    10171119_1395230470762087_43611246009694_585c7e097258d6df7a09ab626381ce099cac8401.jpg
    My friends Tundra and my Tacoma. Brotherly love.
    [​IMG]
    Before and After.
    [​IMG]
     
    Last edited: May 22, 2015
    schecter517 likes this.
  5. May 8, 2014 at 5:01 PM
    #5
    JDawg562

    JDawg562 [OP] Derp.

    Joined:
    Jan 26, 2014
    Member:
    #121588
    Messages:
    967
    Gender:
    Male
    First Name:
    Justin
    Long Beach, CA
    Vehicle:
    2007,TRD Off-Road, Access Cab
    Blacked out Headlight Mod.


    Got around to Blacking out my headlights and restoring them too. I love the way they came out.
    Basically I read this thread Here and just kind of winged it.

    It took about 6 hours all together.
    1st day after work took the headlight out, baked it, pulled apart, painted and tinted left to dry overnight. about 3 hours.
    2nd touched out paint, restored headlight, put all the reflectors/lenses in, put back in housing, baked, silicone, reinstalled everything. about 3 hours.

    Before vs After Comparison.
    10351080_1398025837149217_60045572903244_42f1b2910a730f074fb0679c70026783fec81bc1.jpg

    Materials
    -Flathead skinny.
    -Flathead a crappy one that you don't care will get messed up.
    -Torx screwdriver (I used an allen key that fit, but I had to push down to make sure it didn't slip or strip. You can use pliers too. Both will be a pain I wish I got the right tool.)
    -Old oven mitts
    -Oven
    -Cardboard
    -Valspar Plastic Gloss Black spraypaint.
    -Headlight/Taillight Smoke spraypaint.
    -Silicone.
    -Masking tape/Painter's tape.
    -Meguiar's 2-Step Headlight Restoration Kit Sanding and Polishing System
    -Sandpaper. I used 600grit all they had at Lowes and it worked good. I'd say anything between 600grit - 1,000grit will be good.
    -Spring clamps(Forgot to add to picture)
    10313352_1397993877152413_65868258462273_c1dd4f3fc3e82b34ecbf56441a0da19e1b09cac4.jpg


    Before picture.
    Taking off headlights.
    Getting headlight prepped.
    Baking headlight in the oven set at 200°F for 10 minutes.
    10330504_1397907723827695_21572329932464_1a9923d2083dff39a4505141e81408a3f47a2ba0.jpg

    Pulled headlight housing apart, Sanded and Masked the Blinkers.
    Back view of Blinker lens.
    Blinker lens inside housing.
    Light coat of spraypaint
    10245458_1397907717161029_22043779068707_76424f25708477fee7fa7fc0e8b2875e1e874fe6.jpg

    2nd coat of paint.
    3rd coat of paint drying.
    Took the blinker lens off and took off the tape.
    Tinted the blinker lens and reattached the blinker lens.
    10338855_1397907720494362_86162884765019_2dd4908c10cdf32cd8b82c8bf56ff058d0e3d66f.jpg
    Before headlight restoration.
    Before headlight restoration.
    Before headlight restoration.
    After sanding and and using the PlastiX(Buffing cutter compound).
    1908012_1397907767161024_229047348157582_7539d5442dfb2dbec9d82b908fb1faadde01724a.jpg

    Cleaned and painted part installed on headlight lens.
    Test fit getting ready for the oven.
    In the oven set at 200°F for 10 minutes.
    Smashed the headlight back together and made sure the clips were on. Also used spring clamps to help hold it together.
    10277510_1397907790494355_69305396211851_071a2432f3c1b04e42164654130f7fd87e7ff749.jpg

    Put a bead of silicone around the entire headlight.
    Put headlights side view.
    Headlights front view.
    Close up.
    10172722_1397907797161021_30976772397023_bbab7fef6314e25b33707dd545b186b902cd669c.jpg

    Reattached grill and Finished!
    1958170_1397907810494353_681084651426152_8a3a959fdac9a891bfee5406af4435ddd18104e2.jpg

    Hazards on.
    https://www.youtube.com/watch?v=g9ypqk4nCCA
     
    Last edited: May 22, 2015
    RIDINRICKY and mcharfauros like this.
  6. May 10, 2014 at 10:21 PM
    #6
    JDawg562

    JDawg562 [OP] Derp.

    Joined:
    Jan 26, 2014
    Member:
    #121588
    Messages:
    967
    Gender:
    Male
    First Name:
    Justin
    Long Beach, CA
    Vehicle:
    2007,TRD Off-Road, Access Cab
    Pop & Lock and Mirror Back Up Camera.

    After my friend told and showed me how easy it was to take off my tailgate I looked it up here and got super paranoid. I went to go look for a locking tailgate and found a Pop & Lock I was about to order it and saw one saying "With backup camera mount" and one "Without"
    I went ahead and ordered the one with a backup camera mount.
    By the way my Tacoma didn't have a backup camera when I got it.
    So I looked around for a backup camera and found the Peak Rearview Mirror Back Up Camera System. I figured I could make it work and I did some dremeling and modifying to make it fit and work. I heard the closer the transmitter is to the screen the less interruptions and cutouts you will get so I mounted it to my front windshield.

    Pop & Lock and Peak Rearview Mirror Back Up Camera System.
    The stock tailgate latch (No backup camera).
    Took off the tailgate plastic cover.
    Made sure the tailgate lock worked.
    10289789_1400402403578227_86447602780818_7936e09a91a3b5f5af99438862f96111cdd6ccbe.jpg

    Putting Camera in place seeing how much wire I need and where to cut it. Running the wire threw the drain hole in the tailgate.
    Wire with tailgate up.
    Ran the wire behind the bumper.(Picture was taken under the bed by the rear bumper)
    10308112_1400402413578226_15966601482138_e32cabfe24f8042eb3bcce537267ddfc88f178b4.jpg

    Cut and stripped the wire cover off.
    Measuring how much extra wire I need and then some.
    Made sure the orginal wire that plugs into the transmitter goes under the door step plastic.
    Another picture of the wire I ran from the tailgate.
    10299085_1400402410244893_51452676946171_ccbed5da29acf8ede3902f4f016142e1e381011b.jpg

    Labeled what color the wire that was connected to know where to connect them back to the same wires.
    Wrapped them up individually then all together with electrical tape.
    Hard to see in the picture, but the camera is on. (I used tape to make it easier to see from the tailgate when moving the camera.)
    Camera mounted with Black Silicone again hard to see in the picture.. — with Peak Backup Camera.
    10264415_1400402456911555_64239609644699_5e8fefe79d779cba915488caaa35f2bfe6f01b91.jpg

    After the silicone dried a bit. I took off the tape holding the camera and started to Silicone the back and let that dry. Then put the tailgate cover back on.
    Put my dad's Double Cab running boards on. I had to drill new holes so they would mount correctly. They look a little awkward since they go past the my cab, but they look good to me!
    10357119_1400402460244888_22766086961759_a221852855e3a944ed1265880ee2725497801e9f.jpg
     
    Last edited: May 22, 2015
  7. May 16, 2014 at 7:31 PM
    #7
    JDawg562

    JDawg562 [OP] Derp.

    Joined:
    Jan 26, 2014
    Member:
    #121588
    Messages:
    967
    Gender:
    Male
    First Name:
    Justin
    Long Beach, CA
    Vehicle:
    2007,TRD Off-Road, Access Cab
    This site contains affiliate links for which the site may be compensated.
    #7
  8. May 19, 2014 at 6:42 PM
    #8
    JDawg562

    JDawg562 [OP] Derp.

    Joined:
    Jan 26, 2014
    Member:
    #121588
    Messages:
    967
    Gender:
    Male
    First Name:
    Justin
    Long Beach, CA
    Vehicle:
    2007,TRD Off-Road, Access Cab
    Total Chaos 3.5 Long Travel Kit.

    I got a couple packages in the mail!
    10274293_1407340182884449_50585458535584_29b5f3c873ed57d64770da01ec61f965ef7522f3.jpg
    10365845_1407340186217782_67603751251567_d0e5a7c3ff8327e154c381151f258fd4a099e65d.jpg

    Just waiting on some hardware.
     
    Last edited: May 22, 2015
    mcharfauros, naaack and dillonk1602 like this.
  9. May 19, 2014 at 6:47 PM
    #9
    Jerez

    Jerez SoCal LED Dash Swap

    Joined:
    Feb 1, 2010
    Member:
    #30488
    Messages:
    17,975
    Gender:
    Male
    First Name:
    Rod
    Diamond Bar/Ontario, CA
    Vehicle:
    08 TRD 2wd converted to 4wd
    Estock
    baller...:cool: looks good and good start
     
  10. May 19, 2014 at 8:42 PM
    #10
    JDawg562

    JDawg562 [OP] Derp.

    Joined:
    Jan 26, 2014
    Member:
    #121588
    Messages:
    967
    Gender:
    Male
    First Name:
    Justin
    Long Beach, CA
    Vehicle:
    2007,TRD Off-Road, Access Cab
    [​IMG]

    My Bank Account begs to differ lol
    It's a work in progress... I was going to save alot more till I had money to buy everything all at once, but I saw this kit used and had to jump on it. I'm going to save a bit hopefully buy a welder, then fiberglass, then all the gussets before I install the Long Travel kit. Hopefully buy as much used stuff as I can.
     
    TACO760 likes this.
  11. May 19, 2014 at 8:43 PM
    #11
    Jerez

    Jerez SoCal LED Dash Swap

    Joined:
    Feb 1, 2010
    Member:
    #30488
    Messages:
    17,975
    Gender:
    Male
    First Name:
    Rod
    Diamond Bar/Ontario, CA
    Vehicle:
    08 TRD 2wd converted to 4wd
    Estock
    lmao, take it slow...dont just go all crazy. thats how i did it.
     
  12. May 19, 2014 at 8:47 PM
    #12
    JDawg562

    JDawg562 [OP] Derp.

    Joined:
    Jan 26, 2014
    Member:
    #121588
    Messages:
    967
    Gender:
    Male
    First Name:
    Justin
    Long Beach, CA
    Vehicle:
    2007,TRD Off-Road, Access Cab
    Yeah I'm not buying anything major for at least a month. I have to stop myself from entering the 2nd generation for sale section of this forums lol.
    I just tell myself "Don't do it, DON'T DO IT!!!"
     
  13. May 19, 2014 at 8:49 PM
    #13
    anthony250f

    anthony250f Well-Known Member

    Joined:
    Feb 18, 2012
    Member:
    #73066
    Messages:
    16,544
    Gender:
    Male
    First Name:
    Anthony
    San Diego, CA
    Vehicle:
    2008 dcsb trd offroad 4wd
    i wanted to buy that kit ahha
     
  14. May 19, 2014 at 8:53 PM
    #14
    Jerez

    Jerez SoCal LED Dash Swap

    Joined:
    Feb 1, 2010
    Member:
    #30488
    Messages:
    17,975
    Gender:
    Male
    First Name:
    Rod
    Diamond Bar/Ontario, CA
    Vehicle:
    08 TRD 2wd converted to 4wd
    Estock
    lol its worse too because if you want to run lift spindles you need to buy different upper control arms (heim uppers) with the spindles which equals more $$$$$$ :smash:
     
  15. May 19, 2014 at 10:03 PM
    #15
    JDawg562

    JDawg562 [OP] Derp.

    Joined:
    Jan 26, 2014
    Member:
    #121588
    Messages:
    967
    Gender:
    Male
    First Name:
    Justin
    Long Beach, CA
    Vehicle:
    2007,TRD Off-Road, Access Cab
    lol you saw it in the for sale section here?
    I started PMing him the day he posted it! He took out the 3 way bypass shocks and bump stops so I could afford it.

    Really? I thought I read somewhere as long as you buy the LT spindles your good.
    I'll probably run with just gusset spindles for a long time though. Hopefully...
     
  16. May 25, 2014 at 11:17 PM
    #16
    JDawg562

    JDawg562 [OP] Derp.

    Joined:
    Jan 26, 2014
    Member:
    #121588
    Messages:
    967
    Gender:
    Male
    First Name:
    Justin
    Long Beach, CA
    Vehicle:
    2007,TRD Off-Road, Access Cab
    Gorman, CA

    Finally was able to take my new truck out! Only damage I got was a dirt biker lost his balance (first time rider with his friend) crashed into the side of my bed when I pulled over to let them by. After I checked on him, picked up his bike and talked with them a bit. I got back into my truck and told my girlfriend "Oh well, now I have an excuse to get fiberglass bedsides too right?" :D

    5:00am just about to leave to Gorman.
    [​IMG]
    [​IMG]
    [​IMG]
    [​IMG]
    Messing around with the Instagram settings.
    [​IMG]


    :D We all had a great time.
    All of us had GoPros too. I just need to get all the files from everyone then find time to edit all of them.
     
    Last edited: Feb 17, 2015
  17. May 28, 2014 at 7:53 PM
    #17
    JDawg562

    JDawg562 [OP] Derp.

    Joined:
    Jan 26, 2014
    Member:
    #121588
    Messages:
    967
    Gender:
    Male
    First Name:
    Justin
    Long Beach, CA
    Vehicle:
    2007,TRD Off-Road, Access Cab
    Aw dude I almost got an Subaru WRX STI 2003-2005.
    It's been a toss up between the 2nd gen Tacoma and a 03-05 WRX STI for a year while I saved up the prices were about the same (except for the insurance quotes! ouch.). Then my friends took me off roading in Big Bear. After I got home my decision was made, TACOMA!! lol
     
  18. May 29, 2014 at 8:58 PM
    #18
    JDawg562

    JDawg562 [OP] Derp.

    Joined:
    Jan 26, 2014
    Member:
    #121588
    Messages:
    967
    Gender:
    Male
    First Name:
    Justin
    Long Beach, CA
    Vehicle:
    2007,TRD Off-Road, Access Cab
    LOL! lucky!
    Those look the best IMO, then after those 3 years of that model I like the 1st generation ones 1993-2000 I think. Everything else is meh, I'd buy something else lol.
     
  19. Jun 7, 2014 at 10:02 PM
    #19
    JDawg562

    JDawg562 [OP] Derp.

    Joined:
    Jan 26, 2014
    Member:
    #121588
    Messages:
    967
    Gender:
    Male
    First Name:
    Justin
    Long Beach, CA
    Vehicle:
    2007,TRD Off-Road, Access Cab
    Glassworks Unlimited Fenders with 4″ Flare and 3″ Rise.

    Met up with John at Glassworks Unlimited and bought some fenders! I found out Glassworks is about 10 mins away from my house lol.

    10350519_1419326355019165_37940783714662_9b6203b174d92ff8112b85f8ba5ea82e94350fb3.jpg
    My Tacoma pile in my room.
    10455129_1419326358352498_11422850494947_db0342d472040dde3d697ada3117f6b4c02a5222.jpg

    Finally got around to putting them on. 6-11-14.
    Test Fitting and see how it would look.
    10426292_1421523718132762_10970795936073_5ae41b5e09b296920cd708a06243ad82b5cb3b05.jpg
    10464322_1421523721466095_79724303438078_cb54f96f9c576a3ef54ca8a7d52b90ea28414bc0.jpg
    Side view
    10409634_1421523724799428_21788622487486_388c87067c8c35ac01f2b2e997897e9833131f3e.jpg
    Passenger side.
    10390406_1421523754799425_74555574524197_72f538ac4527f9370bbdc23996e26add20b01873.jpg
    Front view finished.
    10472732_1421523758132758_27843288972227_2e79a54286e3a8e9322a03abdb4725fa5aac54dd.jpg


    It was defiantly an adventure putting these on. I took off the driver side stock fender and my friend took off the passenger side till we got to the antenna (Headache). Finally got the passenger side stock fender off and we both installed the driver side fiberglass fenders pretty easy, minor very trimming. Then started the passenger side we had to take it off a bunch of times and trim it a lot it was annoying... We finished up and started to put the bumper on and I hated the look. We took it off and took a little break. I grabbed a piece of wood and held it up like a skid plate and the hamsters started rolling. My friend took a street sign he had in his room and we used sheet metal screws then hit it with a hammer to bend it! It looked better and was fun messing around. When I was working on the driver side fender I was looking on the ground for tools or bolts and hit my head on the fiberglass fender I looked at my friend and said "It's so wide" and we started dying lol!
     
    Last edited: May 22, 2015
  20. Jun 7, 2014 at 10:22 PM
    #20
    Trigo

    Trigo Because fuck you that's why...

    Joined:
    Dec 21, 2011
    Member:
    #69160
    Messages:
    7,055
    Gender:
    Male
    First Name:
    Rodrigo
    San Diego
    Vehicle:
    1st gen
    Subd, looks good so far! SuperWhite FTW :D
     

Products Discussed in

To Top