

-
Welcome to Tacoma World!
You are currently viewing as a guest! To get full-access, you need to register for a FREE account.
As a registered member, you’ll be able to:- Participate in all Tacoma discussion topics
- Communicate privately with other Tacoma owners from around the world
- Post your own photos in our Members Gallery
- Access all special features of the site
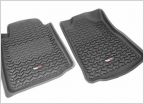 Floor mats
 Using OEM mic and rear camera, with Alpine ILX-W650
 Jack
Jack Transmission fluid level
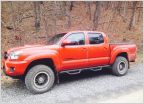 T0678CC nerf bars
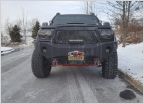 Body Armor TC-19335 Front Winch Bumper & Tiger Shark Winch
DIY Factory style automatic center console light
Discussion in '2nd Gen. Tacomas (2005-2015)' started by packrobottom, Sep 7, 2014.


