

-
Welcome to Tacoma World!
You are currently viewing as a guest! To get full-access, you need to register for a FREE account.
As a registered member, you’ll be able to:- Participate in all Tacoma discussion topics
- Communicate privately with other Tacoma owners from around the world
- Post your own photos in our Members Gallery
- Access all special features of the site
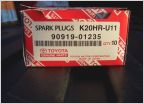 How To: Spark Plug Change (1 GR-FE)
 Why does Toyota recommend changing spark plugs so soon (30,000 miles)
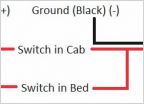 Question: Double Switch DIY Lighting
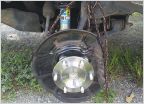 Strange "howl" coming from front wheel?
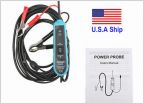 What is this electrical tester?
Relocating the trailer light plug (bumper)
Discussion in 'Technical Chat' started by Thelgord, Oct 5, 2014.


