

-
Welcome to Tacoma World!
You are currently viewing as a guest! To get full-access, you need to register for a FREE account.
As a registered member, you’ll be able to:- Participate in all Tacoma discussion topics
- Communicate privately with other Tacoma owners from around the world
- Post your own photos in our Members Gallery
- Access all special features of the site
 Group Buy ARB Lockers - Gears in a couple weeks.
 TREX GRILLS GROUP BUY FEELER
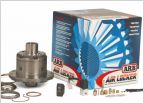 ARB Locker Group Buy - Nov 2014
 Winch Group Buy - Guaranteed Pricing
 Bestop Softopper ROUND 2
 HI LIFT Feeler
Possible roof top tent group buy
Discussion in 'Group Buys' started by cotrailruns, Aug 19, 2014.
- Thread Status:
- Not open for further replies.
Page 10 of 12
Page 10 of 12
- Thread Status:
- Not open for further replies.


