1. Welcome to Tacoma World!

    You are currently viewing as a guest! To get full-access, you need to register for a FREE account.

    As a registered member, you’ll be able to:
    • Participate in all Tacoma discussion topics
    • Communicate privately with other Tacoma owners from around the world
    • Post your own photos in our Members Gallery
    • Access all special features of the site

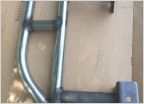
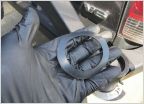
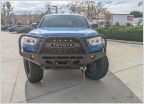
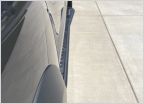
Bolting on my All Pro sliders today.

Discussion in 'Armor' started by cccrockettt, Dec 9, 2014.

  1. Dec 9, 2014 at 7:41 AM
    #1
    cccrockettt

    cccrockettt [OP] Well-Known Member

    Joined:
    Dec 5, 2011
    Member:
    #68220
    Messages:
    230
    Gender:
    Male
    First Name:
    David
    central california
    Vehicle:
    Mid travel front and rear Fox w/ all pro
    Just wondering if there is any threads or advise that anyone can give to make the install go as easy as possible.

    I figure on just using jack stands to mock up and drill any pilot holes needed. Then taking them off, drilling all final holes, touch up paint, and re-install.

    Just seeing if anyone has any tricks I'm not listing here.
     
  2. Dec 9, 2014 at 9:38 AM
    #2
    bayareataco

    bayareataco Well-Known Member

    Joined:
    Aug 15, 2012
    Member:
    #84860
    Messages:
    3,503
    Gender:
    Male
    First Name:
    Jimmy
    Petaluma
    Vehicle:
    2021 Tacoma TRD OR
    That's all there is to it. Get some cutting oil at the hardware store to help the drill bit, lube helps through the strong frame
     
  3. Dec 9, 2014 at 9:54 AM
    #3
    KenLyns

    KenLyns 8.75" Third Member

    Joined:
    May 23, 2010
    Member:
    #37674
    Messages:
    29,363
    Gender:
    Male
    Belly of the Beast
    Vehicle:
    4x4 TRD Off-Road Full-Auto
    LED Headlights, Volant CAI, 32" Duratracs
    Have a few C-clamps handy. Due to welding distortion, the slider's attachment flanges may not rest flat against the frame at all points, so you will need to clamp the flanges to the frame while drilling.

    A stepped "unibit" reportedly works very well on the frame. In my experience, the conventional drill bits tend to grab once you step up to the larger sizes.
     
  4. Dec 9, 2014 at 11:35 AM
    #4
    cccrockettt

    cccrockettt [OP] Well-Known Member

    Joined:
    Dec 5, 2011
    Member:
    #68220
    Messages:
    230
    Gender:
    Male
    First Name:
    David
    central california
    Vehicle:
    Mid travel front and rear Fox w/ all pro
    Never heard of a stepped "unibit" I'll have to check those out. Thanks for the replies.
     
  5. Dec 9, 2014 at 5:46 PM
    #5
    Lord Helmet

    Lord Helmet Prepare To Attack

    Joined:
    Aug 30, 2012
    Member:
    #85875
    Messages:
    39,164
    Gender:
    Male
    First Name:
    Nick
    Vehicle:
    '24 X3 M40i
    This is a unibit:

    [​IMG]
     
  6. Dec 9, 2014 at 6:10 PM
    #6
    numbah57

    numbah57 GIVE THE MALL A BREAK...WHEEL THAT SHIT

    Joined:
    Oct 11, 2009
    Member:
    #24160
    Messages:
    3,437
    Gender:
    Male
    First Name:
    kahai
    Maui, Hawaii
    Vehicle:
    09 tacoma 2.7 Beaten not Babied
    URD ARB G2 PELFREY BAMF LCE AFE
    I used 5 different sizes of bits, 7/32 5/16 3/8 7/16 1/2

    Curing oil for sure
    Took a blown up 5/16 bit to the face, wised up and got safety glasses.

    I bolted all the top/outside bolts first then just let the slider hang there and stick the bit though the holes in the slider mount thingies to drill the frame.

    I have BAMF sliders, should be similar
     
  7. Dec 10, 2014 at 7:11 AM
    #7
    cccrockettt

    cccrockettt [OP] Well-Known Member

    Joined:
    Dec 5, 2011
    Member:
    #68220
    Messages:
    230
    Gender:
    Male
    First Name:
    David
    central california
    Vehicle:
    Mid travel front and rear Fox w/ all pro
    Started with regular bits, just because I had some. Then switched to the Dewalt pilot bits. Those things drilled strait through the frame like hot butter. Similar tip on them to the unibit but only goes up to the size you need to prevent you from making too big of a hole (something I F*ed up on on two of the front holes that need to be smaller for the self tapping bolts, accidentally grabbed the 3/8 bit instead of the 5/16 it called for. Oh well going to have to see if I can find some bigger bolts to fit the bigger holes today).

    My new concern is that on the drivers side the bolts are really close to the break lines in a few spots. Was now wondering what people did to prevent them from rubbing?
     
  8. Dec 10, 2014 at 9:46 AM
    #8
    KenLyns

    KenLyns 8.75" Third Member

    Joined:
    May 23, 2010
    Member:
    #37674
    Messages:
    29,363
    Gender:
    Male
    Belly of the Beast
    Vehicle:
    4x4 TRD Off-Road Full-Auto
    LED Headlights, Volant CAI, 32" Duratracs
    ^You can either carefully bend the brake lines, or get some fuel hose, cut a slit along it, and wrap the hose around the brake lines as a guard.

    Instead of self-tapping bolts, see if you can use through-bolts. To install the nut, lightly tape the nut to a long wrench and insert the wrench through the opening where the frame transitions from boxed to C-channel section. Through-bolts are going to be a lot stronger.
     
    Last edited: Dec 10, 2014
  9. Dec 10, 2014 at 10:16 AM
    #9
    numbah57

    numbah57 GIVE THE MALL A BREAK...WHEEL THAT SHIT

    Joined:
    Oct 11, 2009
    Member:
    #24160
    Messages:
    3,437
    Gender:
    Male
    First Name:
    kahai
    Maui, Hawaii
    Vehicle:
    09 tacoma 2.7 Beaten not Babied
    URD ARB G2 PELFREY BAMF LCE AFE
    Through bolts. Grade 8
     
  10. Dec 10, 2014 at 11:35 AM
    #10
    crazy joker

    crazy joker Well-Known Member

    Joined:
    Oct 11, 2012
    Member:
    #88787
    Messages:
    1,454
    Gender:
    Male
    First Name:
    Jesse
    Charlotte area, NC
    Vehicle:
    2014 DCLB sport 4x4
    Real men just call it camping
    I have the same sliders on order. For the break lines, I was planning to bend them.
     
  11. Dec 11, 2014 at 7:05 AM
    #11
    cccrockettt

    cccrockettt [OP] Well-Known Member

    Joined:
    Dec 5, 2011
    Member:
    #68220
    Messages:
    230
    Gender:
    Male
    First Name:
    David
    central california
    Vehicle:
    Mid travel front and rear Fox w/ all pro
    Thanks I was unable to continue my install yesterday, through bolts look like they would be a pain to get in there but worth a try. Pretty sure I have a few spare grade 8's I could try to get in there later today.

    If the weather holds off long enough here in central CA today I might head up to the mountains and try to get in one last MTB ride tonight instead. We have a pretty good sized storm heading our way that could snow me out of my local trails for a while.
     
  12. Dec 11, 2014 at 9:45 AM
    #12
    KenLyns

    KenLyns 8.75" Third Member

    Joined:
    May 23, 2010
    Member:
    #37674
    Messages:
    29,363
    Gender:
    Male
    Belly of the Beast
    Vehicle:
    4x4 TRD Off-Road Full-Auto
    LED Headlights, Volant CAI, 32" Duratracs
    Be careful not to break the brake lines :laughing: when bending them. With the engine running, pump the brake pedal a few times, then check the bend area for leaks.
     
  13. Dec 31, 2014 at 10:58 PM
    #13
    plurpimpin

    plurpimpin Well-Known Member

    Joined:
    Jul 31, 2011
    Member:
    #60895
    Messages:
    2,971
    Gender:
    Male
    PDX
    Vehicle:
    2010 TRD Off Road 4x4
    do yourself a favor and get a good stepped bit. I have different sliders but spent half a day drilling with crap bits and then got frustrated and went out and got a good stepped one, made it go so much faster.
     

Products Discussed in

To Top