1. Welcome to Tacoma World!

    You are currently viewing as a guest! To get full-access, you need to register for a FREE account.

    As a registered member, you’ll be able to:
    • Participate in all Tacoma discussion topics
    • Communicate privately with other Tacoma owners from around the world
    • Post your own photos in our Members Gallery
    • Access all special features of the site

‘13 Baja - Installing Pioneer DMH-C2550NEX

Discussion in 'Audio & Video' started by WVTaco12, Oct 24, 2020.

  1. Oct 24, 2020 at 2:49 PM
    #1
    WVTaco12

    WVTaco12 [OP] Well-Known Member

    Joined:
    Jul 15, 2014
    Member:
    #133971
    Messages:
    140
    Gender:
    Male
    First Name:
    Cody
    West Virginia
    Vehicle:
    2013 TX Baja
    Well, I finally got some time to pull my factory radio and start installing my Pioneer. Boy, did I find a M.E.S.S. The PO of the truck Has upgraded the speakers and installed a Pioneer amp with a pair of 12” kickers behind the back seat in a nicely built custom box. Extra wires left laying back by the sub box not plugged into anything, etc.

    First, I’ve got plenty of experience installing head units, amps, and subs in the past. However, This is my first venture with something this “new”. First time dealing with a Maestro and all the plugs (rather than the basic solder and heat shrink).

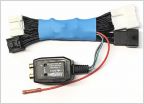
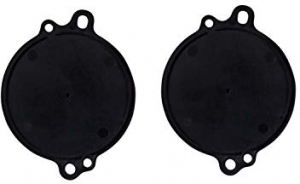
    I found A pair of these line out converters behind my factory unit and running back to the amp. I have NO experience with these. Do they need to remain with me installing an aftermarket head unit? Suggestions on cleaning this mess up?

    I’m thinking of completely stripping everything and trying to start from scratch.
    C54CDD0B-5DA3-4425-A630-1FF98A968DBB.jpg 53DC0D72-C7F1-49C8-BF1C-36D2B69F2376.jpg
     
  2. Oct 24, 2020 at 3:11 PM
    #2
    destin_meeks

    destin_meeks I used to fix people's crappy stereos

    Joined:
    Jul 14, 2017
    Member:
    #223997
    Messages:
    3,939
    Gender:
    Male
    First Name:
    Destin
    Tuscaloosa, AL
    Vehicle:
    2017 SSM DoubleCab TRD Off-Road 4x4
    That hurts to look at.

    Yes, gut it and start over.
    Rebuild the factory harness that they butchered. Solder and heat shrink.

    Pull out everything they installed because I would bet good money that the work at the amp is also awful. The ground is probably awful. The fuse holder at the battery is probably awful.
     
  3. Oct 24, 2020 at 3:51 PM
    #3
    WVTaco12

    WVTaco12 [OP] Well-Known Member

    Joined:
    Jul 15, 2014
    Member:
    #133971
    Messages:
    140
    Gender:
    Male
    First Name:
    Cody
    West Virginia
    Vehicle:
    2013 TX Baja
    I’ll make sure to post pics of everything before and after.
     
  4. Oct 25, 2020 at 7:19 AM
    #4
    WVTaco12

    WVTaco12 [OP] Well-Known Member

    Joined:
    Jul 15, 2014
    Member:
    #133971
    Messages:
    140
    Gender:
    Male
    First Name:
    Cody
    West Virginia
    Vehicle:
    2013 TX Baja
    12D25F28-776B-47C0-81B8-8BC55DA198E3.jpg
    Anyone have a diagram showing what all these plugs run to?

    I’m working on the blue plug right now - it had the line out converters attached, and in taking it apart, looks like positive and negative speaker wires that have to tie back into the plug. However, colors don’t match up. This picture shows a white wire that was tied into this red wire. Correct?12D25F28-776B-47C0-81B8-8BC55DA198E3.jpg
     

Products Discussed in

To Top