

-
Welcome to Tacoma World!
You are currently viewing as a guest! To get full-access, you need to register for a FREE account.
As a registered member, you’ll be able to:- Participate in all Tacoma discussion topics
- Communicate privately with other Tacoma owners from around the world
- Post your own photos in our Members Gallery
- Access all special features of the site
 2012 Fog Lights Solution!
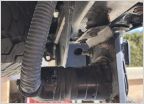 Detaching the trailer wiring?
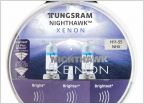 Headlight bulb recommendations
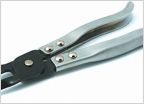 What tool to use to remove valve stem seals?
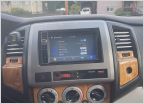 Tacoma with wood trim?
 I have $200 to spend on Amazon. What should I buy?
05+ V6 Tacoma Steering Rack Bushing replacement
Discussion in '2nd Gen. Tacomas (2005-2015)' started by ToyoTaco06, Aug 4, 2013.
Page 2 of 21
Page 2 of 21


